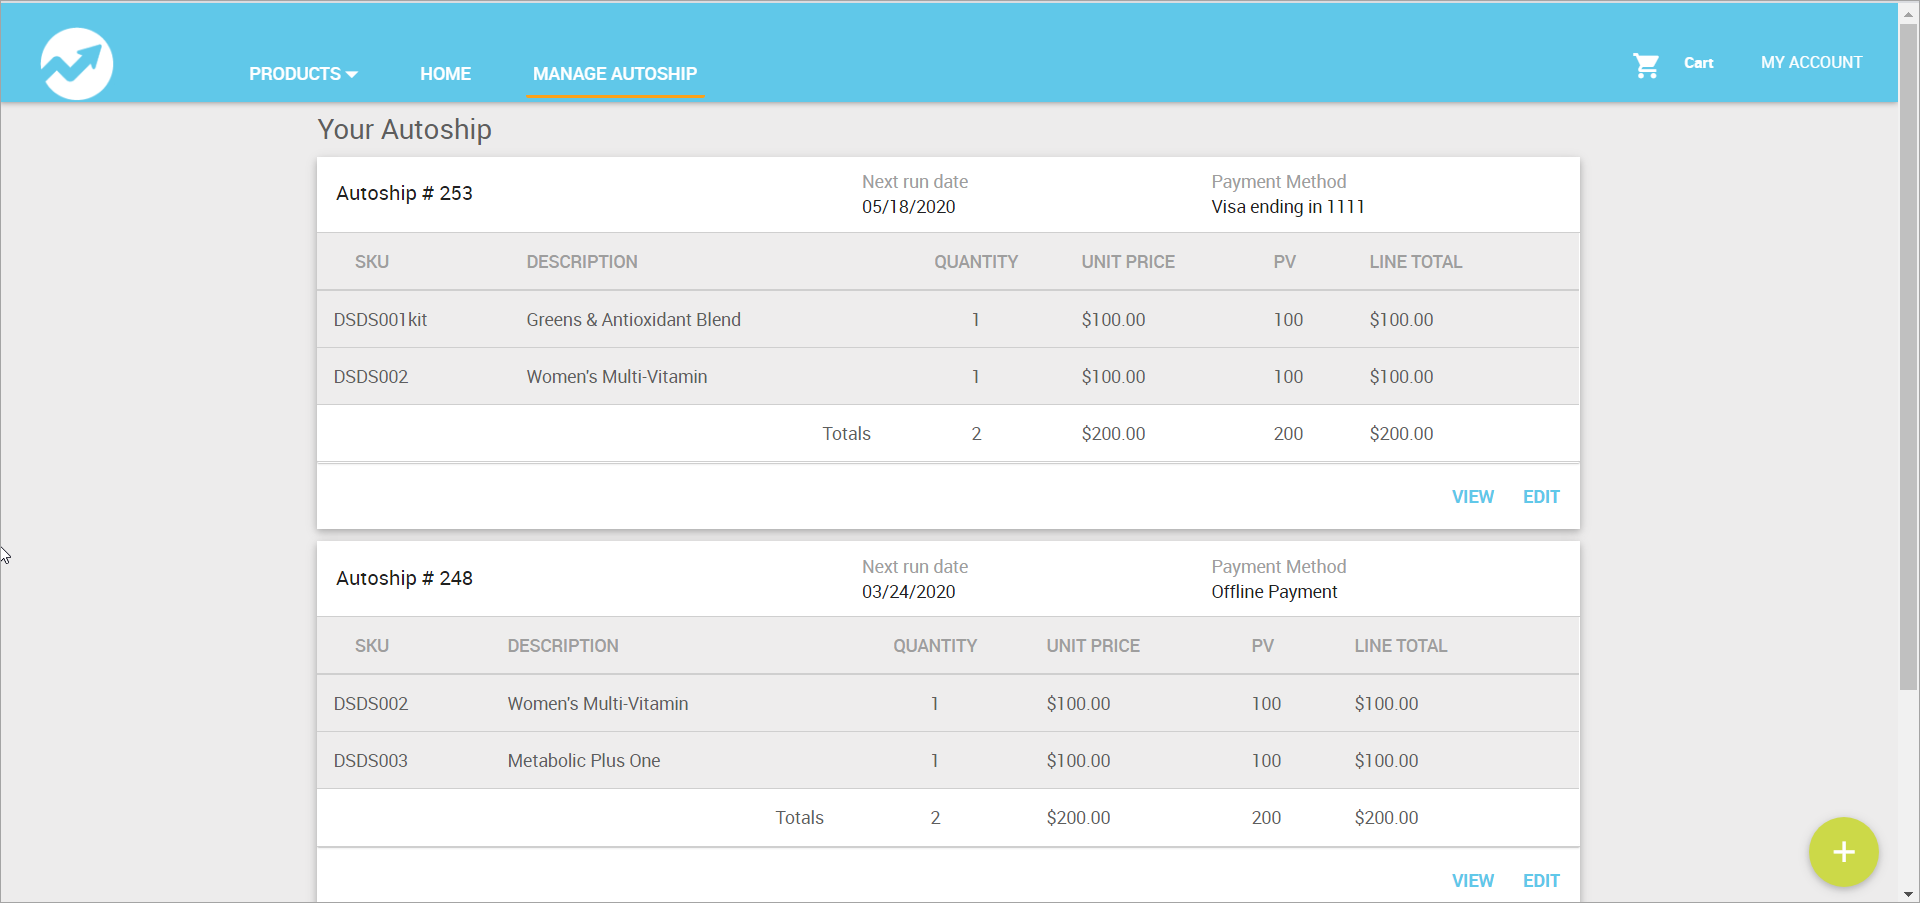
Associates can view/edit their AutoShips on the eCommerce Shop Manage AutoShip page.
Enabling the New Double-Header and Market Selector Toggle
Admin: eCommerce Admin
Page: Company Setting > Settings
URL: [CLIENTID].retailadmin.directscale.com/#/CompanySettings
Permission: Admin Settings
-
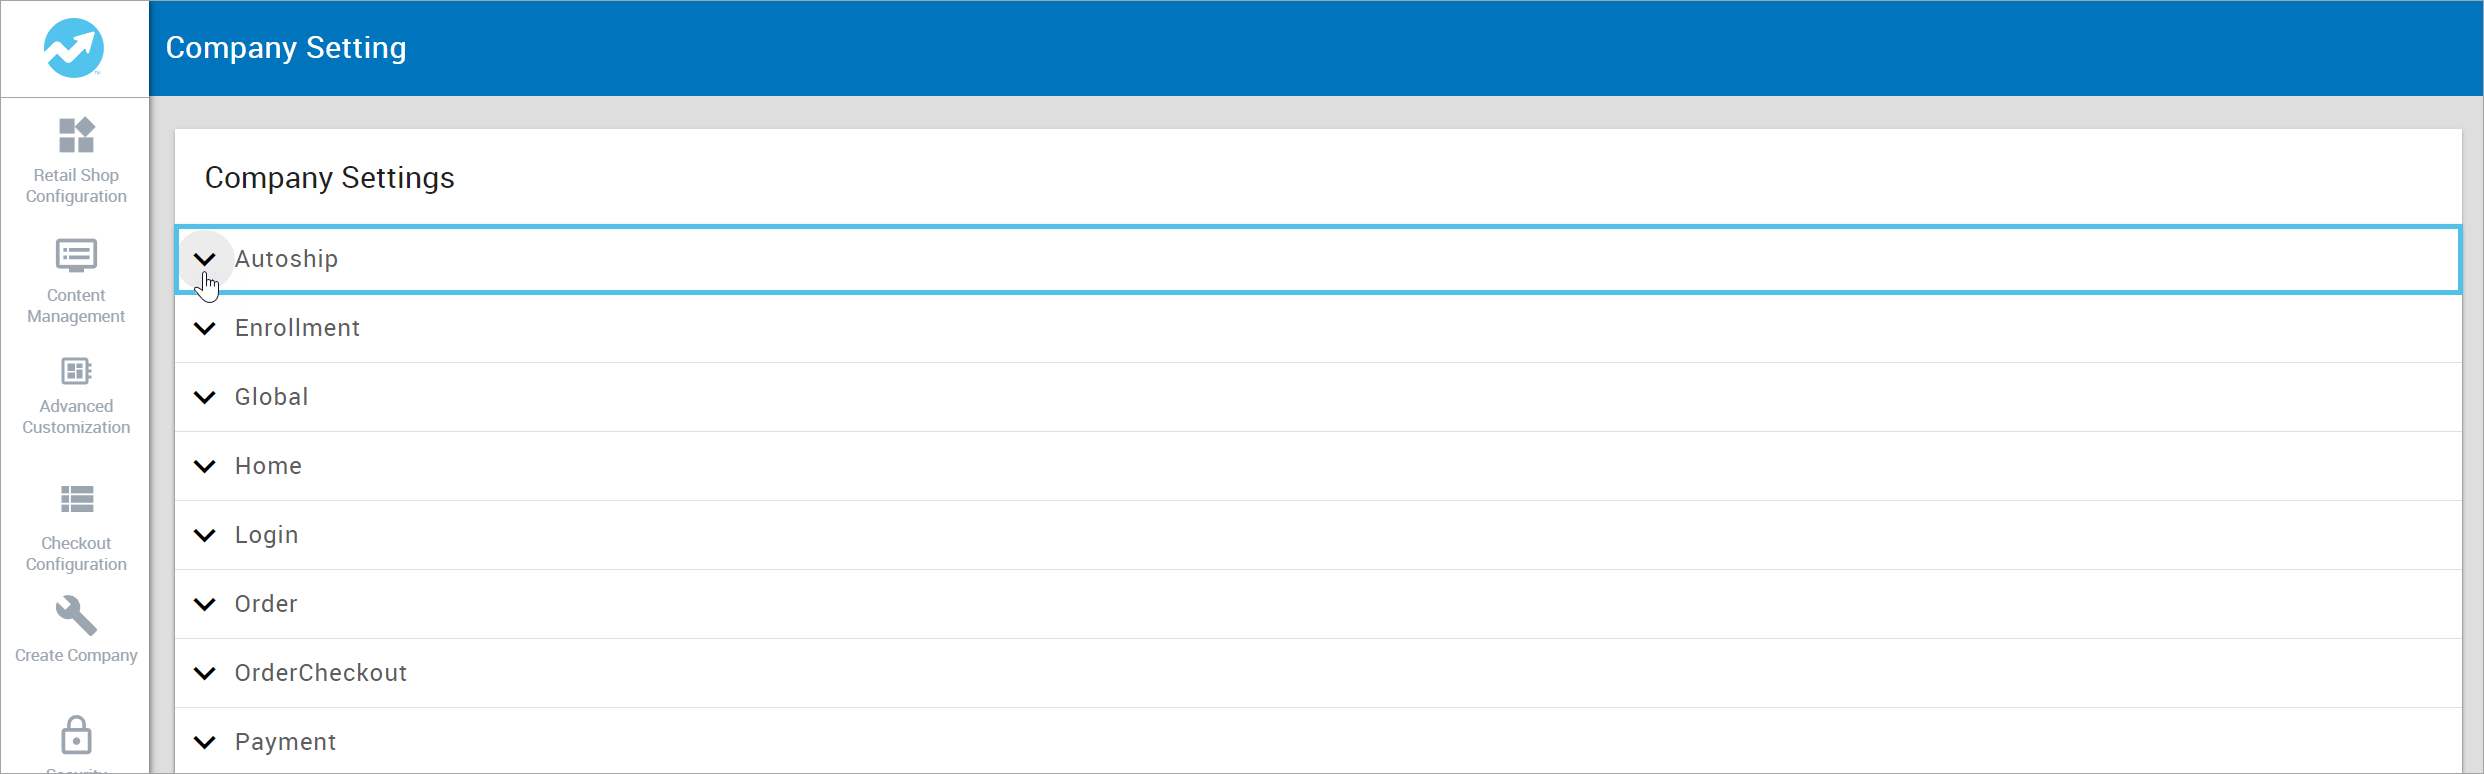
Expand the Global section.

-
Enable the New Double-Header and Market Selector toggle.

-
Click SAVE.
When enabled, an alternate header appears in the eCommerce Shop.
Viewing the Manage Autoship Page Using the Alternate Header
The steps for an Associate to view or edit AutoShips using the alternate header are:
-
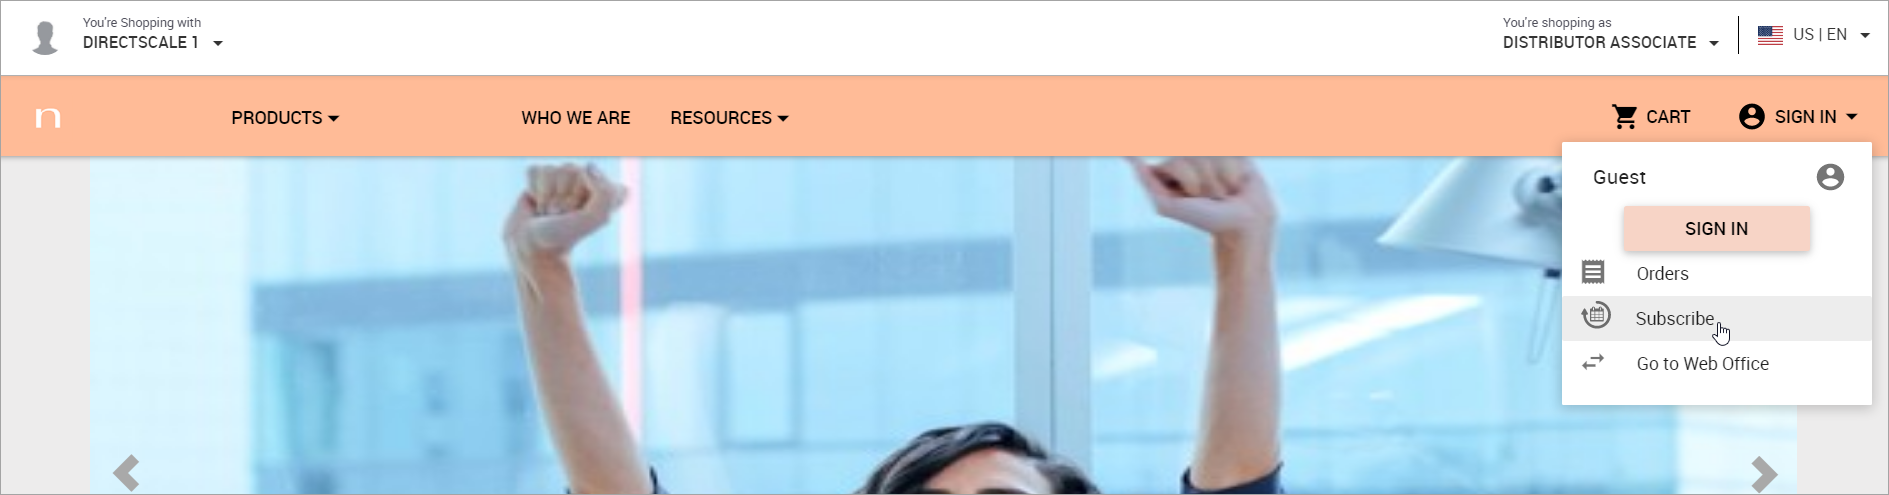
Open the eCommerce Shop and click the Profile Image.
This opens a drop-down menu with various options.
-
Click Subscribe.
You can now view your Manage Autoship page.
Adding Link to the Navigation Bar
Admin: eCommerce Admin
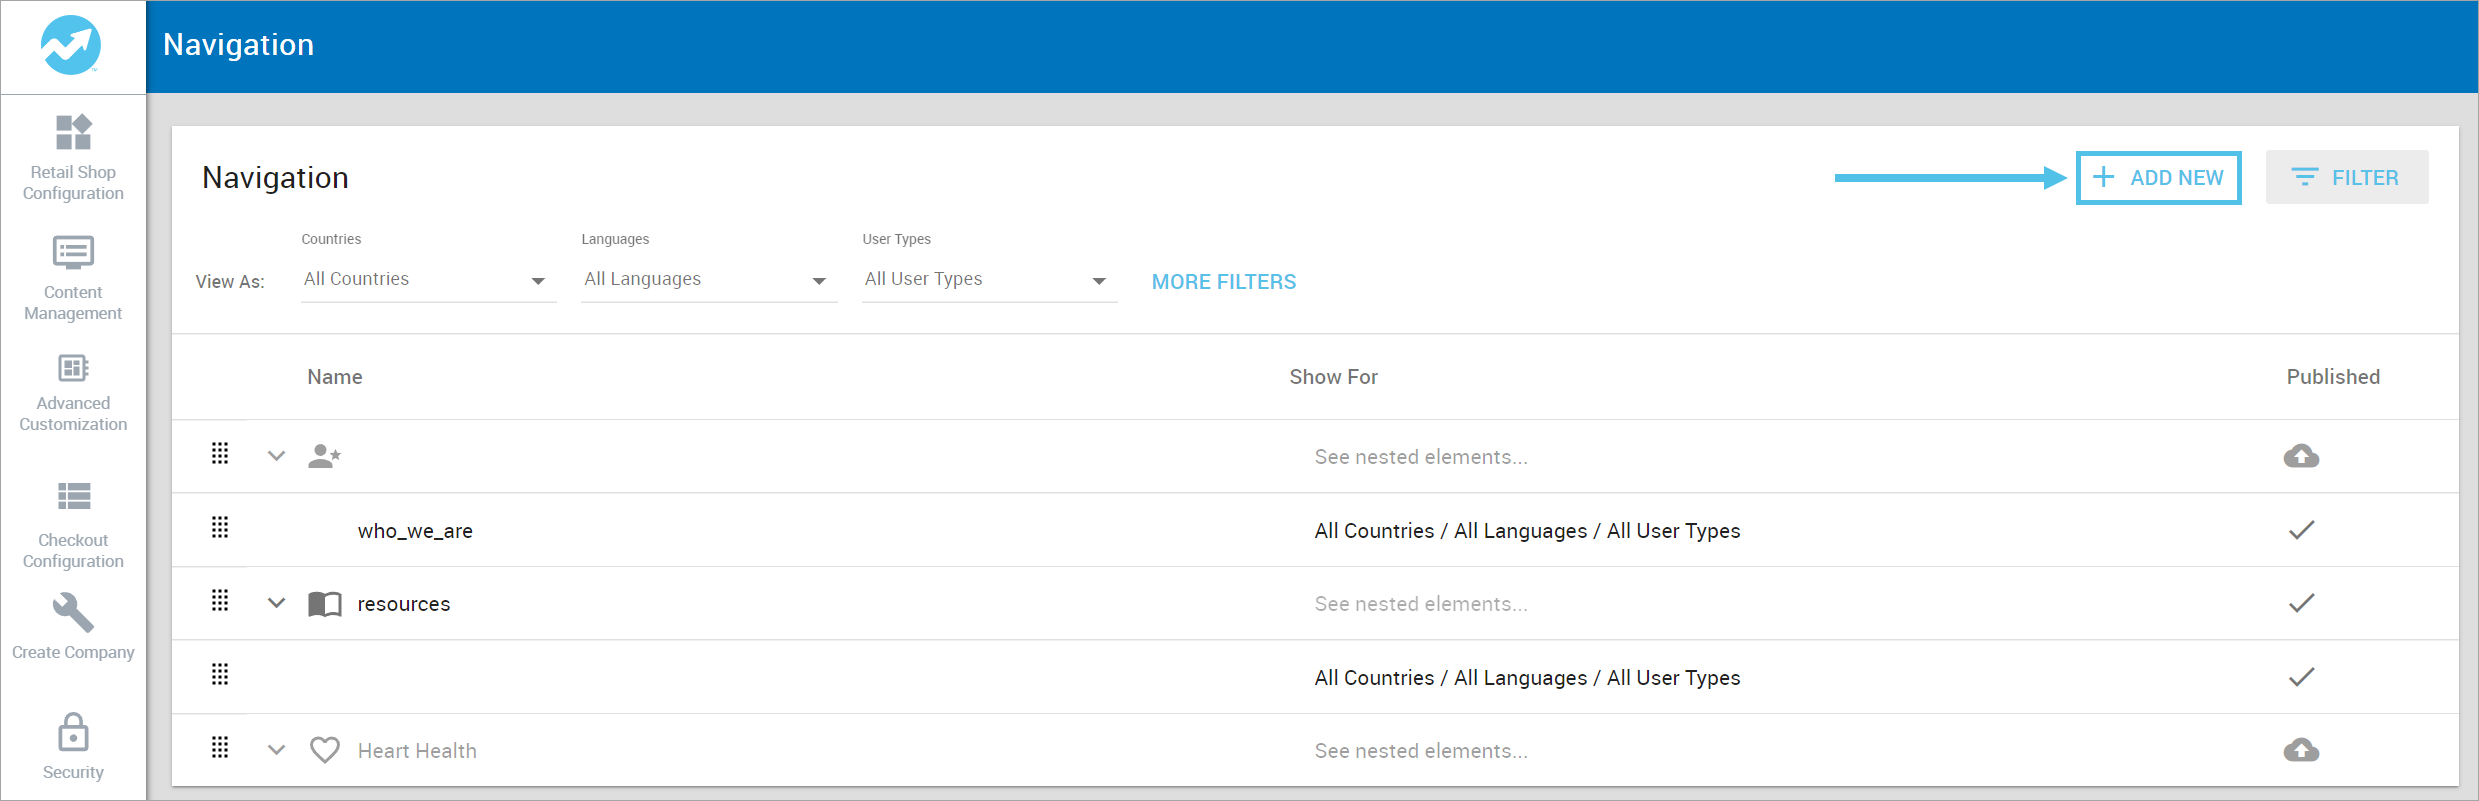
Page: Retail Shop Configuration > Site Navigation
URL: [CLIENTID].retailadmin.directscale.com/#/Navigation
Permission: Site Navigation
-
Click the ADD NEW button and select Add Link.
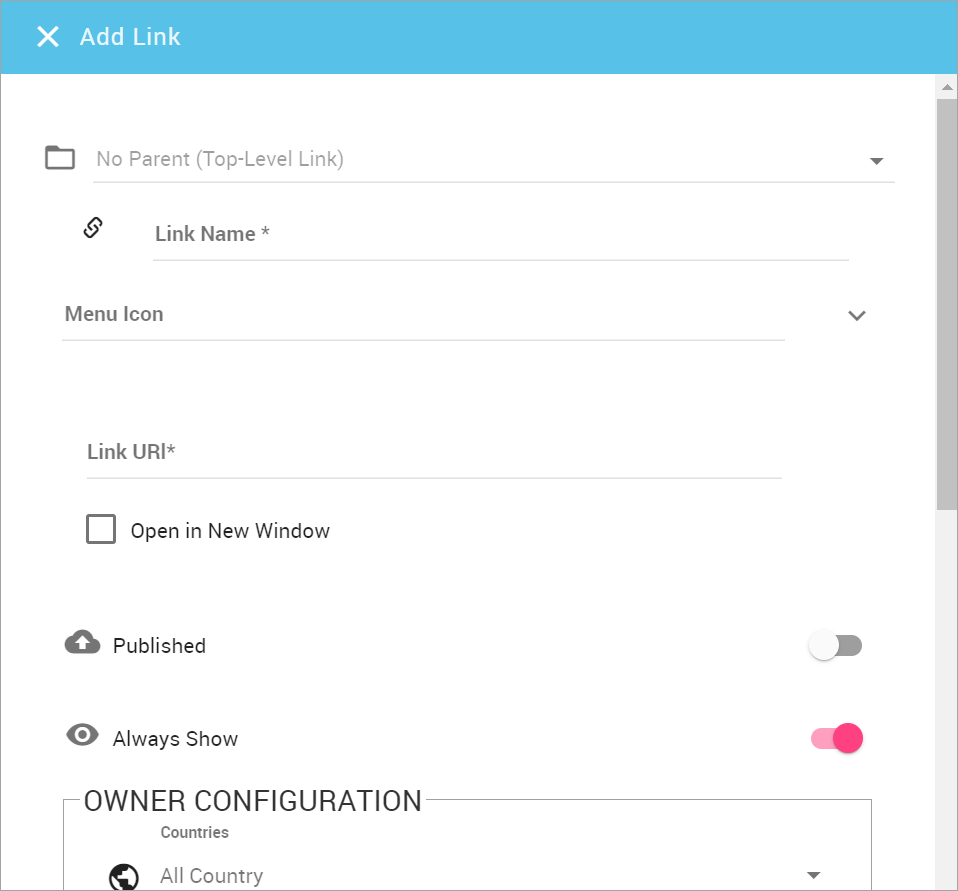
The Add Link pop-up window opens.
-
In the Link Name field, enter: "Manage Autoship".
-
In the Link URL field, enter:
/{webalias}/ManageAutoship. -
Optionally, check the Open in New Window checkbox to open the link in a new browser tab.
-
Click the Published toggle to publish the link after saving the configuration.
Before you save, continue to the next section to manage the MFC settings.
Controlling Access with MFC
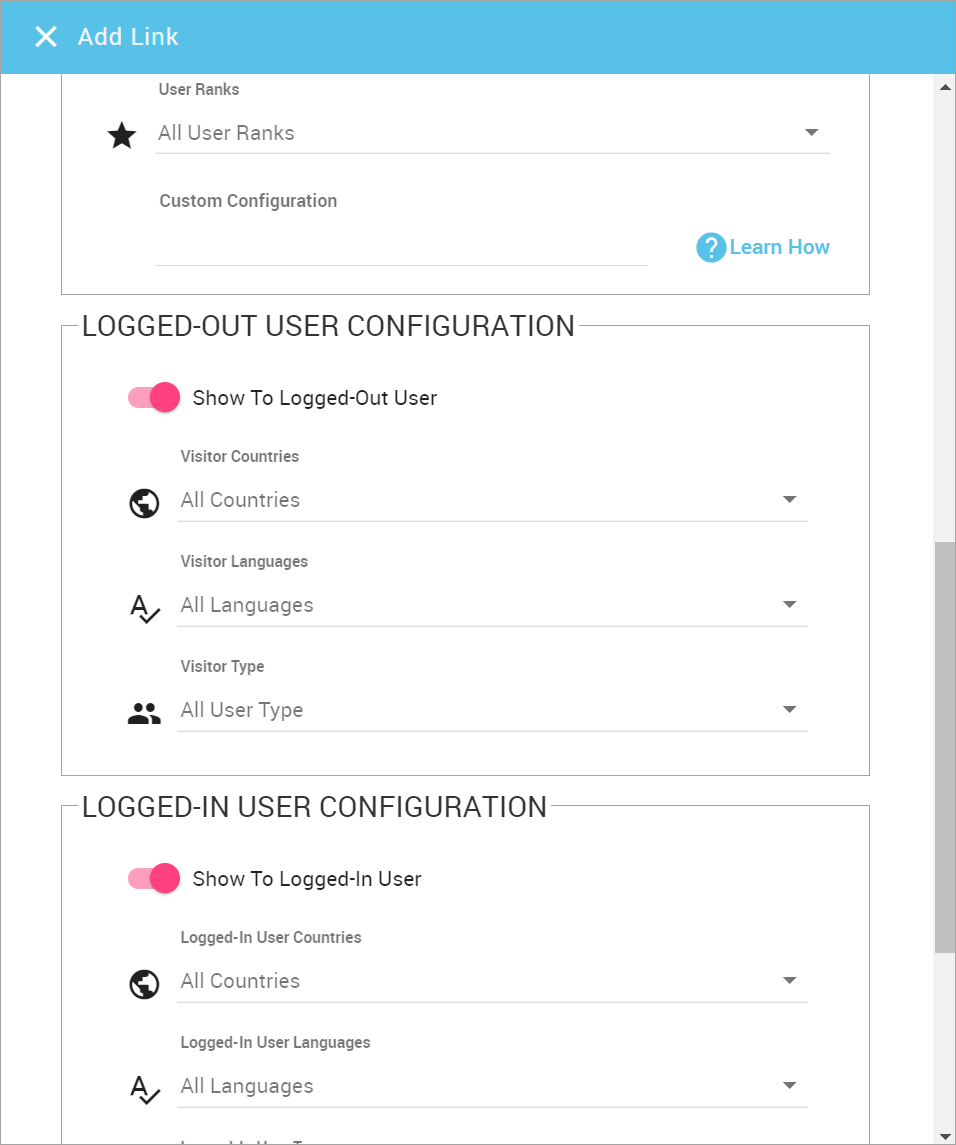
In this section, we’re going to control access to the page with Multi-Faceted Configuration (MFC). In general, the specific configuration is up to you; however, it’s important to:
-
Disable Logged-Out User Configuration by clicking the Show To Logged-Out User toggle off.

-
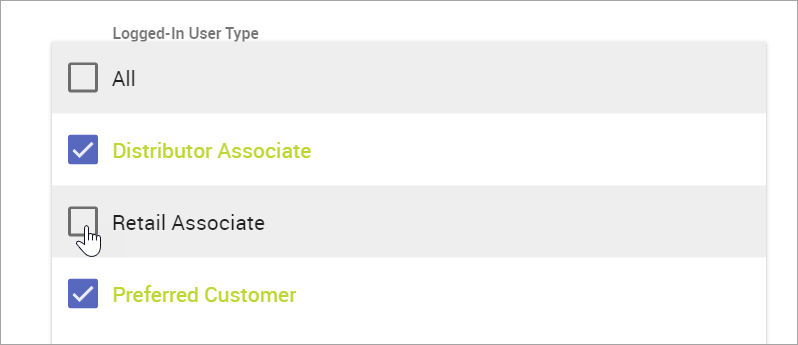
Under Logged-In User Configuration, click the Logged-In User Type drop-down.
-
Uncheck Retail Associate (or your company’s equivalent Associate Type 2).
-
When finished entering the necessary fields and MFC settings, click SAVE.
Viewing the Manage Autoship Page
Site: eCommerce Shop
Page: Manage Autoships
URL: [CLIENTID].shop.directscale.com/[WEBALIAS]/ManageAutoship
-
Open the eCommerce Shop and shop as anything other than Retail Associate (type 2).
-
The Manage Autoship tab will display in the navigation bar.
-
Click the tab and log in.
-
Once logged in, you can view your Manage Autoship page.
Allowing Multiple AutoShip Order Creation
Admin: eCommerce Admin
Page: Company Setting > Settings
URL: [CLIENTID].retailadmin.directscale.com/#/CompanySettings
Permission: Admin Settings
-
Expand the Autoship section.
-
Click the Allow Multiple Autoships toggle to enable it.

When enabled, a button shows on the Manage Autoship page. Associates can click this button to add another Autoship.

Comments
Please sign in to leave a comment.