Web Office Admin
Admin: Web Office Admin
Page: Advanced Settings > Settings
URL: [CLIENTID].admin.directscale.com/#/Settings
Permission: Setup Settings
Some sections may not have all the features added. The steps to make these visible are:
-
Click the ADD NEW EXISTING SETTINGS button.
-
Choose the section you’re configuring from the Select Category drop-down menu.
-
When the features appear beneath the drop-down menu, you can add them to the Setting section by clicking the toggle.
If the feature is a toggle, there may be two toggles visible.
- Click the toggle on the left to add it to the setting section. The toggle on the right determines if it’s enabled when added to the section, they are enabled by default.
- If the pop-up remains empty after choosing the Setting section from the drop-down menu, that section has no features to be added.
-
Click the Save button. You can now configure the feature to your preference.
Important: If the features being added are text fields, you’ll need to fill them out before you can save them.
Note: Remove features from a section by clicking the button. Drop-down menus and text fields will reset from the configurations you added.
eCommerce Admin
Admin: eCommerce Admin
Page: Company Settings > Settings
URL: [CLIENTID].retailadmin.directscale.com/#/Settings
Permission: Admin Settings
The steps to enable a feature are:
-
Click the button on the right of the toggle.

-
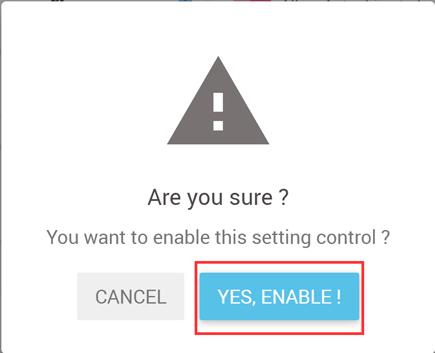
Click YES, ENABLE! in the confirmation pop-up. You can now configure the turn the feature to your preference.
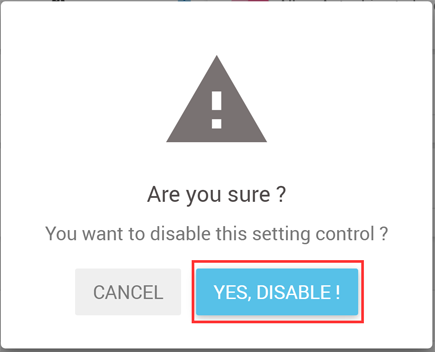
You can disable features by clicking the button that is located where the button was. Confirm by clicking YES, DISABLE! in the pop-up.
Comments
Please sign in to leave a comment.