Admin: Corporate Admin
Page: Reports > Custom
URL: [CLIENTID].corpadmin.directscale.com/Corporate/Reports/Custom
Permission: ManageCustomReports() or ViewCustomReports()
You can create custom reports visible to Admin users. Custom reports won’t appear in the Web Office. Using the Visual Report Builder, you can select the specific data you want to show.
Visual Report Builder Elements
The Visual Report Builder features drag-and-drop functionality. You have a selection of Database tables you can add to the report.
Lists
Lists are a selection of tables in the Replicated Database.
These tables have useful data that pertains to Associate and order details. Adding many tables to the report joins their data, allowing you to craft reports that fulfill specific needs.
Links
Links are color codes indicating the shared data between table Lists.
Key
The Key shows the database columns that appear in many tables.
Each column has a color code.
You can only add Lists with matching Links to a report (for example, you can’t join a brown Link with a yellow Link).
Lists often have many Links. The Lists only need to have one color in common. If you want to join non-matching Links, you need to bridge the two Lists with a List that shares a Link with both.
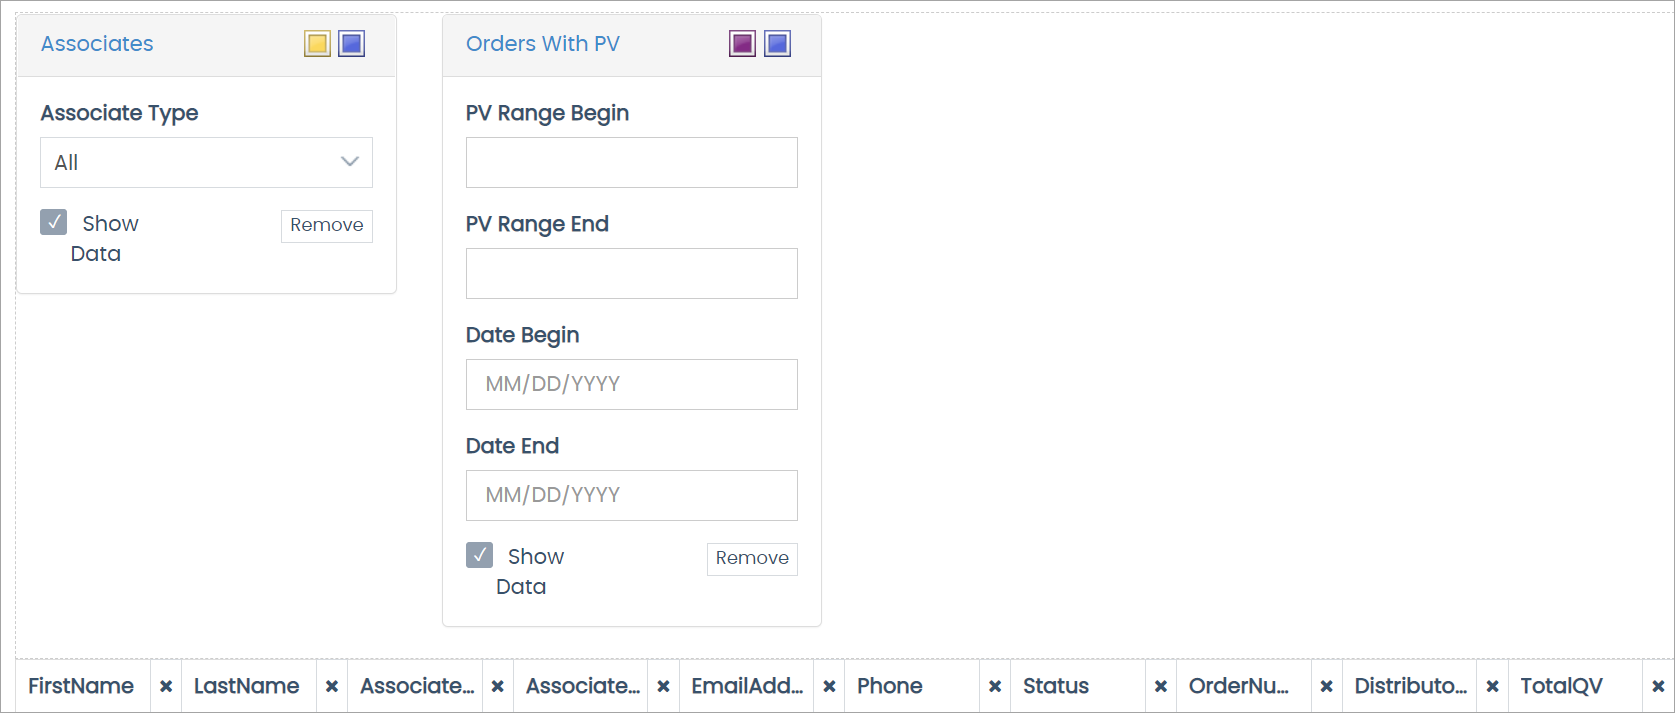
Data Tables
To create a report, click and drag a List and drop it in the Drag and Drop Area.
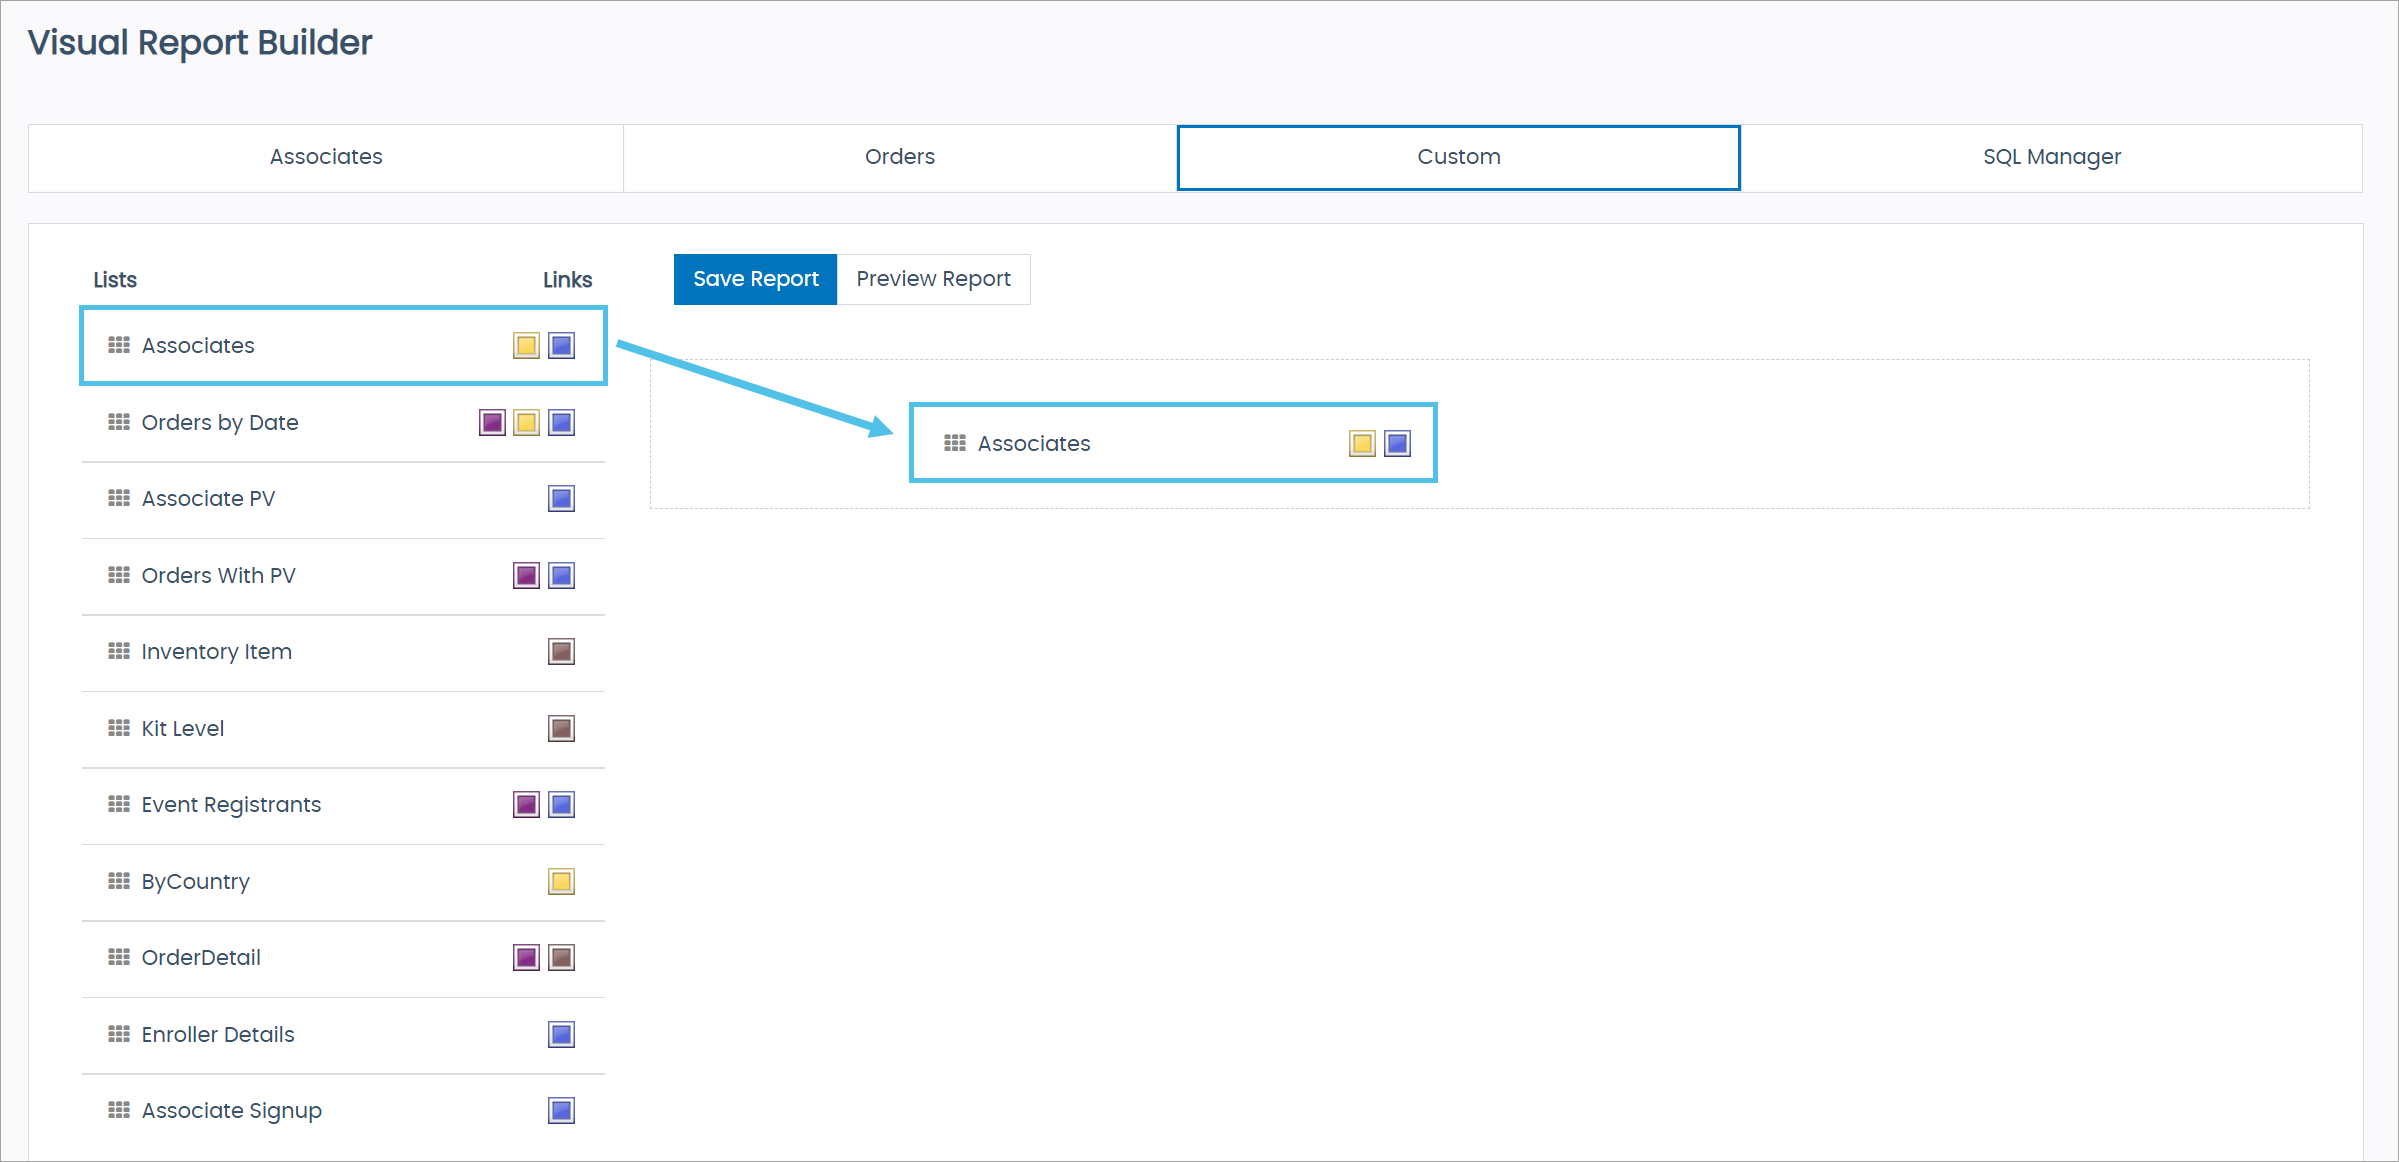
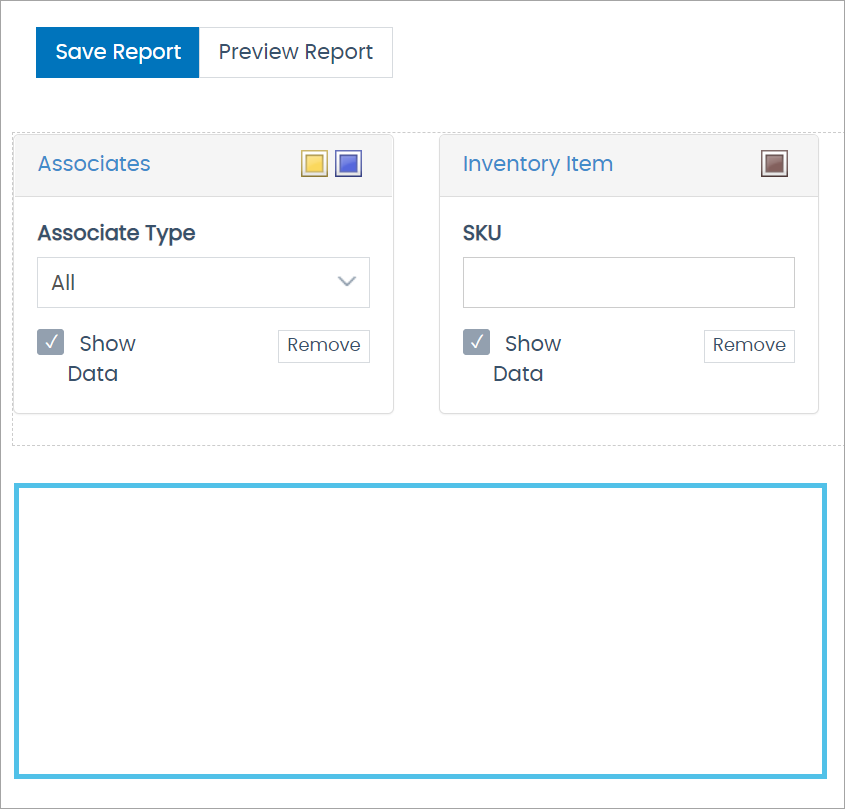
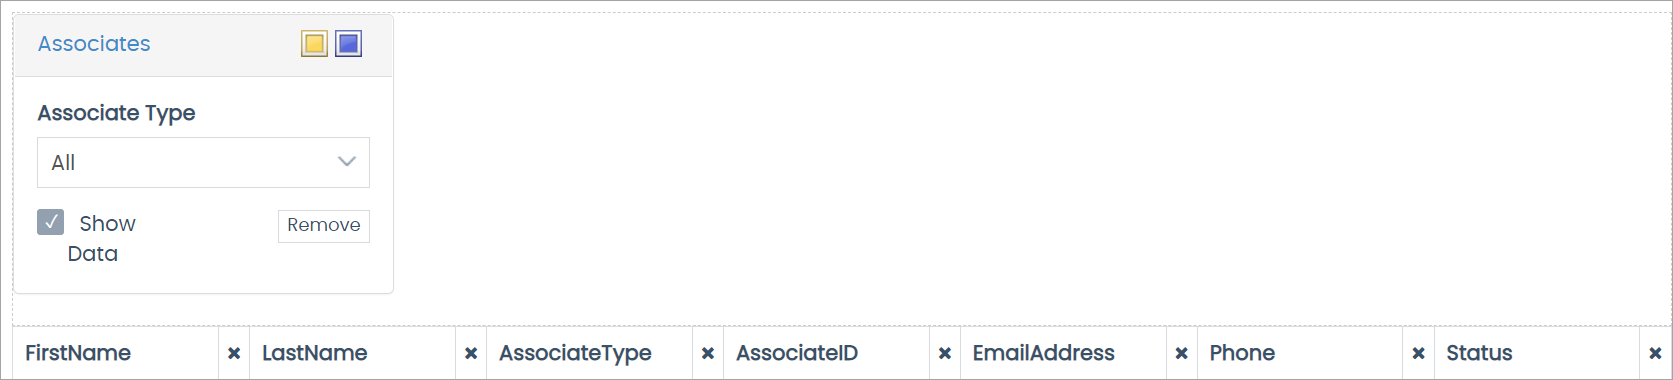
When you add the List to the report, it expands, showing the data table. You can filter the table to show only a specific column.
Toggle whether the data is visible with the Show Data checkbox. Remove the List from the report with the Remove button.
Each List you add to the report displays its data in this table.
Click the column heading to sort the column in ascending/descending alphabetical order. Click the X icon next to the column heading to delete the column from the report. Click and drag the column heading to change its position on the report.
Creating a Report
To create a report:
-
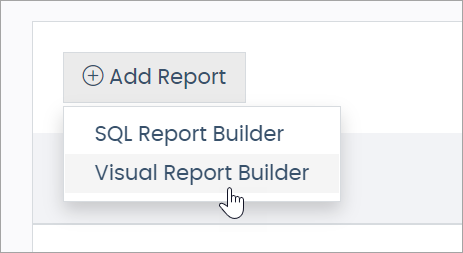
Click the + Add Report button and select Visual Report Builder.
-
Drag a table List into the Drag and Drop Area.
Each List must have at least one matching Link color.
-
Filter the data as you need.
-
Click Save Report.
Bridging Lists with Non-Matching Links
You can only add Lists to a report with matching Links. You can get around this restriction by bridging Lists.
For example:
-
The Associates List has yellow and blue links.

-
The Inventory Item List has a brown link.

If you drag both of these Lists to the Drag and Drop Area, no data will show.
You can join non-matching Links by bridging the Lists with a List/Lists that share Links with both Lists.
-
Drag the Associates List the Drag and Drop area (blue and yellow).
-
Drag the Orders with PV List (purple and blue).
Because it contains a blue link in common, the data shows.
-
Drag the OrderDetail List (purple and brown).
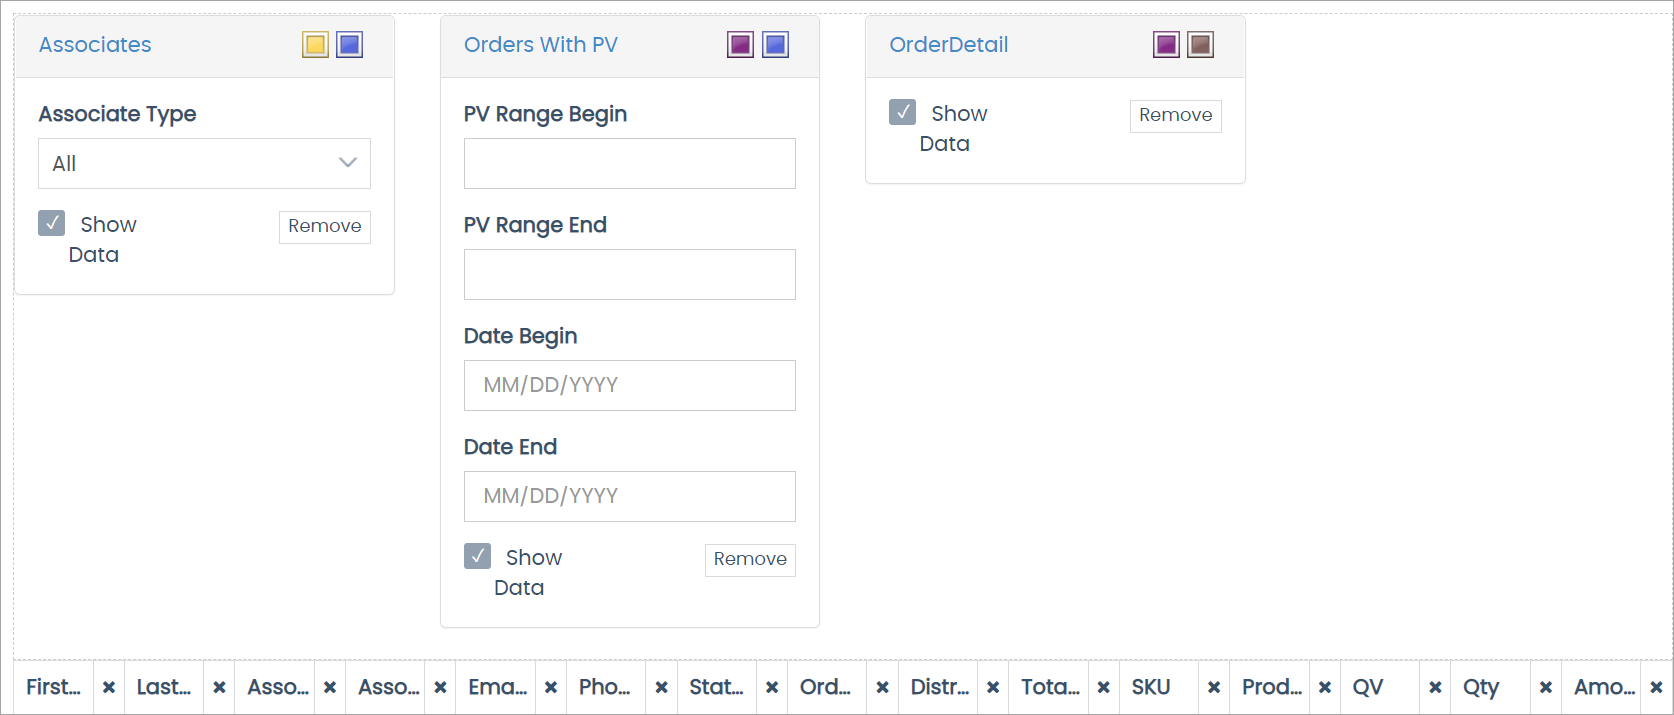
Because it shares purple with Orders with PV List, you can join it.
-
Now, you can drag the Inventory Item List (brown).
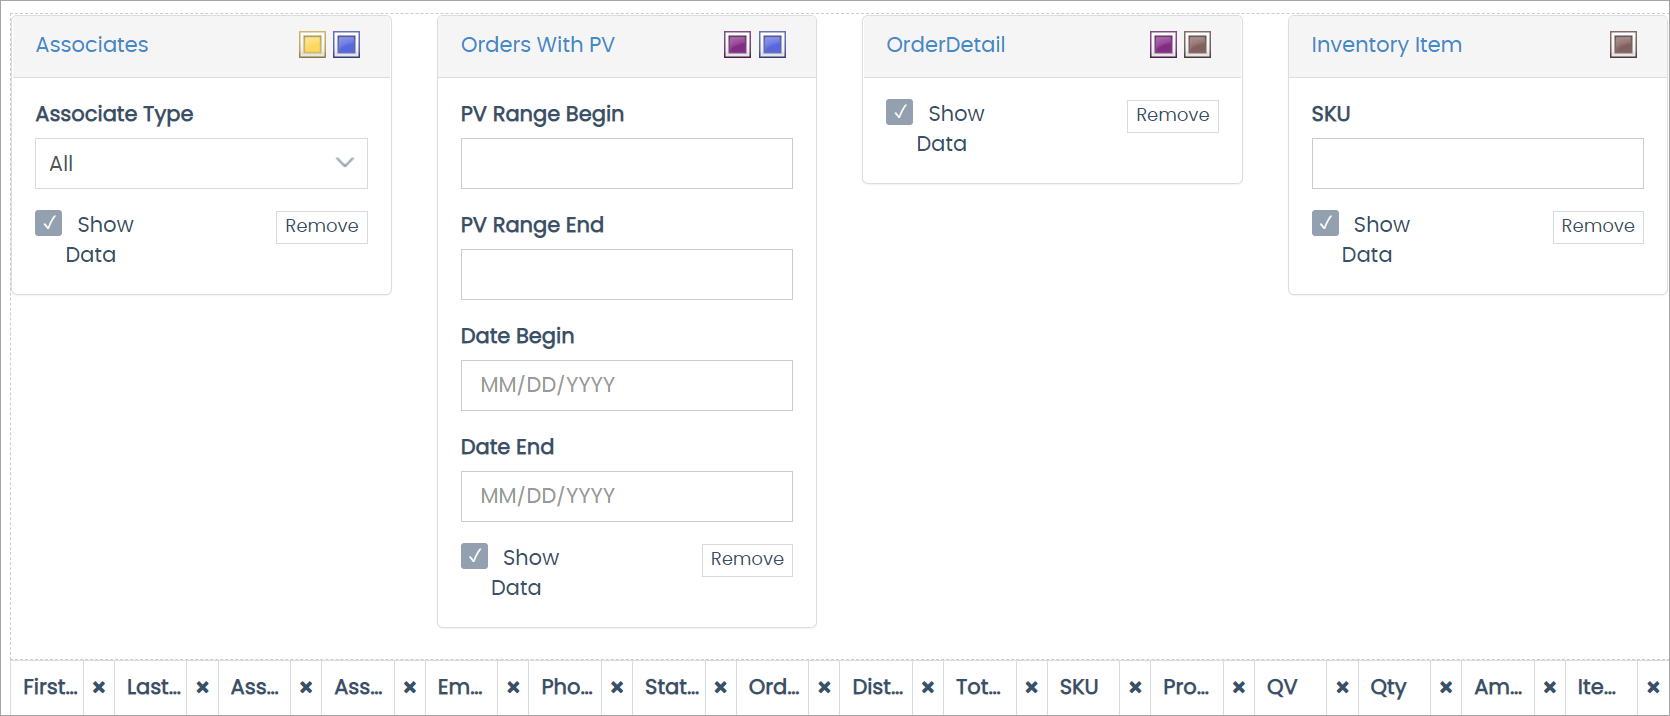
Inventory Item and OrderDetail share brown in common, so they can join.
-
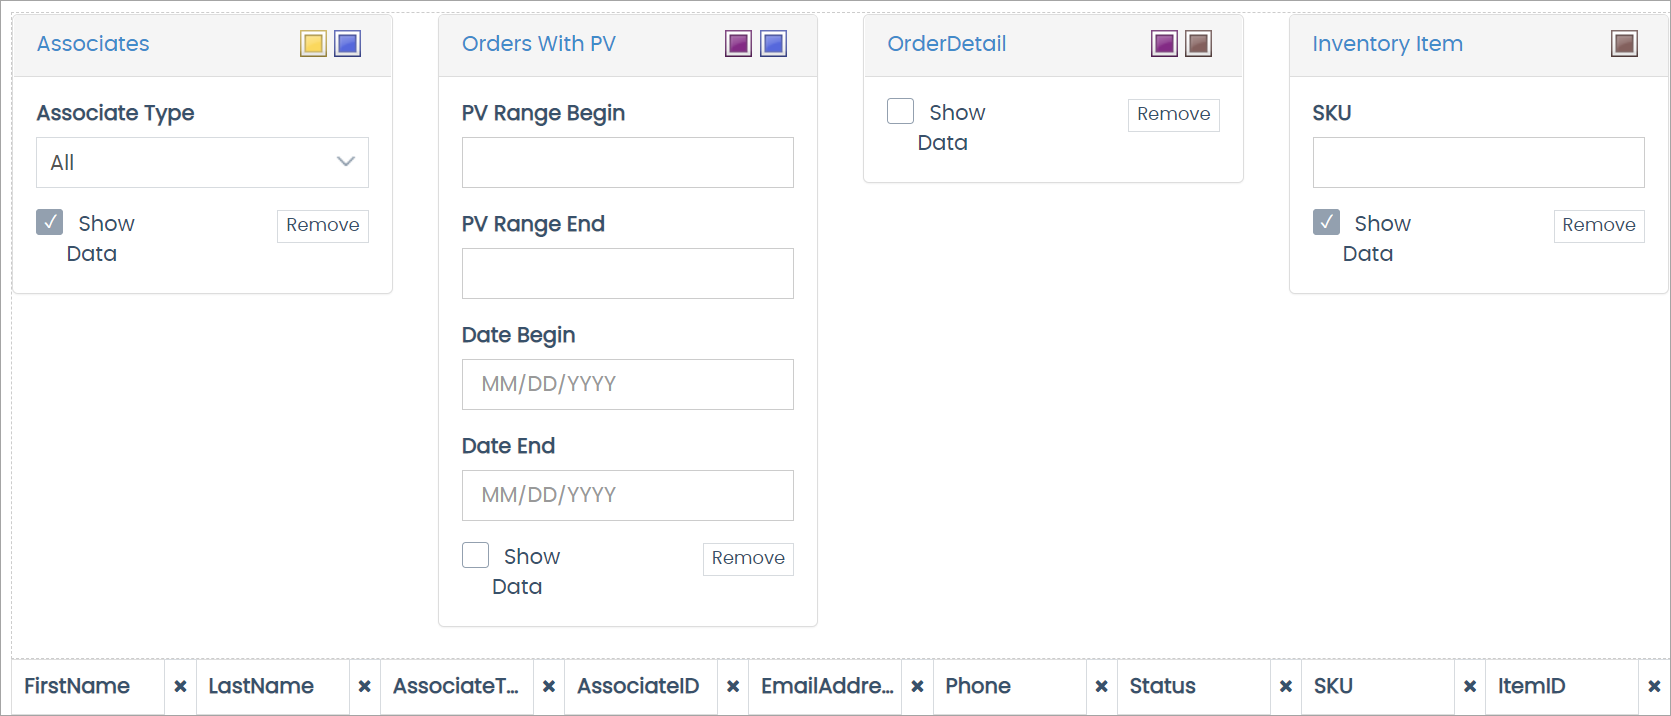
Uncheck the Show Data checkboxes on the Orders With PV and OrderDetail Lists to only show the Associates and Inventory Item List data on the report.
Editing Reports
-
Click the button.
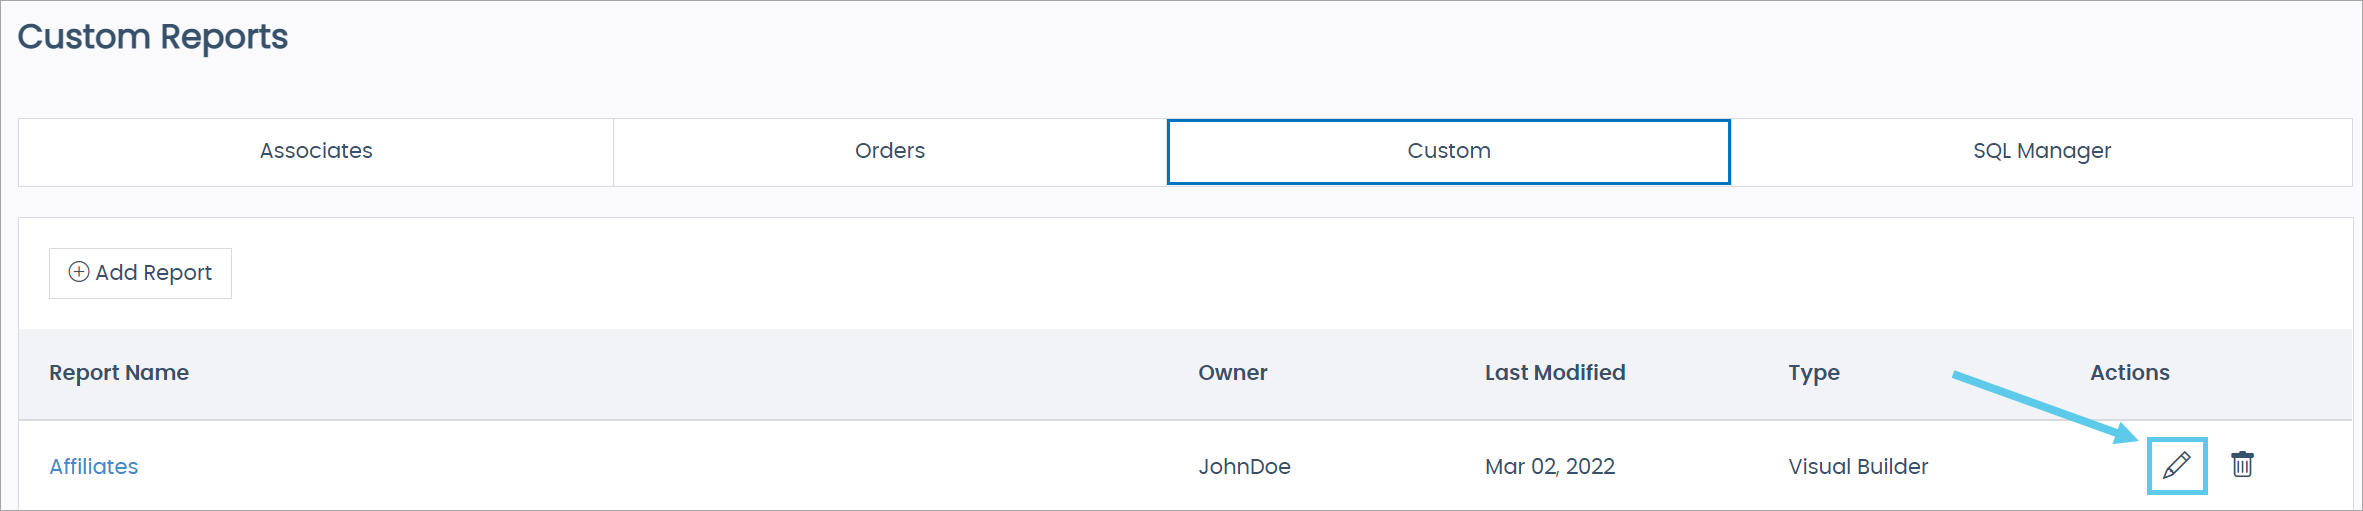
The Edit Custom Report slide-out panel opens.
-
In the panel, click Save.
A pop-up opens with the Report Name field populated with the report’s current name.
-
Leave the name unchanged to save changes to the report.
-
Click the Save Report button.

| If you update the name and confirm the save, then the report will save under the new name; it does not create a new report. |
If you try to close without saving, an Unsaved Changes confirmation pop-up will show. Click the Discard Changes button to close the report without saving your edits.
Deleting Reports
-
Click the button.
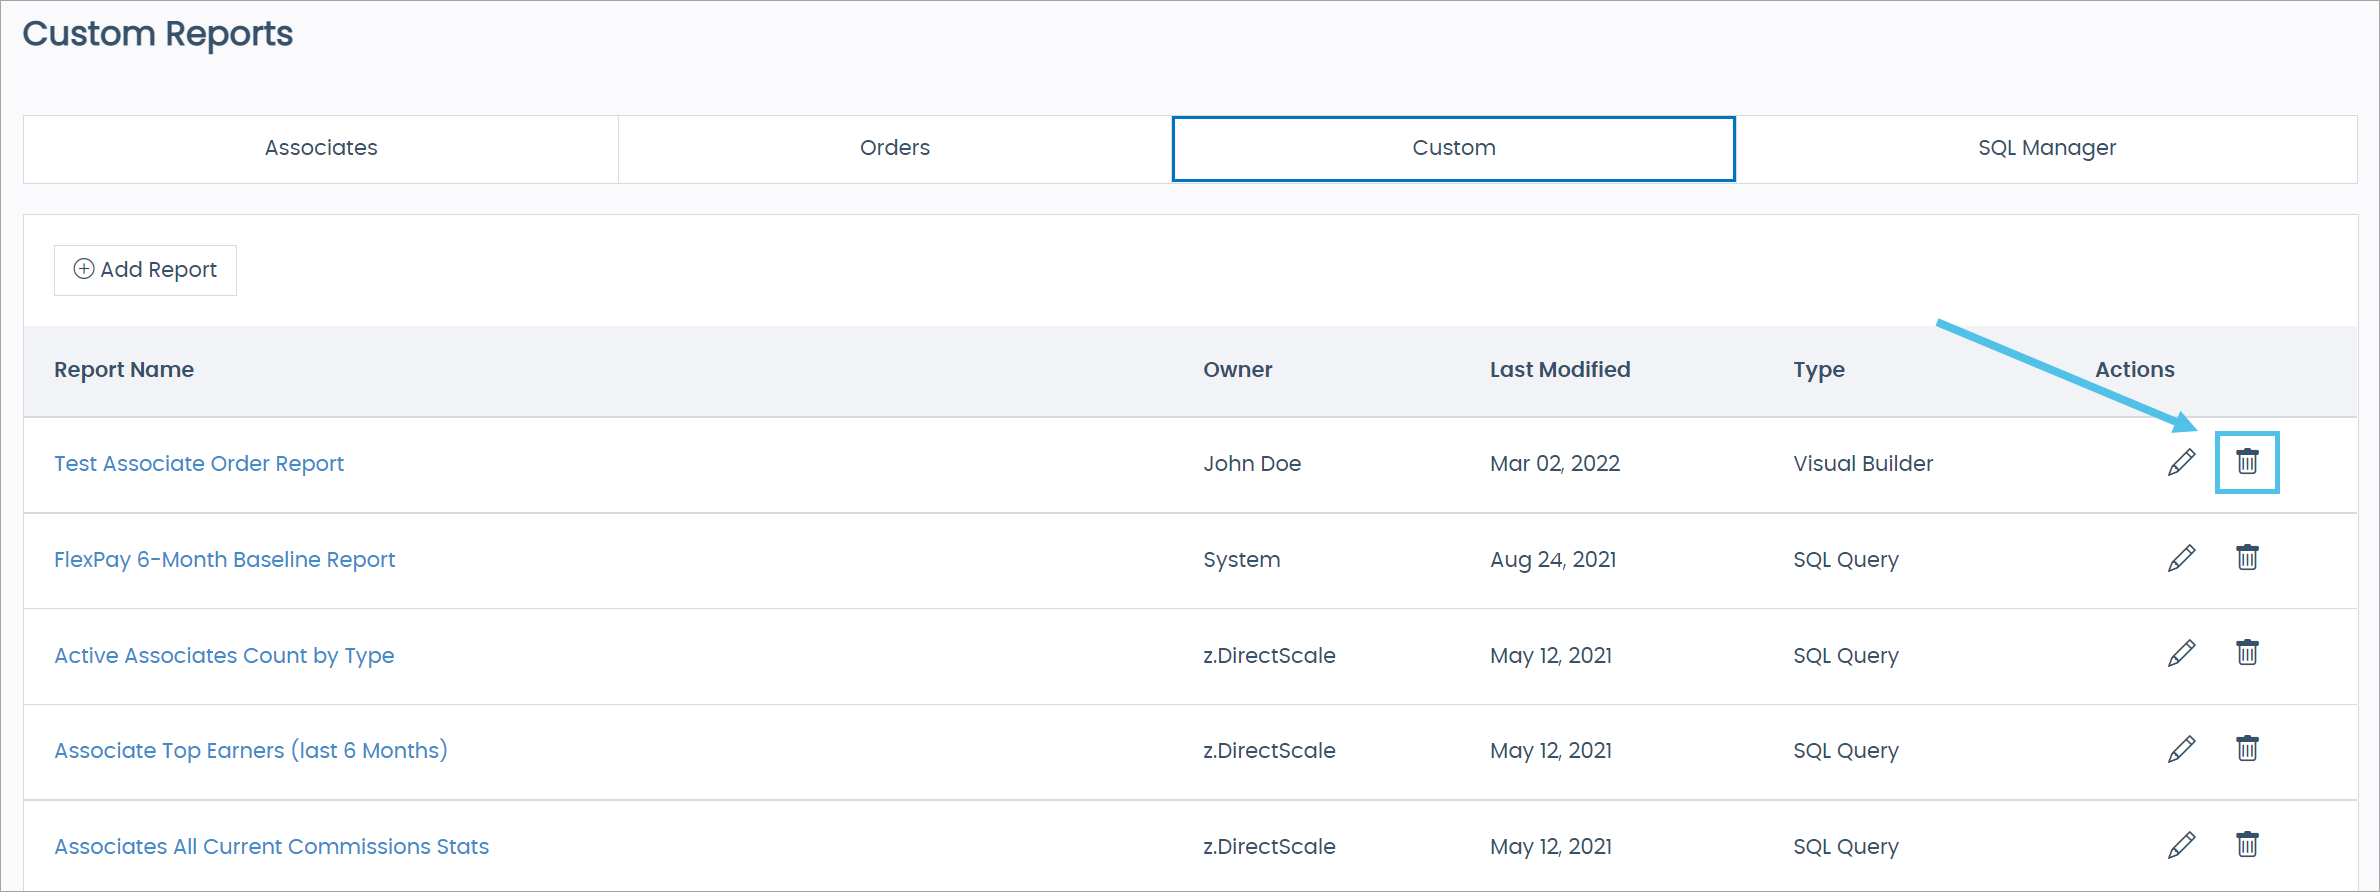
The Delete Custom Report pop-up window opens.
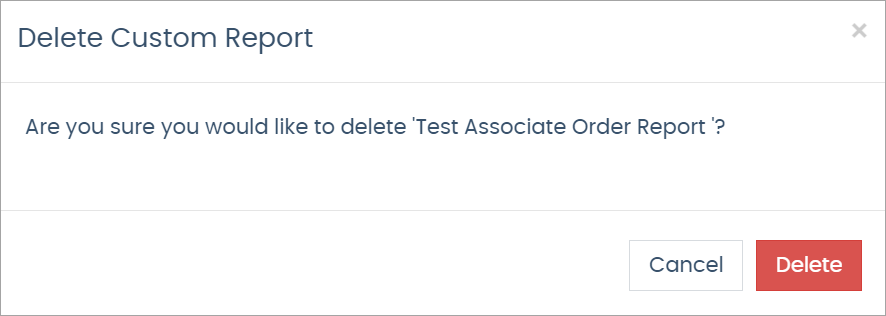
- Click Delete to remove the report.
| You cannot recover a deleted report. |
Comments
Please sign in to leave a comment.