Instead of a flat-cost shipping method, you can set up a Shipping Table to offer a variable rate based on the item’s weight and dimensions. For example, an object weighing 0-3 lbs has a different rate than one weighing 3-5 lbs.
Adding a Shipping Table
Admin: Corporate Admin
Page: Settings > Inventory Settings >Warehouses
URL: [CLIENTID].corpadmin.directscale.com/Corporate/Inventory/Warehouse
Permission: ViewInventory(), *ViewWarehouses()
To add a Shipping Table:
-
Follow the steps to add a shipping method.
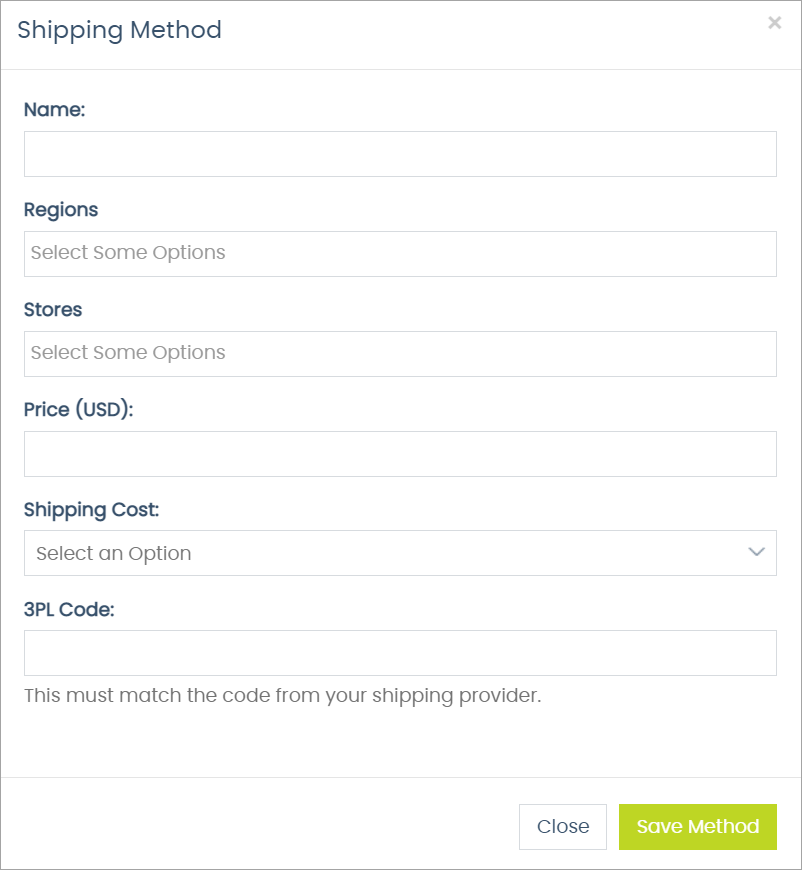
-
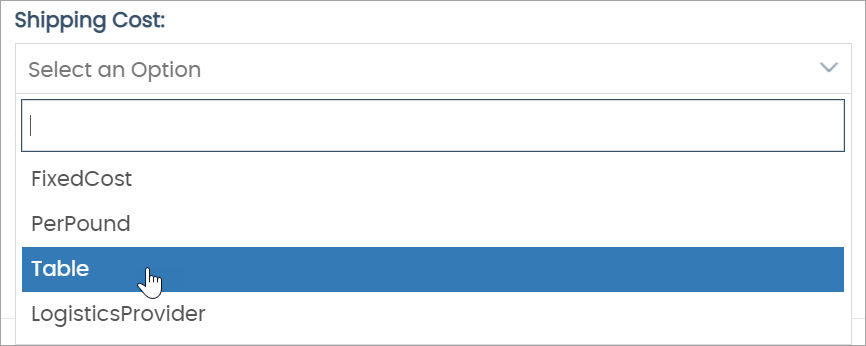
Click the Shipping Cost drop-down and select Table.
-
-
Save the method.
-
Click the button in the Shipping Method List.
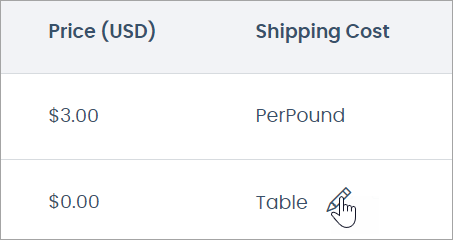
You navigate to the Edit Shipping Table page.

-
On the new page, click the + Add Item button.
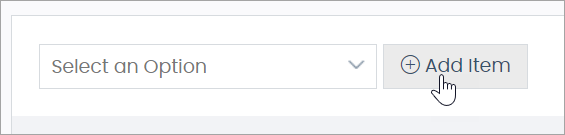
The Add Shipping Details pop-up window opens.

-
In the pop-up, complete the fields. By default, there’s no validation on the fields. See the Adding Validation section to enable.
-
Click Save to add the entry. Each entry should have a different Amount and dimensions representing a variable rate.

The page will autosave with every entry you add.
Editing a Table
To modify the table:
-
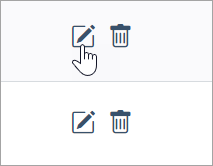
Click the button for each entry to edit the details if needed.
-
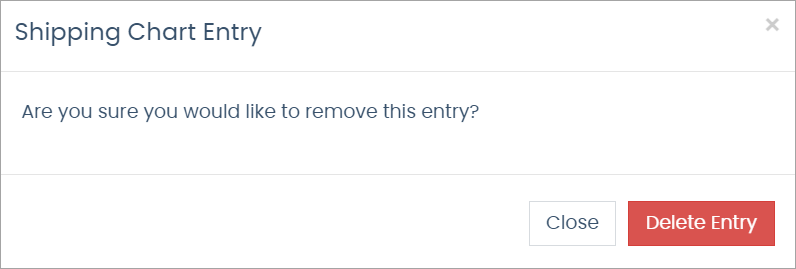
Click the button to delete the entry. The Shipping Chart Entry pop-up window will open requesting confirmation for the deletion.
-
Click Delete Entry to confirm.
Adding Validation
Admin: Corporate Admin
Page: Settings > Advanced Settings > Shipping
URL: [CLIENTID].corpadmin.directscale.com/Settings?category=Shipping
Permission: ViewAdministration(), ViewAdvancedSettings()
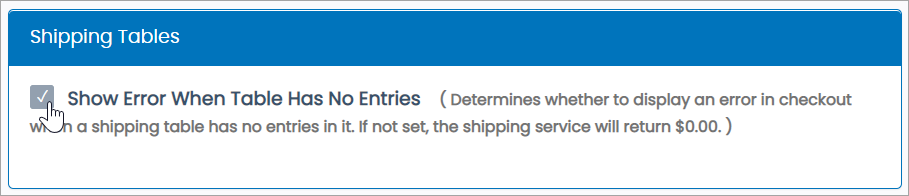
If you add a shipping table but don’t enter any values, the shipping service returns a $0.00 shipping cost. If you’d like to display an error message instead:
-
Navigate to Settings > Advanced Settings > Shipping.
-
Locate the Shipping Tables section.
-
Select the Show Error When Table Has No Entries checkbox.
-
Click Save Changes.
Comments
Please sign in to leave a comment.