Admin: Web Office Admin
Page: Content Management > Calendar
URL: [CLIENTID].admin.directscale.com/#/Calendar
Permission: Calendar
The Calendar page allows you to create company-wide calendar events that can be viewed by an Associate in the Web Office. The Associate can also create events for themselves and their team from the Web Office Calendar page.
The Calendar is available through the Web Office Home > Calendar widget and the Web Office Calendar page.
This widget is added to the Homepage by default but can appear on any widget page. Simply navigate to a widget page within the Web Office Admin Page Configuration section (such as the Team Dashboard or Settings page) and add the Home > Calendar widget.
Event Filter

Above the general Web Office Admin Filter Bar, you’ll find the Event Filter.
You can filter your added events by Event Type, Name, Description, and specific date range with this feature.
Adding a Calendar Event
-
Click the ADD EVENT button.
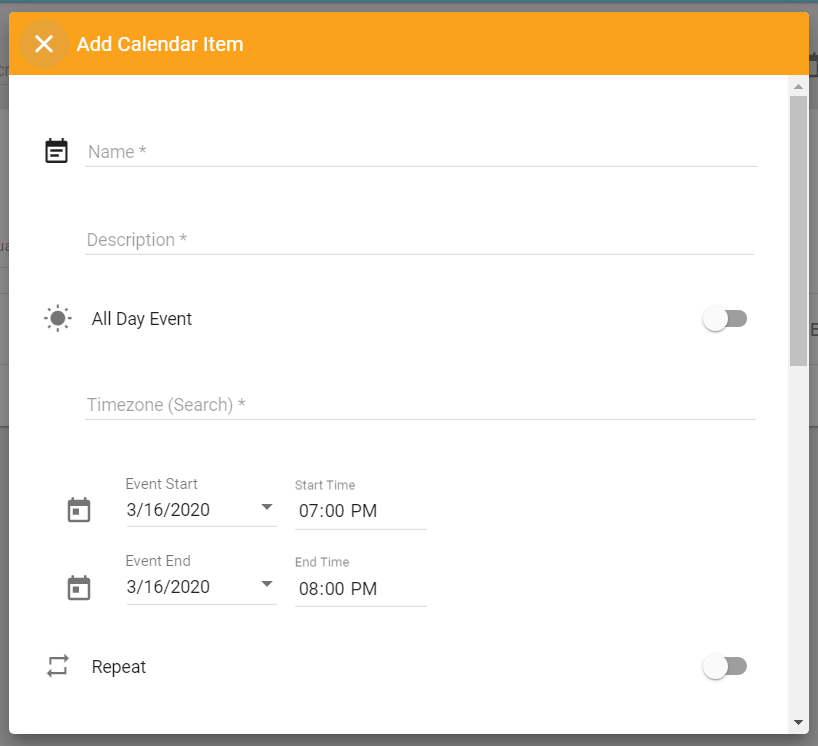
The Add Calendar Item pop-up window opens.
-
Enter the event’s Name.
-
Enter the event’s Description.
-
If it’s an all-day event, click the All Day Event toggle on.

-
Click the Timezone (Search) dropdown, and select the event’s timezone.
-
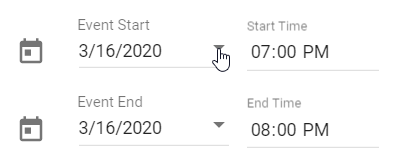
If the All Day Event toggle is off, you can select the Event Start and End Date and the Start and End Time.
Enabling Repeat Events
-
If you want your event to repeat, click the Repeat toggle on.

-
Once toggled on, the Event Repeat Type dropdown reveals.

-
How often do you want this event to show?
- None – Default (one-time event)
- Daily
- Weekly (such as Every Wednesday)
- Bi-Weekly (such as Every other Wednesday)
- Monthly
-
If the Repeat toggle is on and you’ve selected an Event Repeat Type, then you can set the date the event stops repeating by clicking the ADD REPEAT END DATE button.
-
Add a Location (area and city) where the event will be held.
The location can be a physical location or just the city/state. A selection menu will populate as you type with suggestions. A link to Google Maps will generate in the Web Office Calendar.
Selecting the Event Type
There are two types of Calendar Events: Corporate or Shared.
- Corporate events are those that are created and managed by corporate.
- Shared events are created by Associates in the Web Office. When creating an event, Associates can add to one or both of the following calendars:
- Private Calendar
- Shared Calendar
Disabling Shared Calendar Events:
1. In Web Office Admin, navigate to Administration > Admin Settings.
2. In the Admin Settings page, click the Disable shared calendar events toggle on.
3. The page saves automatically.
Saving the Event
-
Click the Published toggle to publish the event now after saving the configuration.
Alternatively, you can publish the event from the Events List by clicking the icon.
-
The rest of the settings are Multi-Faceted Configuration (MFC). Enter your specific configurations on who can view the calendar item.
-
Once all required fields are complete, click SAVE.
To edit an event, click the Edit icon. While editing, If you want to take over a Shared event, you can change Event Type to Corporate.
This will remove the Associate from the event, and they will no longer have the ability to edit.
You can’t change the event type back to Shared after changing to Corporate.
Deleting an Event
- Click the icon.
- The Edit Calendar Item pop-up window opens.
- Click the button at the bottom of the window.
- Click DELETE to confirm.
Adding Events in the Web Office
Site: Web Office
Page: Tools > Calendar
URL: [CLIENTID].office.directscale.com/app.html#/Calendar
If you happen to have a Web Office page open for testing at the time the changes were made and notice the changes haven’t occurred immediately, log out and then re-enter the Web Office page.
Using the Calendar
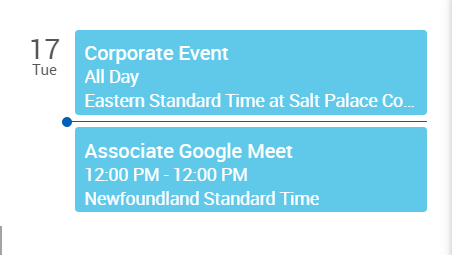
Events appear as boxes in their days colored with the Branding Main Color. All-day events appear at the top, and timed events display in chronological order labeled with their start time.

Hovering your mouse over the event shows a box with the event details.
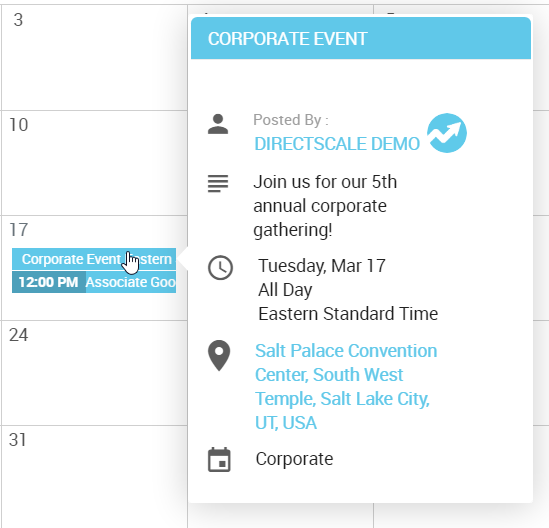
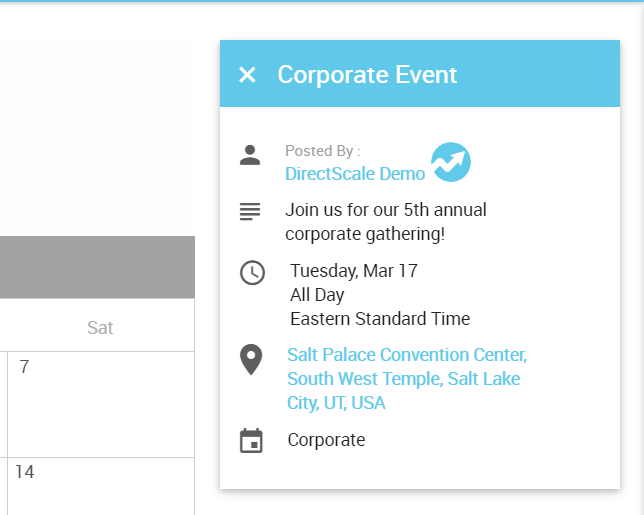
Clicking the event opens a pop-up at the right of the page. The location links to Google Maps.
On each selected day, the day’s events are listed in the top right of the page.
Adding Events
Associates can add events to their calendar.
-
Click the button to open the Create Event pop-up window.
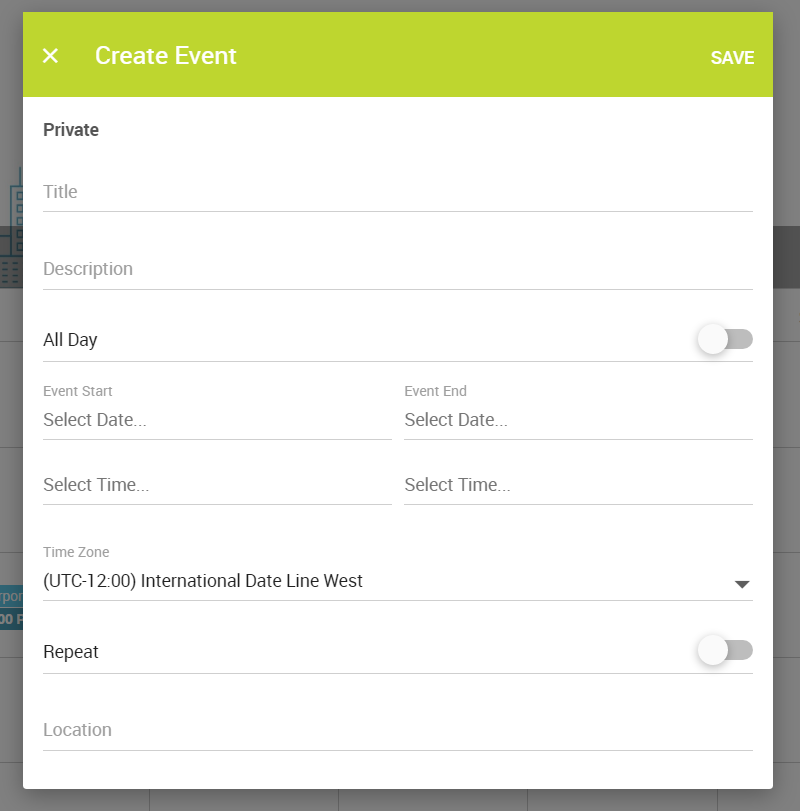
This pop-up contains the same fields as the Web Office Admin Add Calendar Item pop-up window, minus the MFC settings.
There are two types of calendar events that Associates can create: Private and Shared.
Shared events create an event for everyone in the company. The shared event will also be sent to the Calendar page in the Web Office Admin where corporate can review, edit, or delete it.
Comments
Please sign in to leave a comment.