Admin: eCommerce Admin
Page: Retail Shop Configuration > Site Navigation
URL: [CLIENTID].retailadmin.directscale.com/#/Navigation
Permission: Site Navigation
You can add links to the main navigation for the eCommerce Shop. These can be internal or external links; the links nest in folders creating two-tier navigation. With the Site Navigation page, you can customize the folder names, links, and icons. When you begin configuring your eCommerce Shop for the first time, you’ll notice that the Products navigation link is the only link there by default.
Adding a Folder
Create a folder where you can group navigation links to create a dropdown menu on the site navigation bar.
-
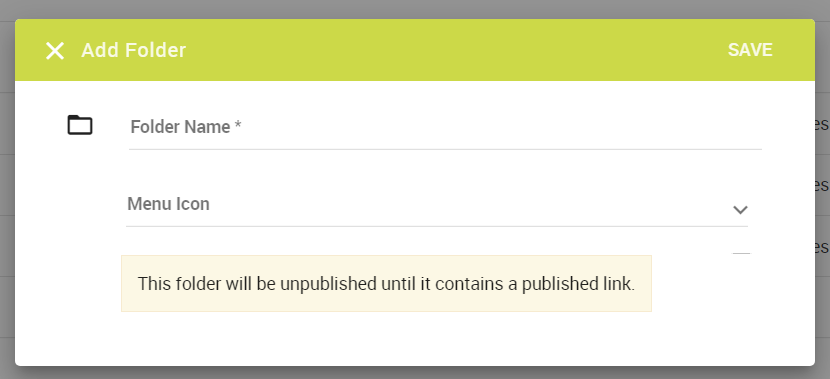
Click ADD NEW and select Add Folder.
The Add Folder pop-up window opens.

Add Folder pop-up window -
Type a Folder Name that will appear in the Shop’s navigation bar.
-
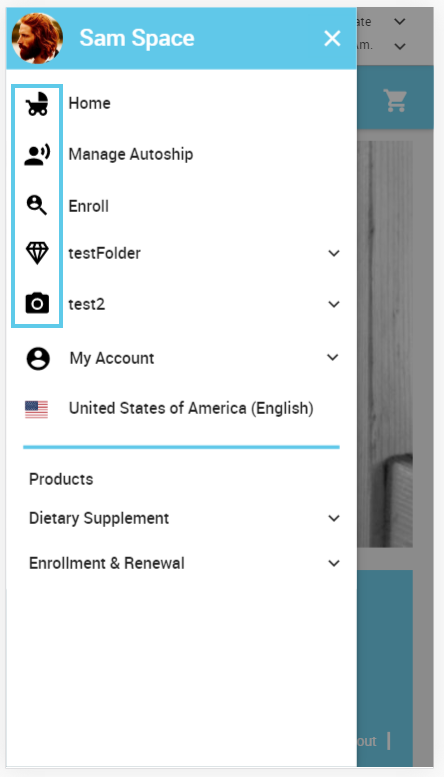
Click the Menu Icon dropdown to select an icon that displays next to the navigation link in the site’s mobile layout.
The icons only display for top-level links and folders.

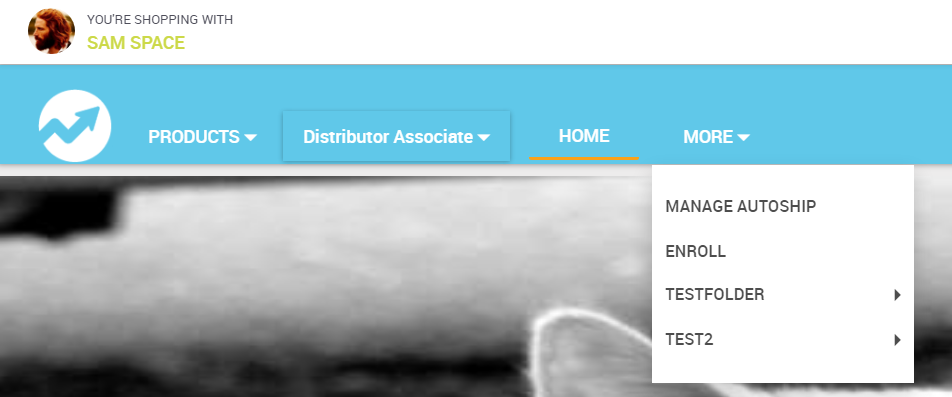
Mobile site menu icons The menu icons don’t display in the desktop site layout.

Mobile site menu icons -
Click SAVE.
Important: Added folders are not published in the eCommerce Shop until they contain a published link.
Adding a Link
-
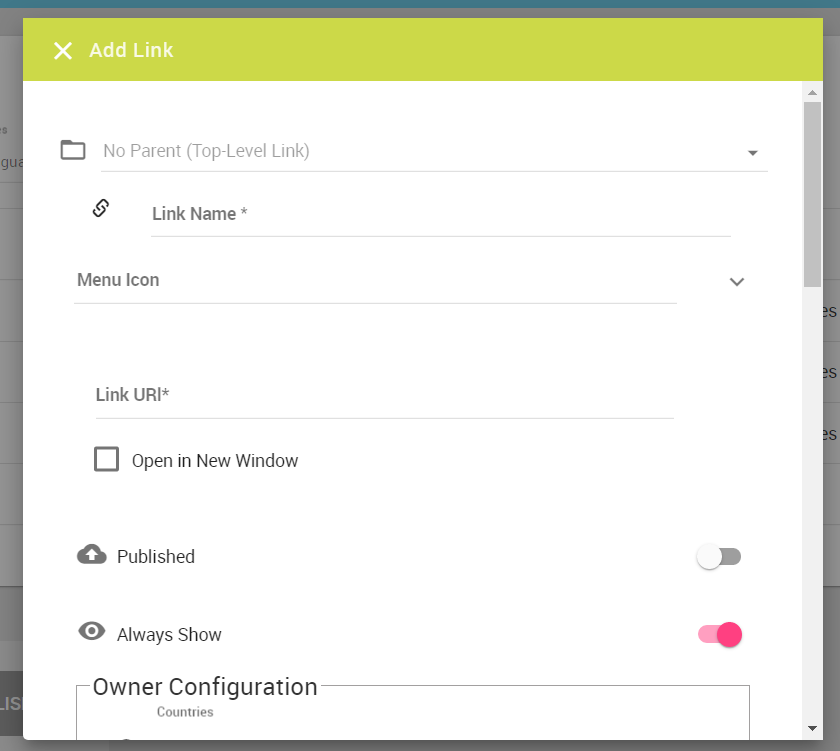
Click ADD NEW and select Add Link.
The Add Link pop-up window opens.

Add Link pop-up window -
Select a Parent Folder, if configured, to nest the link under. The link will appear as a dropdown on the eCommerce Shop’s navigation bar.
-
Type a name for your link that will appear in the site’s navigation bar.
-
Click the Menu Icon dropdown to select an icon that displays next to the navigation link in the site’s mobile layout.
The icons only display for top-level links and folders. Links nested in a folder won’t display an icon.

Mobile site menu icons The menu icons don’t display in the desktop site layout.

Mobile site menu icons -
Type the Link URL of the page you wish your navigation link to go.
Internal eCommerce Shop links must begin with “/” (such as
/Homeor/{webalias}/Home).Note: A webalias is the username of the Associate who owns the eCommerce Shop. Use
/{webalias}/Hometo keep the eCommerce experience under the Associate’s name and ensure correct commissions are paid out.Some useful default pages to link to are:
{webalias}/Home- Links to the Homepage, not linked by default.{webalias}/Contact- Links to a page with a contact form.{webalias}/Application- Links to an Enrollment form.{webaslias}/ManageAutoships- Links to the Manage Autoships page.
-
Select the Open in New Window checkbox to open the link in a new browser window.
Select this option for external links while leaving it unchecked for internal links.
-
Click the Published toggle on to publish now after saving the configuration.
-
The rest of the settings are Multi-Faceted Configuration (MFC). Enter your specific configurations for who can view them.
-
Click SAVE.
Enabling/Disabling the Full eCommerce Shop Navigation
The Navigation menu that shows in the eCommerce Shop can be enabled or disabled.
In Company Setting > Settings > Global.
Switch: 
Enabled: Displays the Navigation menu.

Disabled: Removes the Navigation menu.
Enabling/Disabling the Products Navigation Tab
The Products tab in the eCommerce Shop navigation can be enabled or disabled.
In Company Setting > Settings > Global.
Switch: 
Enabled: Displays the Products tab in the eCommerce Shop navigation.

Disabled: Removes the Products tab from the eCommerce Shop navigation.
String: products
Enabling/Disabling Redirect to Enroller Shop
By default, after logging into the eCommerce Shop, those with no webalias will be redirected to their enroller’s Shop. In Company Setting > Settings > Global you can disable this behavior.
Switch: 
Enabled: Disables the automatic redirect to the enroller’s Shop.
Disabled: Re-enables the automatic redirect to the enroller’s Shop.
Comments
Please sign in to leave a comment.