Admin: eCommerce Admin
Page: Content Management > Localization
URL: [CLIENTID].retailadmin.directscale.com/#/Localization
Permission: Strings
The Localization page is where you control eCommerce Shop text changes and language translations.
Static vs. Dynamic Content
The eCommerce Shop features static and dynamic content. You can customize most elements using the appropriate eCommerce Admin page. However, some elements are “hard-coded” into the HTML and are thus static.
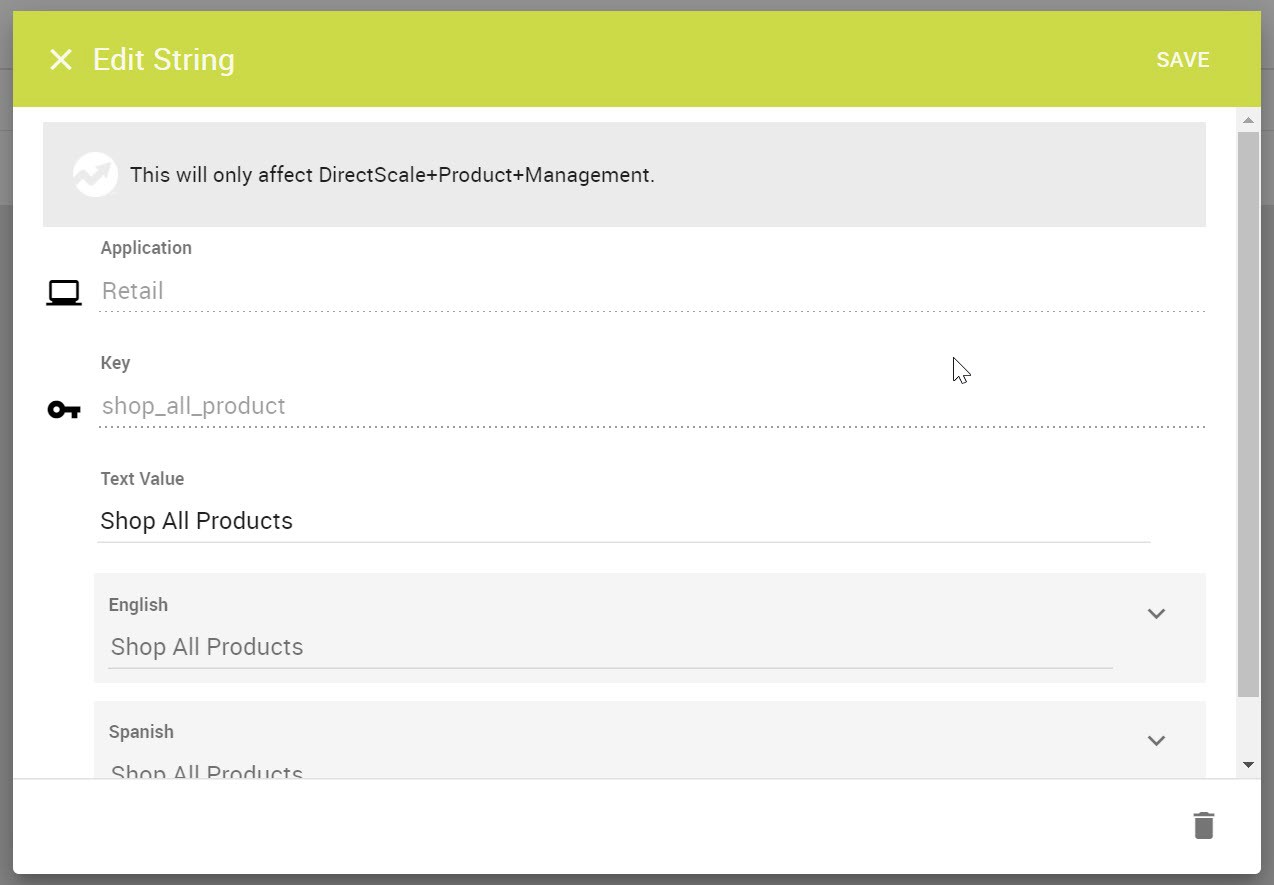
For example, in the eCommerce Shop, the category sidebar text “Shop All Products” is static.
Use the search bar and search “Shop All Products” on the Localization page to find and edit the text value.
With this system, you can manage all of your translations easily and have your shop localize dynamically.
Editing Text Values
Strings are defined in the HTML translate attribute, such as <p translate="string_name"></p>. You can use the developer tools for your browser to find the string in the HTML code (e.g., In Chrome, right-click the static text and select Inspect.)
-
Search for either the String Key or the Text Value you want to change. The search results appear below the search bar. You can filter them based on type.
-
Click the Edit icon for the string you want to change. The Edit String pop-up window opens.
-
Edit the Text Value as necessary.
-
Click each language box and enter the translations.
-
Click SAVE.
-
A Success message will appear to confirm the changes were updated successfully.

If you have the eCommerce Shop open in a different tab, refresh the page to see your changes.
Some changes can take a while to take effect. Clearing your browser cache can be useful or checking back later until the system’s cache clears automatically.
Adding a String
-
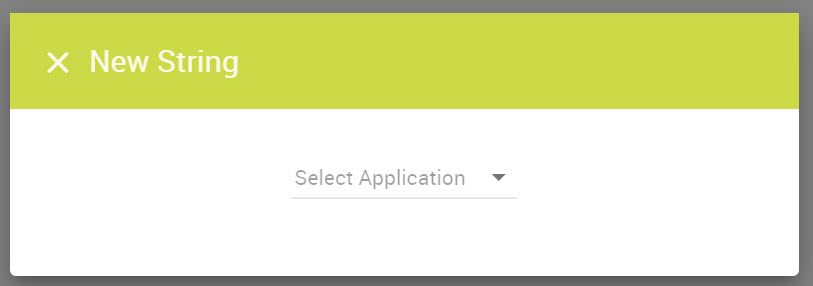
Click the + ADD NEW button.

The New String pop-up window opens.
-
In the pop-up, click the Select Application dropdown and select Retail.
-
Enter the String name in the Key field.
-
Edit the Text Value as necessary.
-
Click SAVE.
-
A Success message will appear to confirm the localization was added successfully.

If you have the eCommerce Shop open in a different tab, refresh the page to see your changes.
Some changes can take a while to take effect. Clearing your browser cache can be useful or checking back later until the system’s cache clears automatically.
Exporting Translations
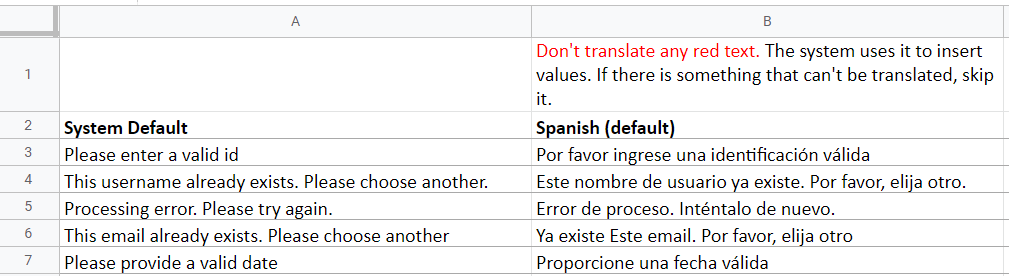
This page features the ability to export a CSV file (you can open that in any spreadsheet program, such as Excel or Google Sheets) and modify the bulk translations. Translations are displayed in the eCommerce Shop based on the value entered in the string or the exported CSV. If there is no value entered for the market/language, it will default to the next available value.
-
Click the IMPORT/EXPORT button and select Export Translations. The Export Translations pop-up window opens.

-
In the Language dropdown, select the language to be translated.
Do not mix languages. If you export English, only enter English values. If you select Spanish, enter Spanish values. -
Expand the Advanced options section.
Two checkboxes are revealed:
- Include market-specific translations – Useful if there are multiple markets for a language that need unique translations (Mexico – Spanish, Spain – Spanish, Puerto Rico – Spanish).
- Only include missing translations – Instead of exporting the entire eCommerce Shop, this will only export the text that is missing translations for the selected language.
Check the necessary box(es).
-
Click the EXPORT button. This will download the workable CSV file.
-
Enter the translations in the CSV file.
Important: You shouldn’t change the English default column in the translation process. If changed, the system will not recognize either the English value or the translation provided, and users will see an error in the eCommerce Shop where ever the text appears.
-
Save the file. The file is now ready to be imported back into the system.
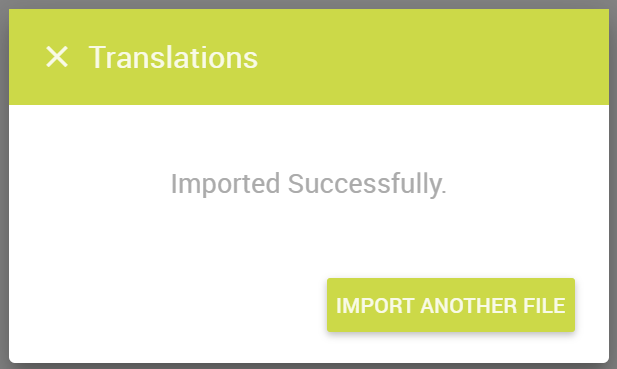
Importing Translations
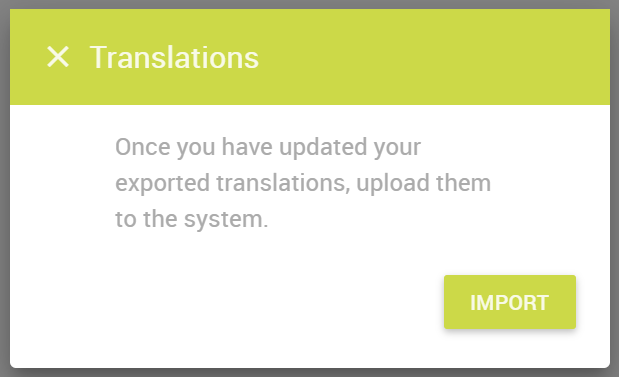
Importing translations allows you to upload all of the translations that you entered into the export document.
-
Click the IMPORT/EXPORT button and select Import Translations. The Translations pop-up window opens.
-
Click the IMPORT button. Your computer’s file finder window opens.
-
Select the completed translations spreadsheet from your computer.
The translations will show in the eCommerce Shop once the cache is recycled. This can take up to 30 minutes.
-
Click IMPORT ANOTHER FILE to repeat the process, If necessary.
Comments
Please sign in to leave a comment.