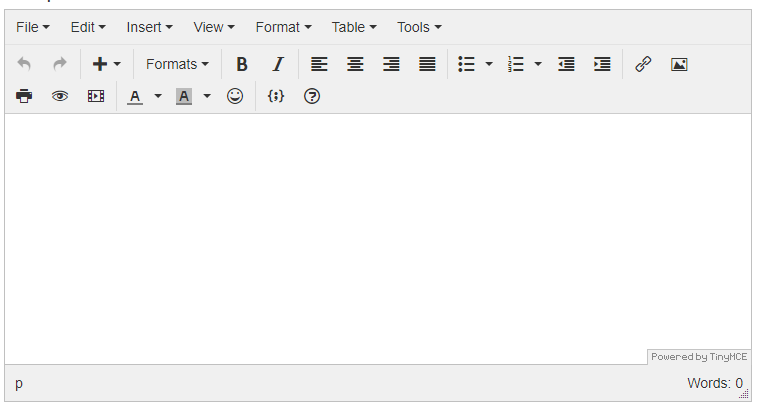
The TinyMCE Editor is a rich text editor with many text editing tools you would find in Microsoft Word or Google Docs. You can format text, insert images and video and add HTML source code.
Options Toolbar
The Options toolbar has settings and tools that affect the formatting and functionality of the editor. When you click each tab, a dropdown menu opens that features additional options. See the following list to learn more about each option.

-
File - Dropdown with two selections:
-
New Document - Clear the text editor.
-
Print (CTRL+P) - Create a printable version for the contents of the text editor. Opens your computer’s print dialog box.
-
-
Edit - Standard editing options:
-
Undo (CTRL+Z) - Undo the last action.
-
Redo (CTRL+Y) - Redo the previous action.
-
Cut (CTRL+X) - Remove the selected element and add it to your pasteboard.
-
Copy (CTRL+C) - Copy the selected element and add it to your pasteboard.
-
Paste (CTRL+V) - Insert an element in your pasteboard.
-
Paste as text - Toggle on the option to paste text without formatting styles. Select again to turn off.
-
Select all (CTRL+A) - Select all elements in the editor.
-
Find and replace (CTRL+F) - Find the inputted text with the option to replace it with the text of your choice. Opens the Find and replace pop-up window.
-
-
Insert - Insert various forms of media and formatting options:
-
Media - Embed a video. Opens the Insert/edit media pop-up window.
-
Image - Embed an image. Opens the Insert/edit image pop-up window.
-
Link (CTRL+K) - Insert a hyperlink. Opens the Insert link pop-up window.
-
Special character - Insert a symbol or special character. Opens the Special character pop-up window.
-
Horizontal line - Insert a horizontal rule/dividing line.
-
Anchor - Inserts an
idin the html; the value of which can be linked to via the Insert Link pop-up > Anchors dropdown or in the HTML source editor (Tools > Source code) usinga href="#chosen-anchor-name>Link text</a>. -
Page break - Insert a page break. Anything below the break will appear on a new page. This is useful if you plan on printing your text editor content; however, it will have no affect when viewed on the site.
-
Date/time - Insert a date or time format to which you can add your values.
-
Nonbreaking space - Inserts a nonbreaking space in the HTML source (
) ensuring that the space will display. -
Template - Insert a defined template; however, there are no templates defined in the plugin.
-
Table of Contents - Inserts a table of contents. You must have headings defined for this to work.
-
-
View
-
Show invisible characters - Toggle the ability to see invisible characters like
displayed in the editor. -
Show blocks - Display a visual representation of the underlying HTML.
-
Visual aids - Has no effect.
-
Preview - View how your formatting will appear to the user.
-
Fullscreen - View the editor in fullscreen.
-
Help - Open a pop-up with a list of formatting keyboard shortcuts and a list of the plugins in use.
-
-
Format
-
Bold (CTRL+B) - Bold the text (example).
-
Italic (CTRL+I) - Italicize the text (example).
-
Underline (CTRL+U) - Underline the text (example).
-
Strikethrough - Display a line through the text (example).
-
Superscript - Formats highlighted text as smaller and slightly above the line (example2).
-
Subscript - Formats highlighted text as smaller and slightly below the line (example2).
-
Formats
-
Headings - Heading sizes 1-6.
-
Inline - Format the text. Contains the same options as above with the addition of Code formatting (e.g.,
<html>) -
Blocks - Wrap the text with the chosen HTML tags: Paragraph
<p></p>, Blockquote<blockquote></blockquote>, Div<div></div>, and Pre<pre></pre>. -
Alignments - Align the text: Left, Center, Right, and Justify.
-
-
Clear formatting - Clear any chosen formatting styles.
-
-
Table - Insert a table with rows and columns. Options include:
-
Table - Display a grid with which you can decide the size of your table.
-
Table properties - Edit the table properties once added. Opens the Table properties pop-up window where you can adjust the specifics of the table’s height, width, and styles.
-
Delete table - Delete the added table.
-
Cell
-
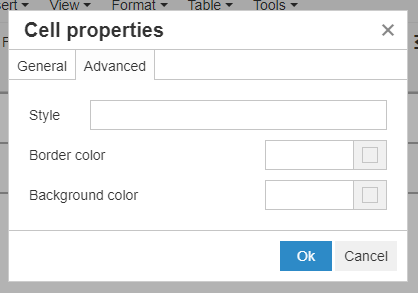
Cell properties - Edit the cell’s properties once a table has been added. Opens the Cell properties pop-up window where you can adjust the specifics of the table’s height, width, and styles.
-
Merge cells - Combined multiple cells into one.
-
Split cell - Separated merged cells back to their original state.
-
-
Row
-
Insert row before - Add a row before the currently selected row.
-
Insert row after - Add a row after the currently selected row.
-
Delete row - Remove the selected row.
-
Row properties - Edit the row’s type, alignment, and styles. Opens the Row properties pop-up window.
-
Cut row - Remove the selected row and add it to the pasteboard.
-
Copy row - Copy the selected row and add it to the pasteboard.
-
Paste row before - Paste the row in the pasteboard before the selected row.
-
Paste row after - Paste the row in the pasteboard after the selected row.
-
-
Column
-
Insert column before - Add a column before the currently selected column.
-
Insert column after - Add a column after the currently selected column.
-
Delete column - Delete the selected column.
-
-
-
Tools
-
Source code - View and edit the underlying HTML code.
-
Formatting Toolbar
The Formatting toolbar features quick-links to the most popular formatting tasks.

-
Undo (CTRL+Z) - Undo the last action.
-
Redo (CTRL+Y) - Redo previous action.
-
Add - Insert various forms of media and formatting options:
-
Media - Embed a video. Opens the Insert/edit media pop-up window.
-
Image - Embed an image. Opens the Insert/edit image pop-up window.
-
Link (CTRL+K) - Insert a hyperlink. Opens the Insert link pop-up window.
-
Special character - Insert a symbol or special character. Opens the Special character pop-up window.
-
Horizontal line - Insert a horizontal rule
<hr>below the current line. -
Anchor - Insert an
idin the html, the value of which can be linked to via the Insert Link pop-up > Anchors dropdown or in the HTML source editor (Tools > Source code) usinga href="#chosen-anchor-name>Link text</a>. Opens the Anchor pop-up window where you can assign an anchor name. -
Page break - Insert a page break. Anything below the break will appear on a new page. This is useful if you plan on printing your text editor content; however, it will not be visible on the site.
-
Date/time - Insert a helpful date or time format to which you can add your values.
-
Nonbreaking space - Insert a nonbreaking space in the HTML (
), ensuring the space will display. -
Template - Insert a defined template; however, there are no templates defined in the plugin.
-
Table of Contents - Insert a table of contents. You must have headings defined for this to work.
-
-
Formats
-
Headings - Heading sizes 1-6.
-
Inline - Format the text. Contains the same options as above with the addition of Code formatting (e.g.,
<html>) -
Blocks - Wrap the text with the chosen HTML tags: Paragraph
<p></p>, Blockquote<blockquote></blockquote>, Div<div></div>, and Pre<pre><pre>. -
Alignments - Align the text: Left, Center, Right, and Justify.
-
-
Bold (CTRL+B) - Bold the text (example).
-
Italic (CTRL+I) - Italicize the text (example).
-
Align Left - Align the text to the left side.
-
Align Center - Center the text in the editor.
-
Align Right - Align the text to the right side.
-
Justify - Adjust text to have straight edges on both sides of the paragraph.
-
Bullet List - Insert a bulleted list.
-
Numbered List - Insert a numbered list.
-
Decrease Indent - Decrease the line indention.
-
Increase Indent - Increase the line indention.
-
Insert/Edit Link (CTRL+K) - Insert a hyperlink. Opens the Insert link pop-up window.
-
Insert/Edit Image - Embed an image. Opens the Insert/edit image pop-up window.
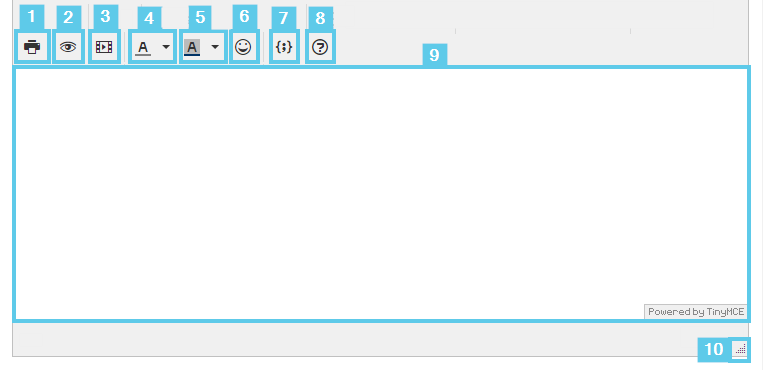
Text Editor
-
Print (CTRL+P) - Create a printable version for the contents of the text editor. Opens your computer’s print dialog box.
-
Preview - View how your formatting will appear to the user.
-
Insert/Edit Media - Embed a video. Opens the Insert/edit media pop-up window.
-
Text Color - Select from the color palette or click Custom… to choose your own text color with the Color Selector.
-
Background Color - Select from the color palette or click Custom… to choose your own text background color with the Color Selector.
-
Emoticons - Insert an emoji.
-
Insert/Edit Code Sample - Insert a formatted code snippet with syntax highlighting. Opens the Insert/Edit code sample pop-up window where you can select your programming language and enter your code.
-
Help - Open a pop-up with a list of formatting keyboard shortcuts and the plugins in use.
-
Editor - Where you can add your content.
-
Expand - Click and drag to expand the editor’s length.
Find and replace Pop-up Window
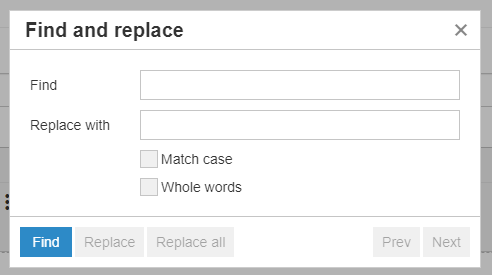
Find your text and optionally replace it with the value in the Replace with field. Configure this option to only replace the values that match the case and are whole words with the checkboxes.
Insert/edit media Pop-up Window
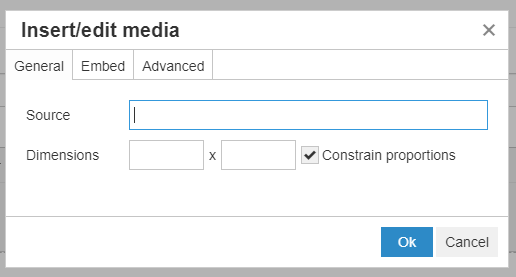
Typing the URL in the Source field will allow you to insert the media into the editor. From there, you can edit the Dimensions as necessary.

If your media has an embed code, you can paste the code in the Paste your embed code below: field.
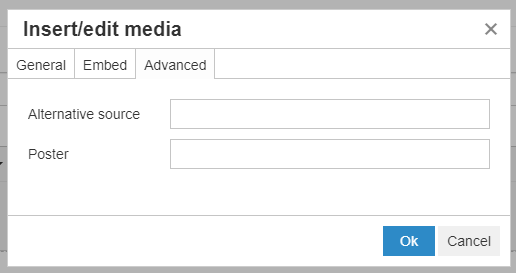
With the Advanced tab, type the URL for a fallback source so your videos always display.
Insert/edit image Pop-up Window
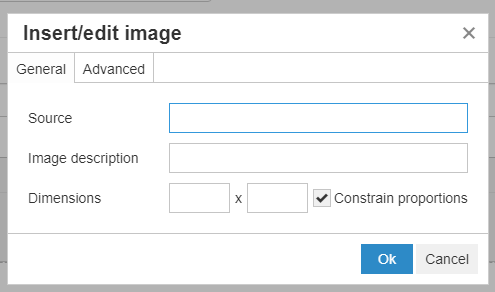
Typing the URL for the image in the Source field will insert the image into the editor. The Image description field is where you type the images alt-text and you can edit the image dimensions by changing the values in the Dimensions fields.
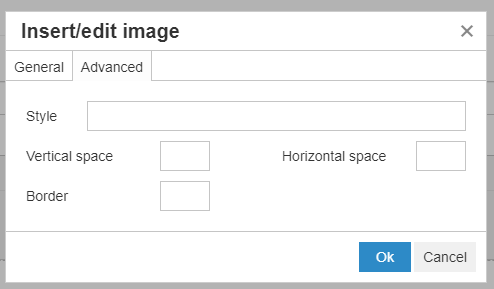
Under the Advanced tab, you can style the image with CSS in the Style field, and manage the spacing and border styles.
Insert link Pop-up Window
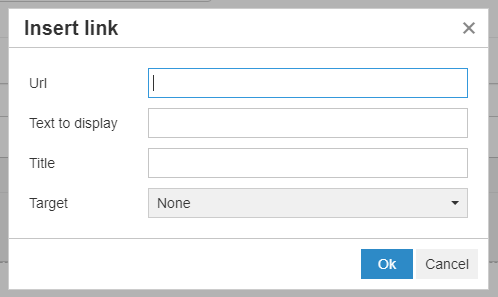
Input the URL, the text that will display, the title text that will appear when you hover your mouse over the text, and whether the link will open in a new browser tab on navigate within the same tab.
Anchor Pop-up Window
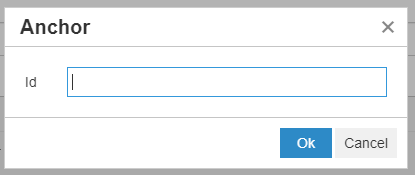
Input an ID to which you can link allowing in document navigation.
Tables

Drag your mouse across the grid to determine the size of your table. Click to insert your table into the editor.
Once a table has been added, the Table properties option in the Table menu is available. Clicking Table properties opens the Table properties pop-up window.
Table properties Pop-up Window
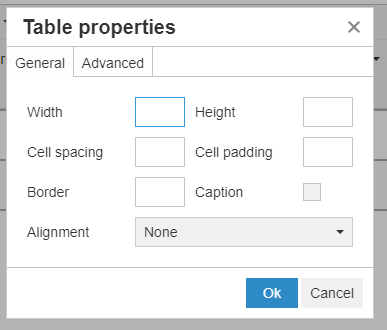
With the Table properties pop-up window, you can edit the dimensions, spacing, alignment, and certain styles.
Click the Caption checkbox to add a caption above the table. Once you click Ok in the Table properties pop-up window, a dotted box will appear above the table where you can type your caption.
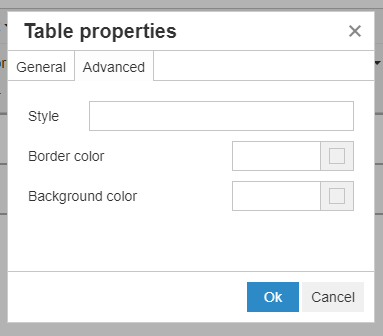
Clicking the Advanced tab displays the CSS style and color options. In the Style field, you can type CSS style separated by a semi-colon (;). The Border and Background color fields are where you input your hexadecimal color code or click the box next to the field to open a Color Selector.
Cell properties Pop-up Window
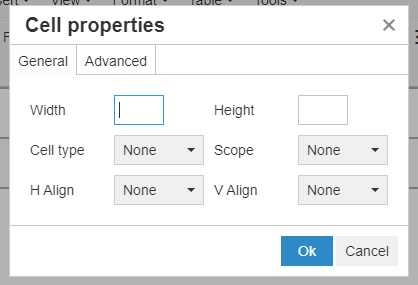
Row properties Pop-up Window
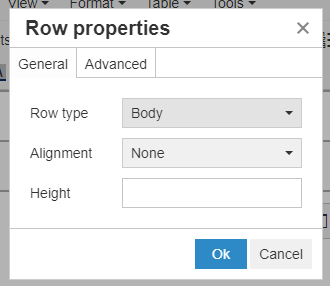
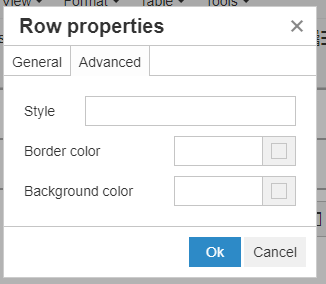
The Cell and Row properties pop-up windows function the same as the Table properties pop-up detailed above. Each pop-up allows you to customize the look of the cells and rows for your table.
Color Selector
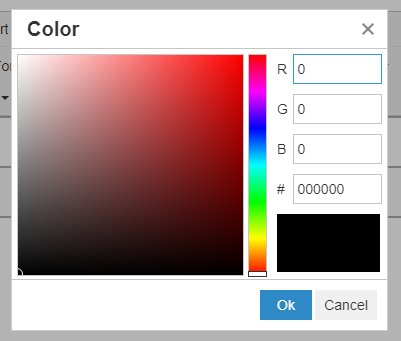
The Color Selector allows you to pick your color by clicking the palette. You can choose a specific color by typing its value in the RGB and # (hexadecimal) fields.
Embedding a PDF in a Product’s Detail
TinyMCE allows you to insert all sorts of media; however, unless it’s an image or a video, the path to success isn’t so obvious. If you want to embed a scrollable PDF into a product’s details, you’ll have to edit the HTML Source Code.
This method does not work in the TinyMCE Editor used when adding a training task for the Web Office Training Course feature.
Before you start the following steps, you need to have your PDF hosted on a server and copy its URL. Conveniently, the Web Office Admin features an Amazon Web Services upload tool, where you can upload your PDF and copy the URL.
Read more in Uploading Files and Assets in Web Office Admin.
-
In your editor, select Tools > Source code.
Or click the icon.
-
In the Source code pop-up, locate in the HTML where you want your PDF to be placed.
-
Copy and paste the following HTML:
<embed src="https://directscalestring.directscale.com/Files/demo/18487cc9-59d8-4b7a-a63d-0a01533b947a.pdf" width="300" height="150"></embed>Remember to change the
srcvalue to your PDF’s URL, as well as the necessarywidthandheight. -
Click OK to close the pop-up and save the edits.
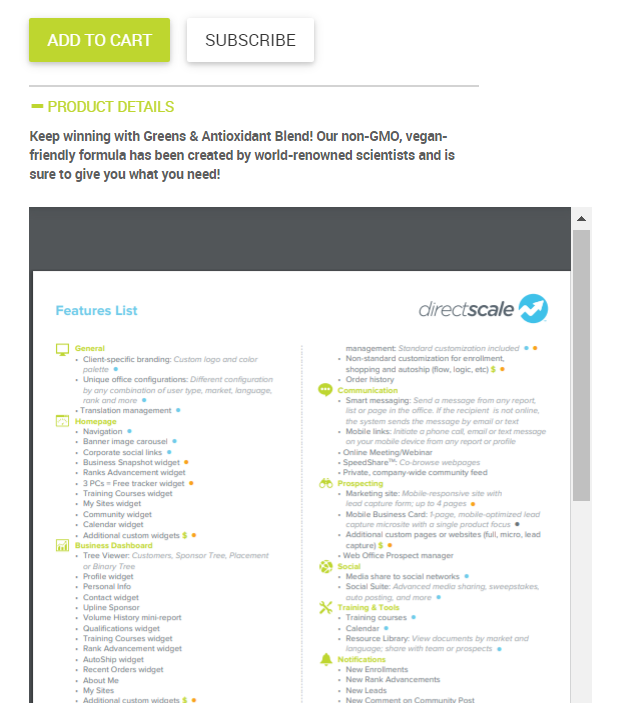
For example, in the eCommerce Shop Product Detail, you can see how the embedded PDF displays:
Embedding Google Drive Documents (Docs, Sheets, Slides, or Forms)
When creating high quality Training Course content for your associate’s Web Office, you may want to have a Google Slides presentation or Google Doc embedded in the training task content, instead of merely hyperlinked.
This process is similar to the previous section, Embedding a PDF in a Product’s Detail, in that you’ll need to edit the Source Code of the TinyMCE Editor in the Training Courses > Add Task pop-up window.
Publishing Your Google Resource to the Web
The first thing you need to do is open the Google resource you want to embed. Whether it’s a Slides presentation or a quiz Form, the process is the same.
-
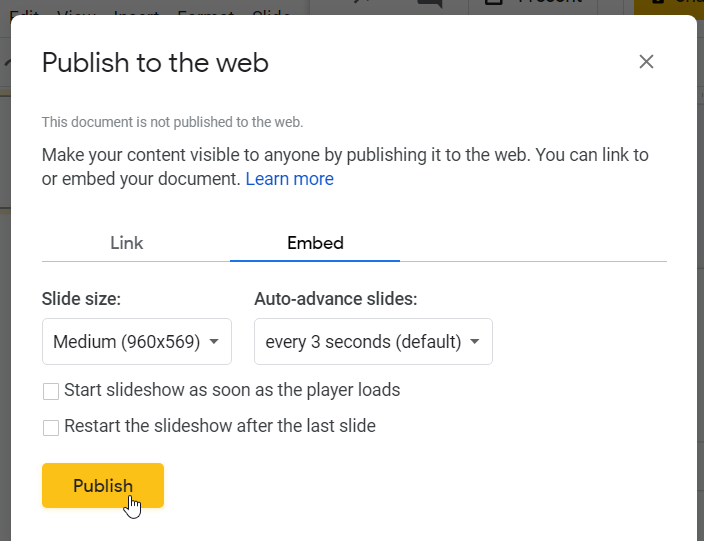
In the Google resource, select File > Publish to the web.
-
In the Publish to the web pop-up, select the Embed tab.
-
Make any adjustments to the Embed settings, if necessary.
-
Select the Publish button, when ready.
A dialog box will request confirmation.
-
Once confirmed, a text field will appear with an snippet of HTML you can copy that looks similar to this:
<iframe src="https://docs.google.com/presentation/d/e/2PACX-1vQpwRGjHpzXoLy42r4zcdtBufMHseXSn4np9z5j4YGHqnc9zPh8QAOsSesmF8VqC2LeGKYI2hXOdUpK/embed?start=false&loop=false&delayms=3000" frameborder="0" width="960" height="569" allowfullscreen="true" mozallowfullscreen="true" webkitallowfullscreen="true"></iframe> -
Keep this snippet handy for the next steps.
Adding the Embed Code to the Editor
In Web Office Admin, navigate to: Content Management > Training Courses.
If you are unfamiliar with adding Training Courses, read more here Creating Web Office Training Courses.
-
Either add a new task, or edit an existing one.
-
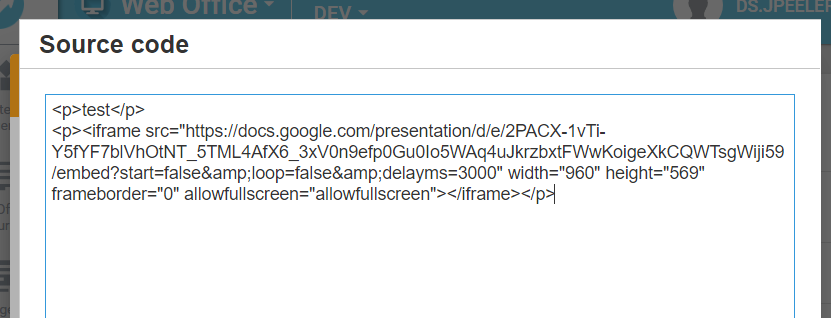
In the Add Task or Edit Task pop-up, in the Description TinyMCE Text Editor, click the icon to view the Source Code.
-
In the Source code pop-up, paste the Google embed HTML code where you want your resource to appear.
-
When finished, click OK.
-
Click SAVE to close the Add/Edit Task pop-up and add the content.
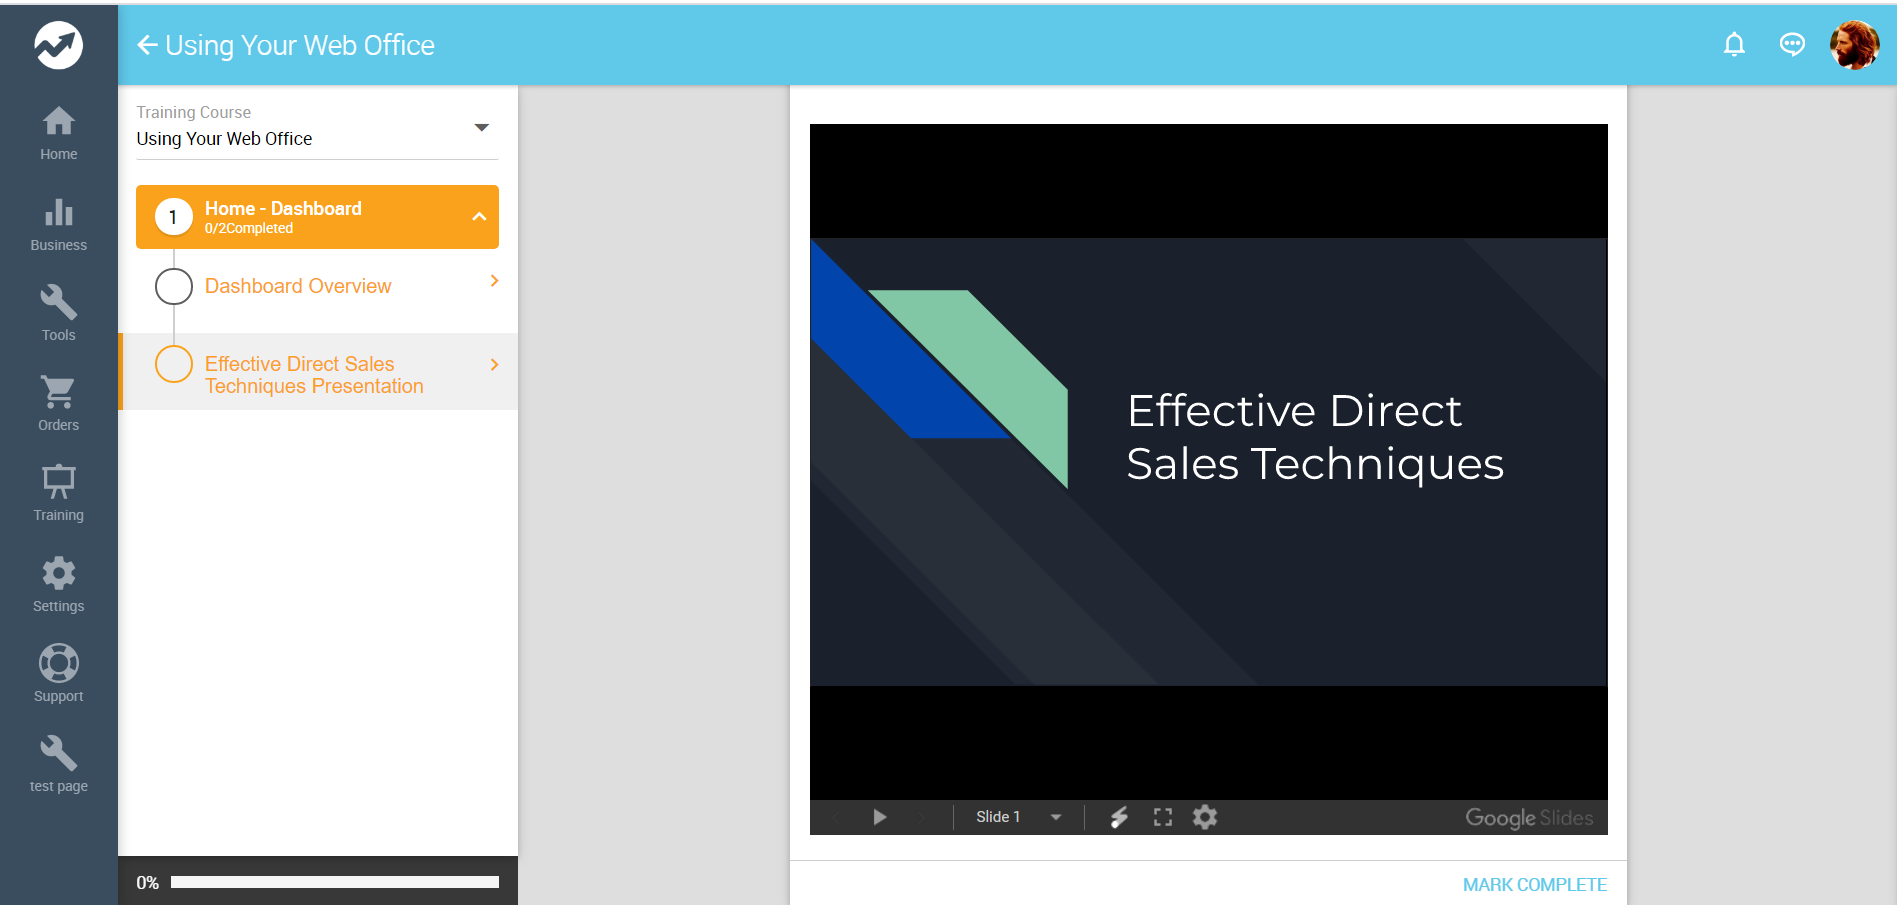
In the Web Office > Training > Training Courses page, you can see your embedded Google resource.
Comments
Please sign in to leave a comment.