Admin: Corporate Admin
Page: Settings > Inventory Settings > Categories
URL: [CLIENTID].corpadmin.directscale.com/Corporate/Inventory/Categories
Permission: ViewCategories()
Categories are a great tool to keep your eCommerce experience user-friendly. Their purpose is to organize inventory items in the various stores.
-
The Corporate Shop displays categories as a sidebar menu.
-
In the Web Office Store, you’ll see them as tabs along the top of the page.
-
In the eCommerce Shop, categories live in the sidebar menu and the Products dropdown menu.
Adding a Category
To add a new category:
-
Click the + Add Category button.
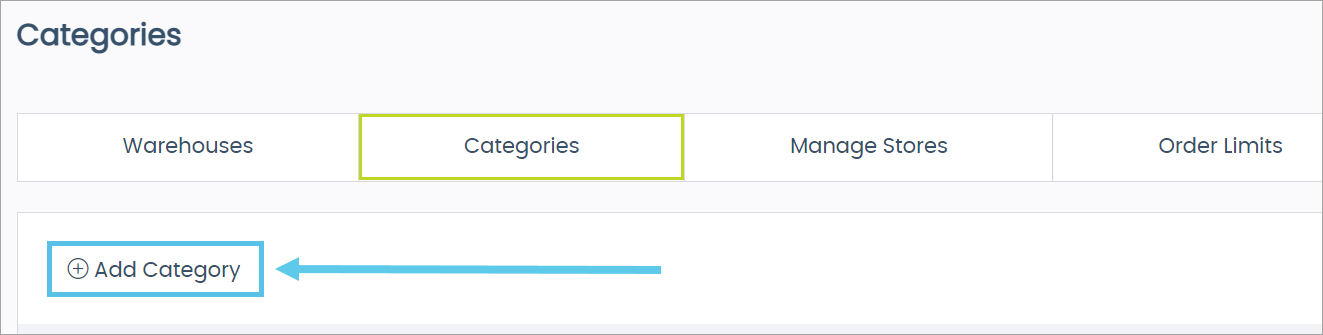
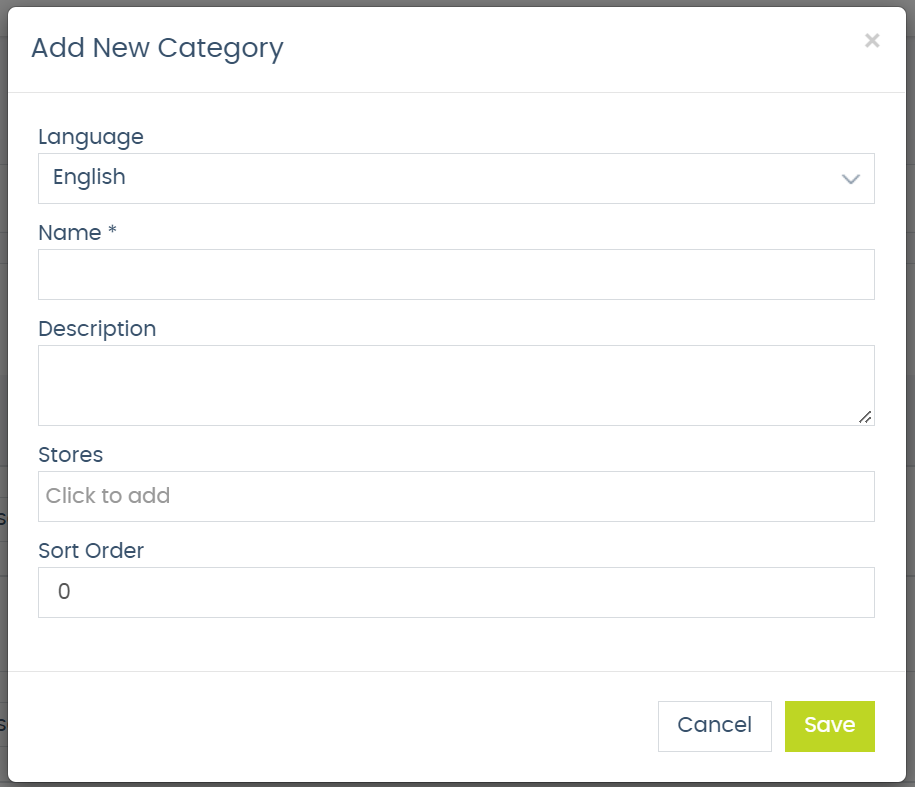
The Add New Category pop-up window opens.
-
Complete the following fields:
-
Language - Select from a list of added languages. You can enter localized content in the Name and Description for each language.
-
Name (Required) - Give the category a name.
-
Description - Enter a brief description of the category’s contents. This text does not appear anywhere in the shops; it is only for context for admin users.
-
Stores - Select one or multiple Stores where the category will be visible.
-
Sort Order - Enter a number that determines the category’s sorting. Categories sort from smallest to largest, with zero being the smallest number. Zero is set by default on all new categories.
-
-
Click Save Changes. Repeat steps for each Language.
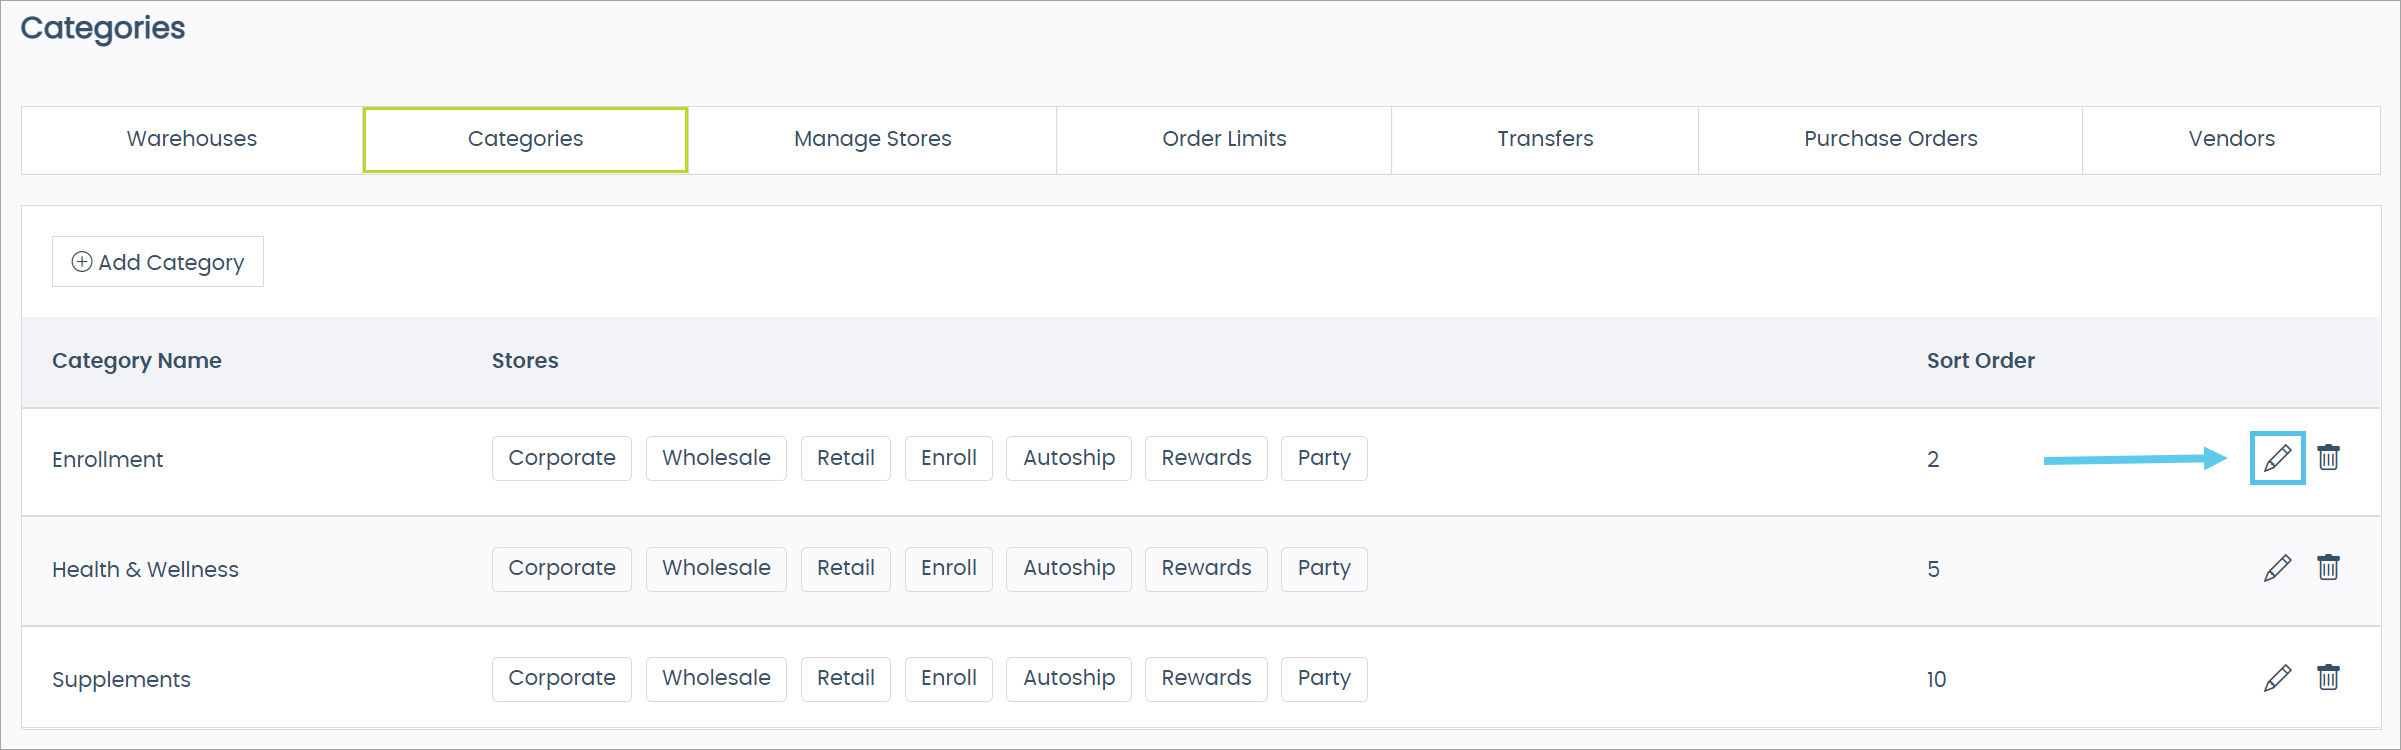
Your category adds to the Categories List.
Categories aren’t visible until they contain an inventory item. Empty categories, however, display in the Corporate Shop.
Editing a Category
On the Categories page:
-
Click the icon for the Category Name you want to edit.
The Edit Category pop-up window opens.
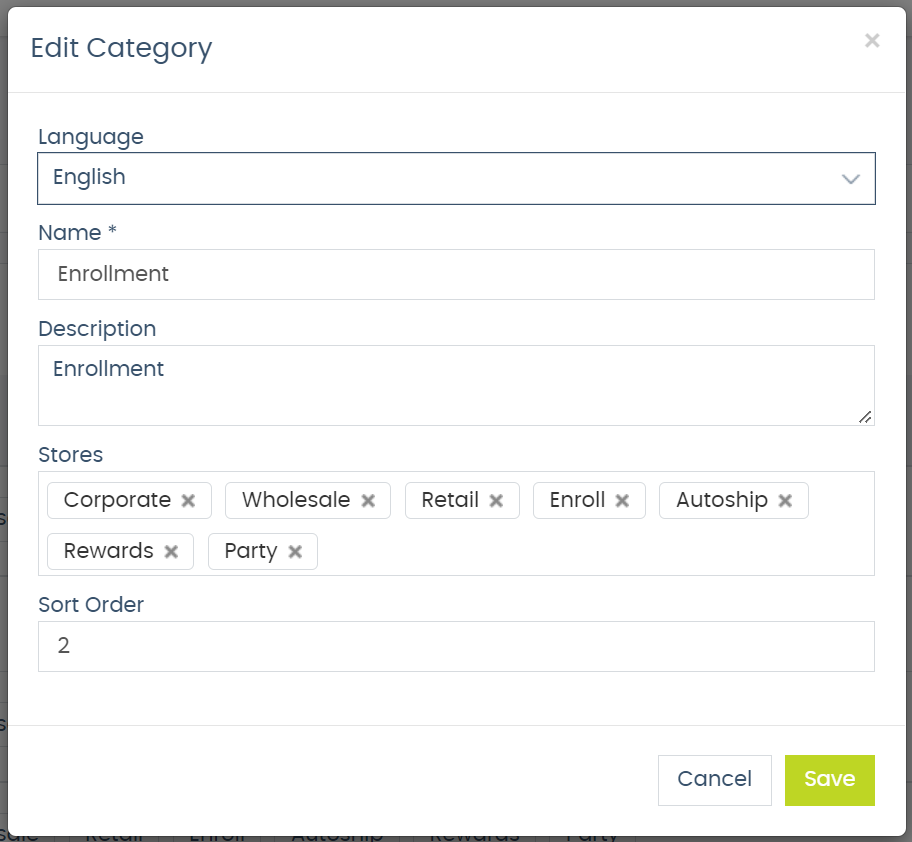
- Edit the applicable fields.
-
Click Save.
Deleting a Category
On the Categories page:
-
Click the icon for the Category Name you want to remove.
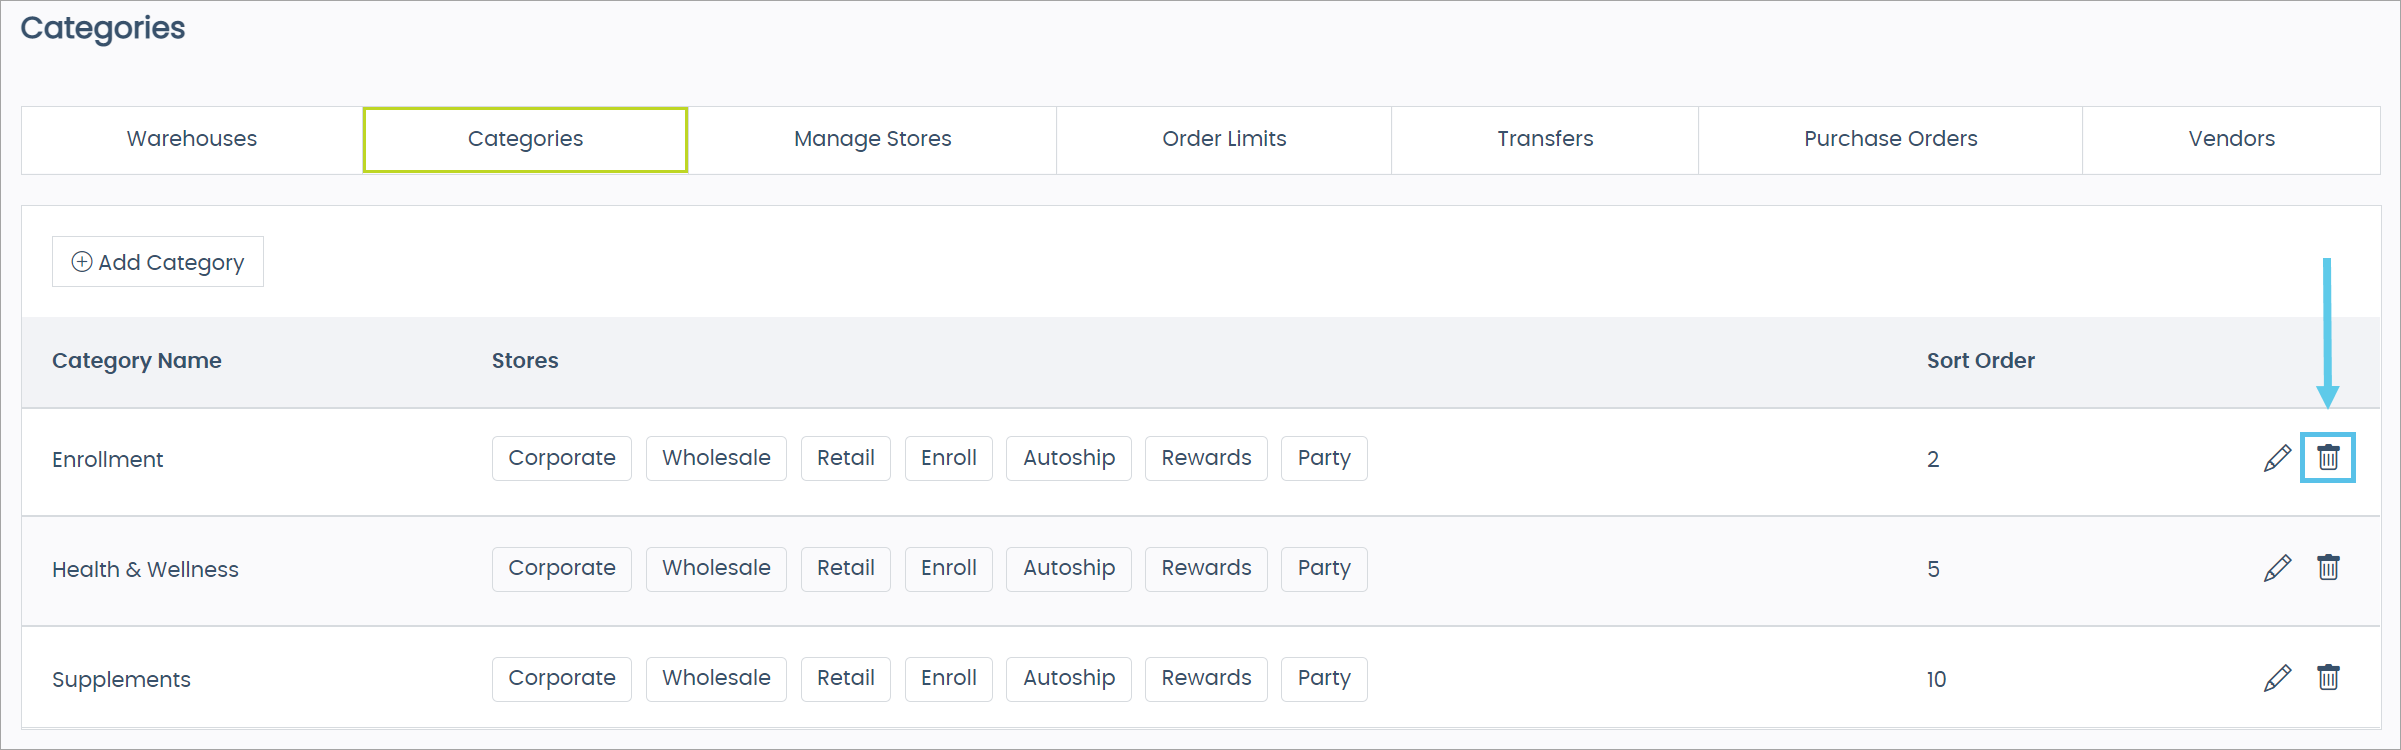
The Delete Category pop-up window opens.
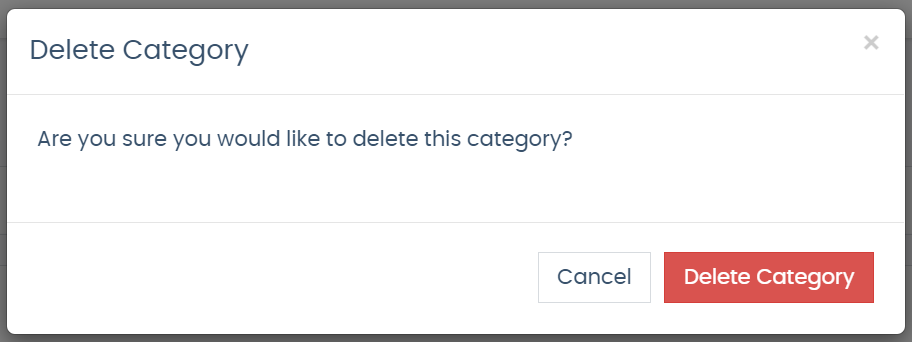
- Click Delete Category to confirm the deletion.
Comments
Please sign in to leave a comment.