The Team Dashboard > Orders/Autoships widget displays the details of the associate’s personal orders and autoships.
Using the Widget
The widget has two tabs by default:
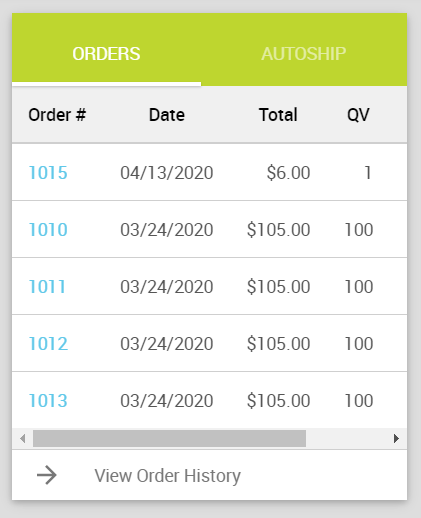
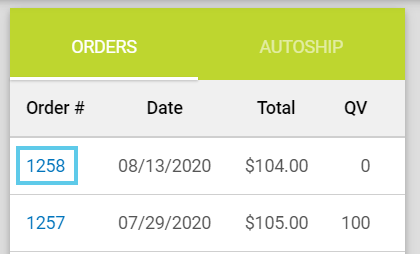
ORDERS Tab
Orders are displayed sorted by the order date; limited to five records.
Clicking View Order History navigates you to the Web Office Order History page.
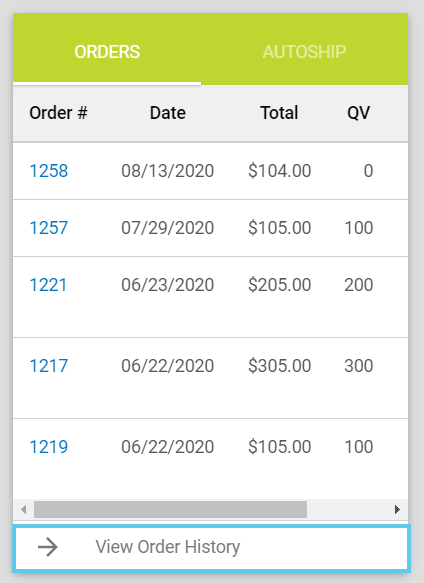
Clicking the Order # link navigates you to the Order Detail page in Web Office.
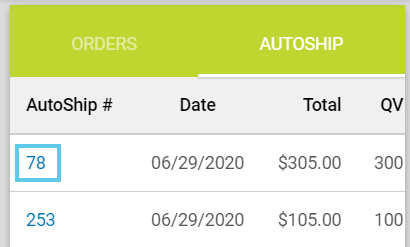
AUTOSHIP Tab
Autoships are displayed sorted by order date; limited to five records.
Clicking Manage Autoship navigates you to the Web Office Manage Autoship page.
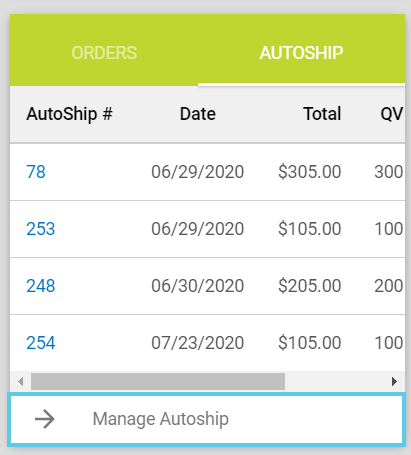
Clicking the AutoShip # link navigates you to the Web Office Manage Autoship page, as well.
Configuring the Widget
Admin: Web Office Admin
Page: Advanced Settings > Widgets
URL: [CLIENTID].admin.directscale.com/#/WidgetsSetup
Permission: Setup Widgets
Widget Settings

-
Expand the Orders/Autoships section.
-
Click the button to open the Orders/Autoships pop-up window.
-
Under the SETTINGS tab, select one or more of Order Statuses types you want to display in the widget.
Order Statuses include:
- Waiting Payment
- Paid
- Partial Paid
- Refunded
- Shipped
- Partial Shipped
- Returned
- Processing RMA
- Awaiting Shipment
- Partial Returned
- Pending Processing
- Card Declined. Call Issuer.
- Card Under Review
-
Select one or more of AutoOrder Statuses types you want to display in the widget.
AutoOrder Statuses include:
- Active
- Inactive
Widget Elements
-
Under the WIDGET ELEMENTS tab, select the Customer Type.
Customer Type is another name for Associate Type, read more: Base Associate Types, Associate Types, and Price Groups Explained
-
Select the Page Name where the widget is located (either the Homepage or Team Dashboard).
-
Select the markets (i.e., countries) where the changes will apply.
-
Click the ELEMENTS button.
-
A series of checkboxes appear where you can select different elements to include in the Web Office Team Dashboard > Orders/Autoships widget.
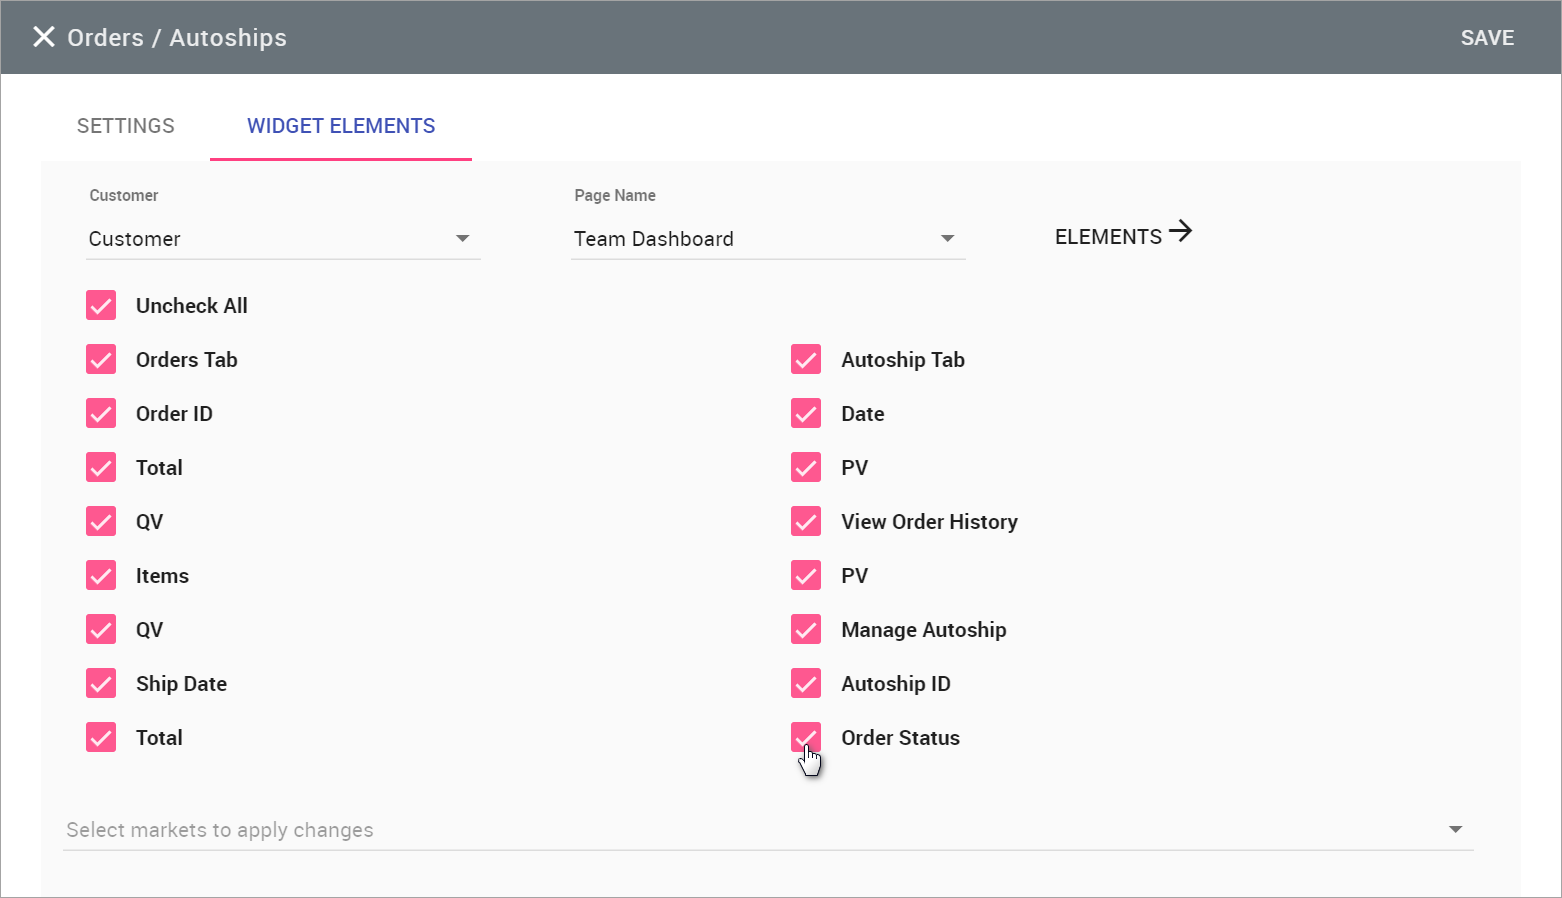
Element checkboxes -
Click SAVE. Repeat the steps for each market, if necessary.
Comments
Please sign in to leave a comment.