You must enter your company headquarters’ address and contact details in the Admins.
Entering Business Information in Corporate Admin
Admin: Corporate Admin
Page: Settings > Company Settings > Business Information
URL: [CLIENTID].corpadmin.directscale.com/Corporate/Admin/Dashboard
Permission: ViewAdministration()
The Business Information page is where you enter your company headquarters’ address. This address appears on order invoices.

- Enter your Business Name.
- Enter your company Phone number.
- Enter your Addresses Line 1 and 2, City, State, and Postal Code in the appropriate fields.
- Click Save Changes.
Entering Company Details in Web Office Admin
Admin: Web Office Admin
Page: Advanced Settings > Details
URL: [CLIENTID].admin.directscale.com/#/Details
Permission: Setup Details
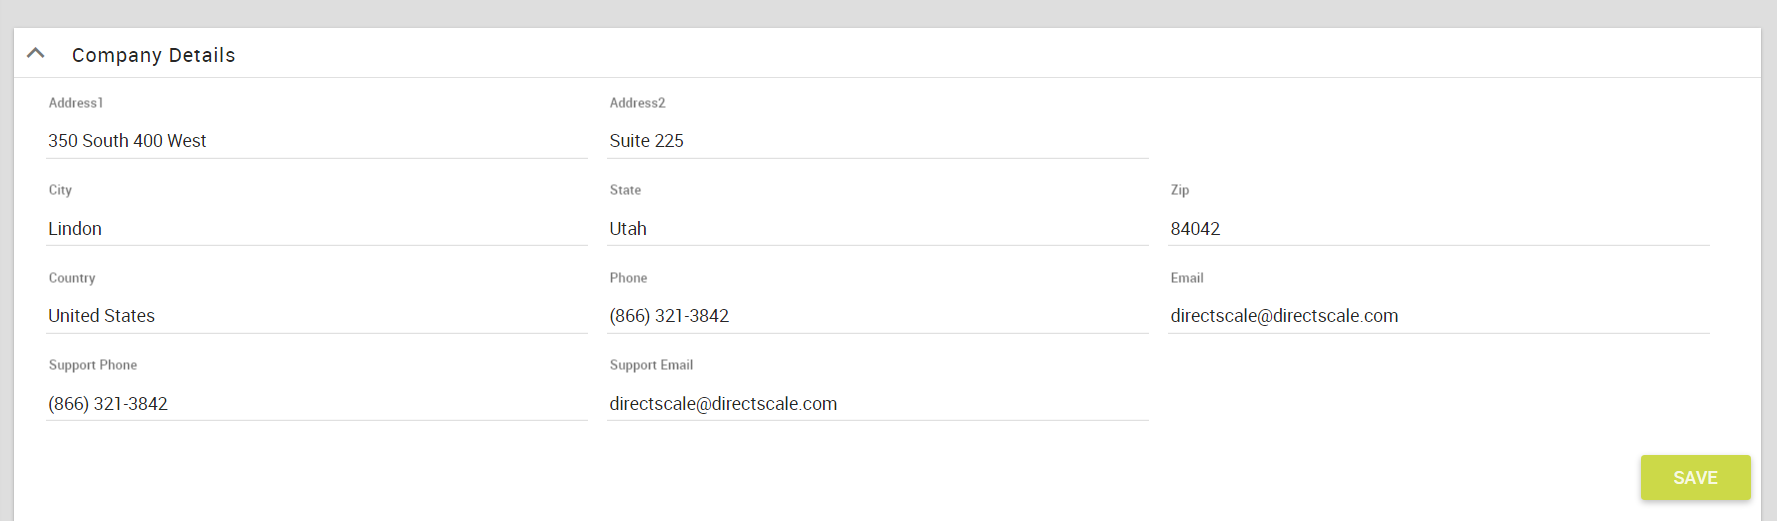
You must enter your company headquarters’ address and contact details. These details show for your Associates in the Web Office Support > Corporate Contact Info widget.
-
Expand the Company Details section.

-
In the form, enter your Address 1, Address 2, City, State, Zip Code, and Country in the appropriate fields.
-
Enter your company Phone number.
-
Enter your company Email address.
Note: You will use this for official use and customer contact.
-
Enter your Support Phone number and Support Email address in the appropriate fields.
-
Click SAVE.
Entering Company Details in eCommerce Admin
Admin: eCommerce Admin
Page: Company Setting > Detail
URL: [CLIENTID].retailadmin.directscale.com/#/CompanyDetails
Permission: Setup Details
You must enter your company headquarters’ address and contact details for the eCommerce Shop.
-
Expand the Company Details section.
-
In the form, type your Address 1, Address 2, City, State, Zip, and Country in the appropriate fields.
-
Enter your company Phone number.
-
Enter your company Email address.
Note: You will use this for official use and customer contact.
-
Enter your Support Phone number and Support Email address in the appropriate fields.
-
Click SAVE.
Comments
Please sign in to leave a comment.