Admin: Corporate Admin
Page: Settings > Advanced Settings > Checking Information
URL: [CLIENTID].corpadmin.directscale.com/Settings/CheckingInfo
Permission: ViewAdministration(), ViewAdvancedSettings()
You can pay commissions to your Associates with the Check payment provider. This allows you to send a paper check. The Check payment provider is set up by default. But, to pay commissions with a check, you must set up the Checking Information template.
Editing Checking Information
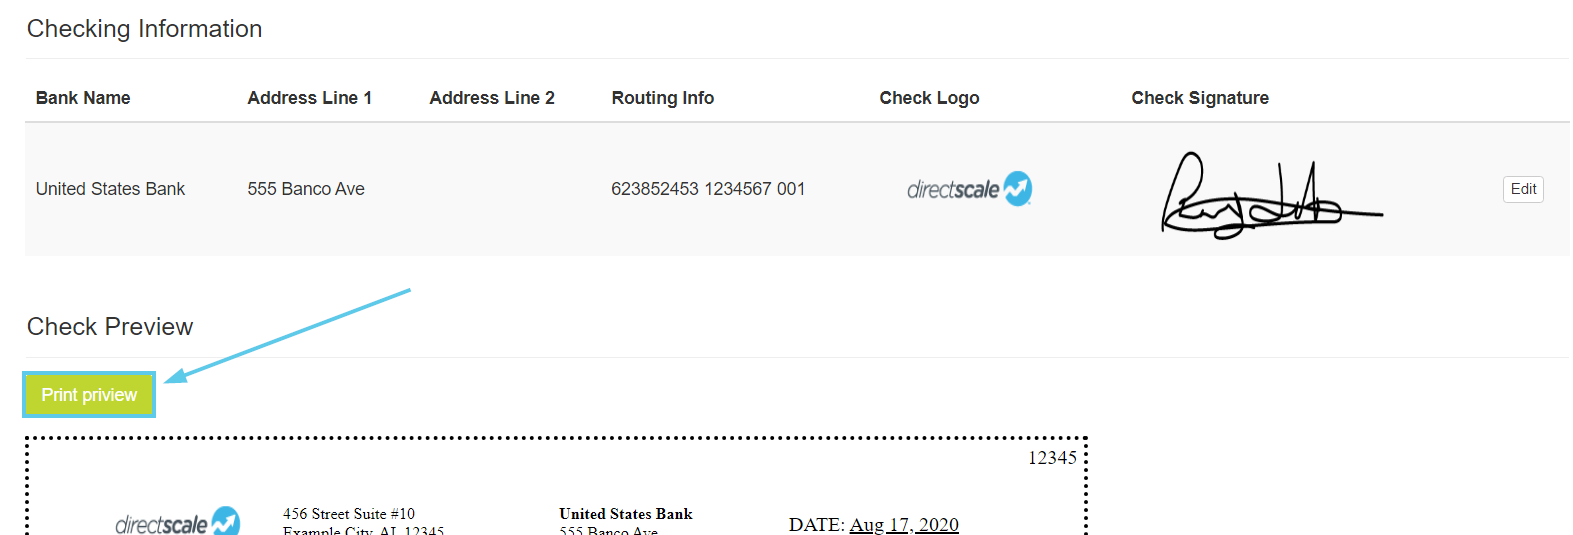
On the Checking Information tab.
-
Click the Edit button.
The Checking Information pop-up window displays.

-
Enter your company’s Bank Name.
-
Enter the bank’s street address, suite number, or P.O. box number in the Address Line 1 field.
-
Enter the bank’s city, state, and ZIP code in the Address Line 2 field.
-
Add your company’s bank Routing Info.
-
Upload your company’s Check Logo Image by clicking Choose File and selecting an image from your computer.

-
Upload an authorized Check Signature Image by clicking Choose File and selecting an image from your computer.

-
Once all configurations are complete, click Save.
Printing a Sample Check
-
Click the Print Preview button.
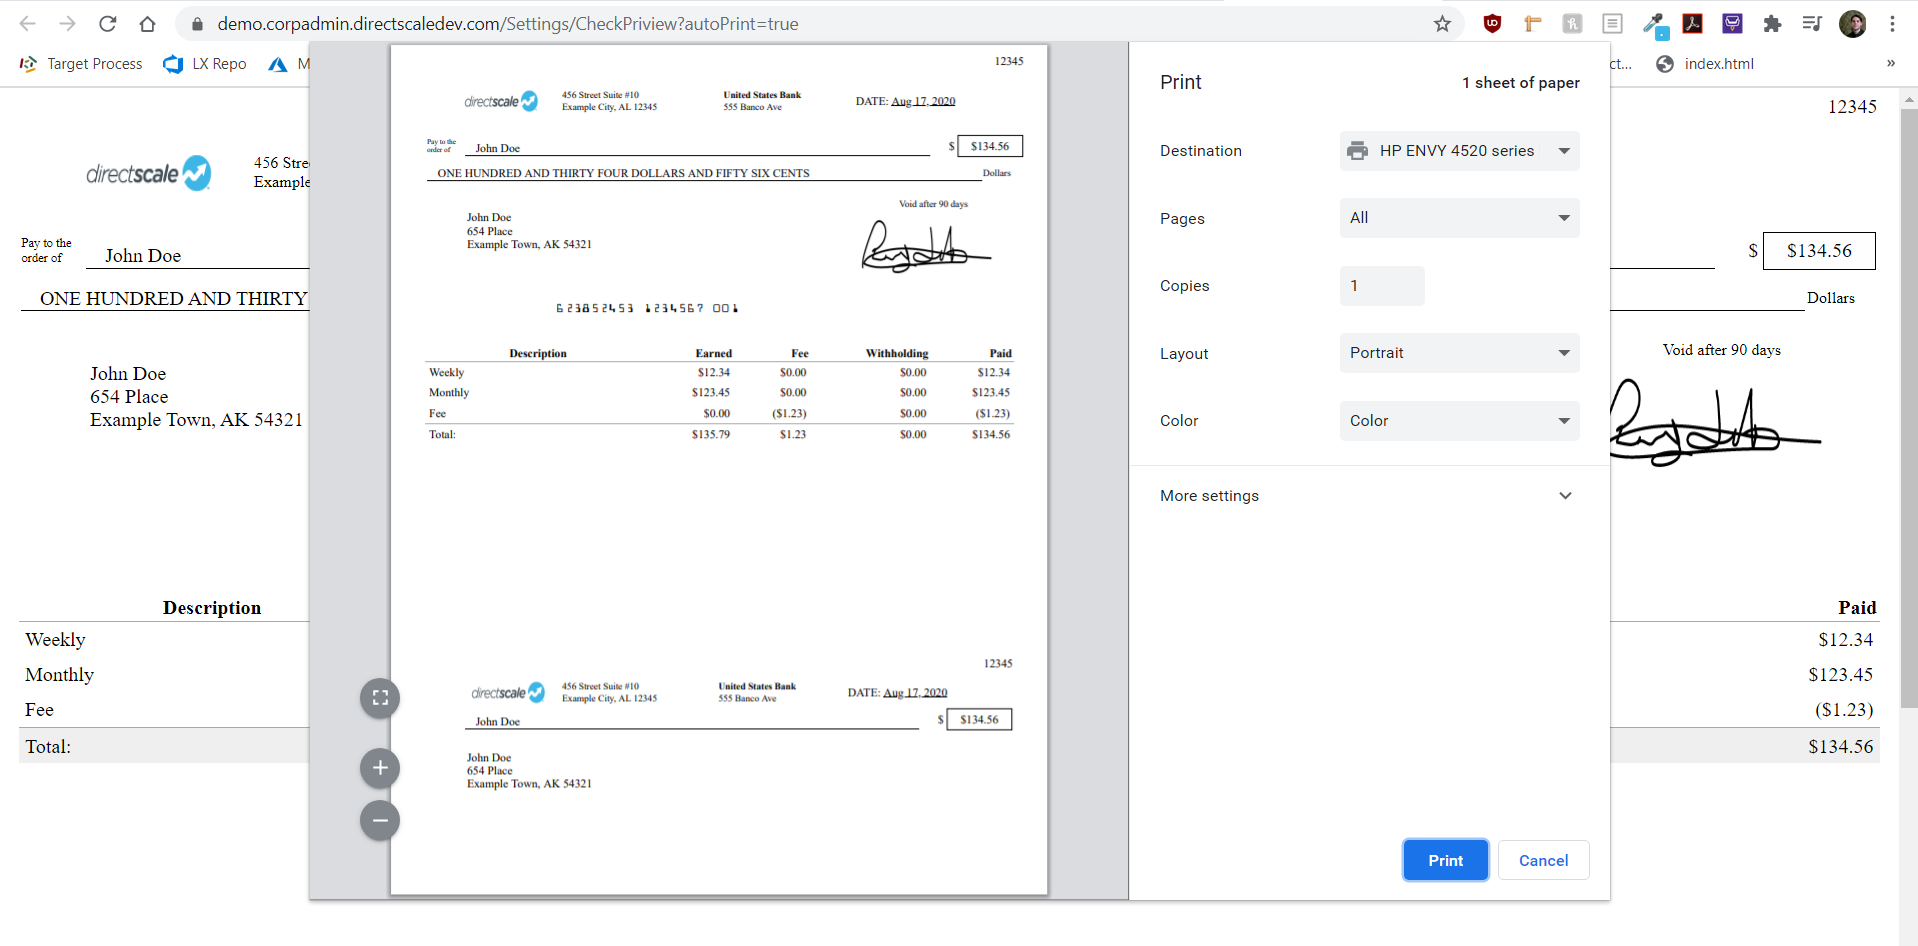
Your computer’s Print dialog box opens where you can print a sample check.
Testing a Commission Check Payout
Admin: Corporate Admin
Page: Commissions > Payables
URL: [CLIENTID].corpadmin.directscale.com/Corporate/CRM/Commissions/ManagePayables
Permission: ViewCommissions(), ViewPayables()
The chosen payment provider (in this case, Check) is applied to the next Commission Run. To test that the commission payments will work as intended, you can make a Payment Adjustment to a test Associate.
To add an Adjustment:
-
Click Add Adjustment and select Add new adjustment.
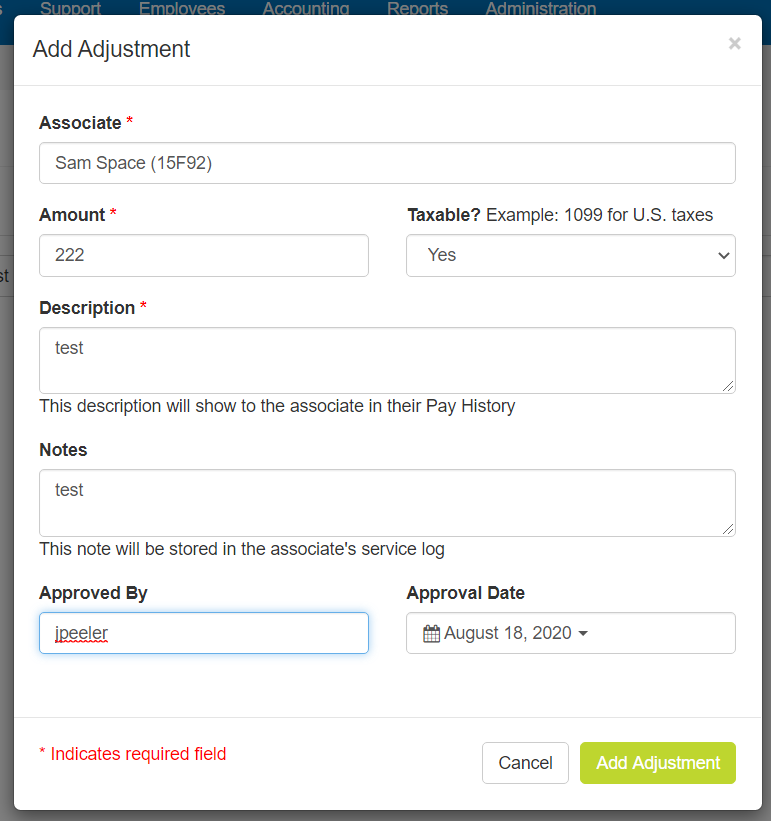
The Add Adjustment pop-up window opens.
-
Enter the name or ID of the test Associate.
-
Enter an Amount of the Adjustment.
-
Enter the Description of the Adjustment.
-
Type any Notes on the Adjustment.
-
In the Approved By field, type the Admin user’s name who approved this Adjustment.
-
Click Add Adjustment.
Complete the preceding instructions any way you want, as it’s just a test. After adding the Adjustment, you can see that the test Associate has the Check payment provider.

Marking Check Payment Status as Paid
Admin: Corporate Admin
Page: Commissions > Payment Approval
URL: [CLIENTID].corpadmin.directscale.com/Corporate/CRM/Commissions/PaymentApproval
Permission: ViewCommissions(), PayCommissions()
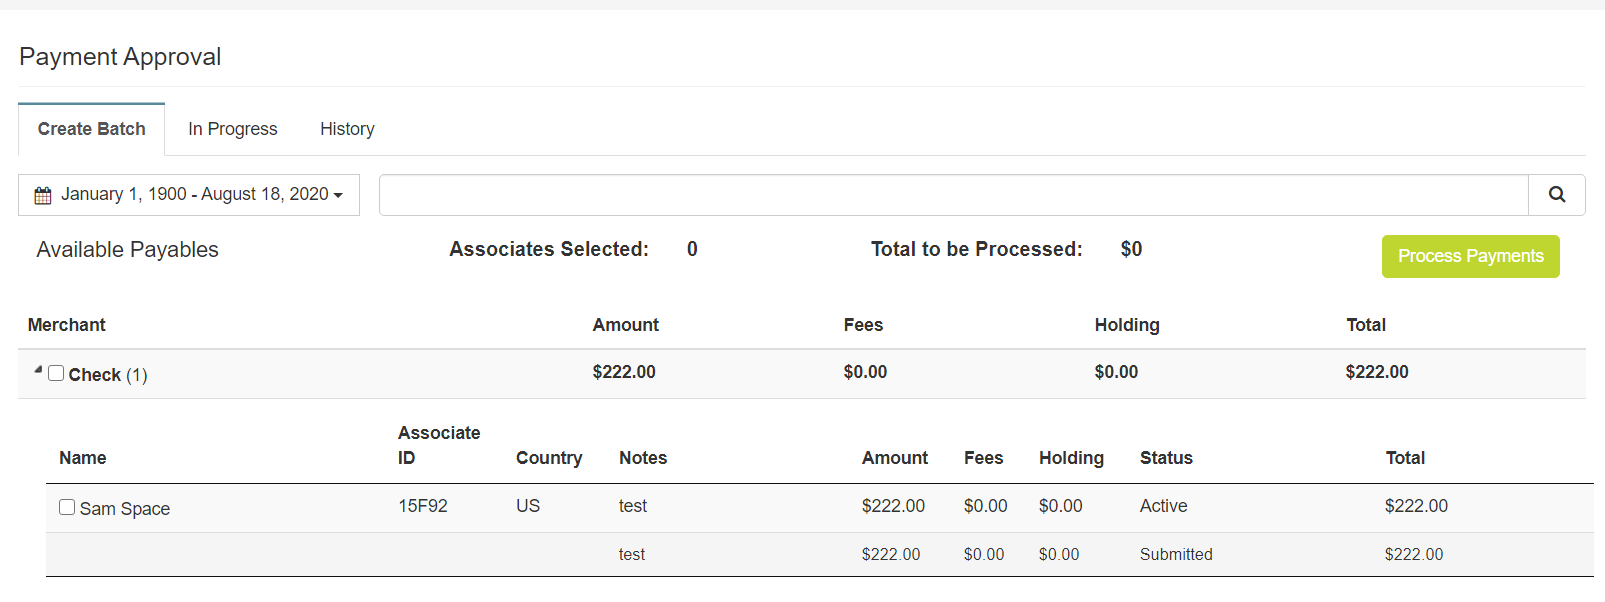
For a commission check payment status to be "Paid", you have to print the checks in the Payment Approval page:
-
Select the checkbox next to Check or next to the Associate’s name you want to process.
-
Click Process Payments.
The Process Payments pop-up window opens requesting confirmation.
-
Click Process to proceed.
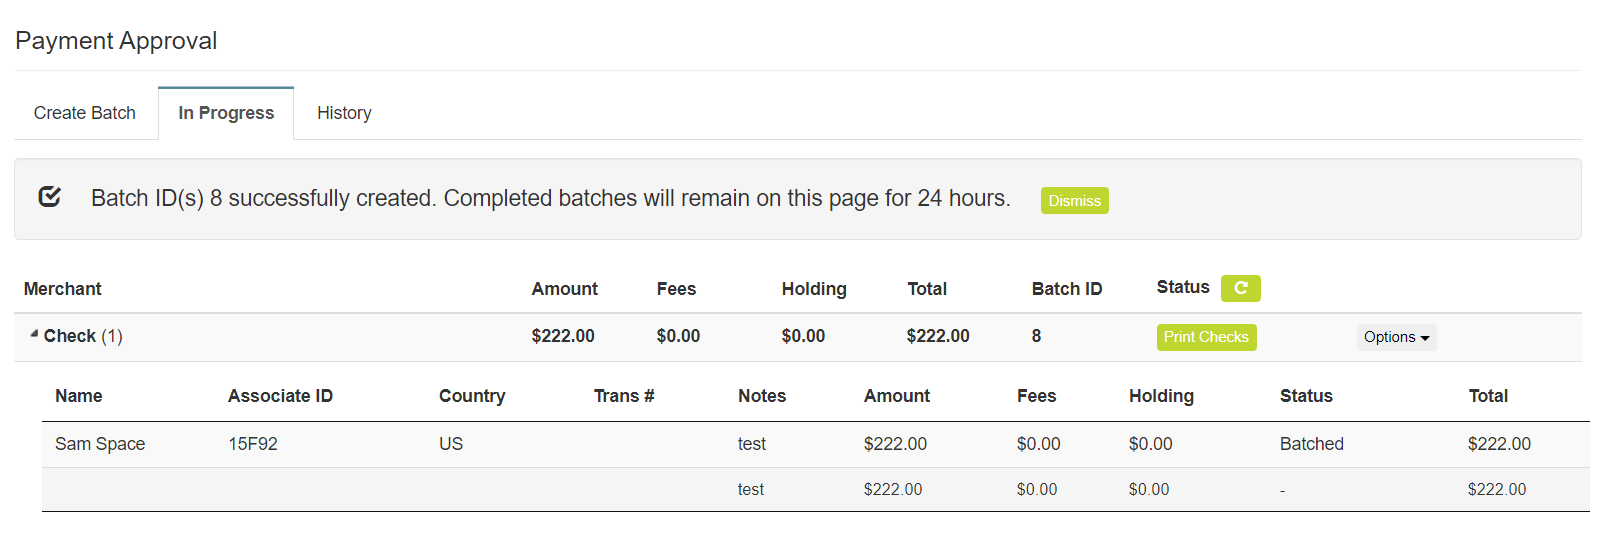
You are navigated to the In Progress tab, where your payments have a "Batched" status.
-
To change this status to "Paid", click Print Checks.

-
The Check Number pop-up window opens with the next check number filled in the field. If you need to, you can update the Check Number and click Submit.

If you’ve added your check information into the system, then a printable check will open.

If you print checks outside the system and haven’t set up your checking information, you’ll get an error page. But, this isn’t anything to fret about.
-
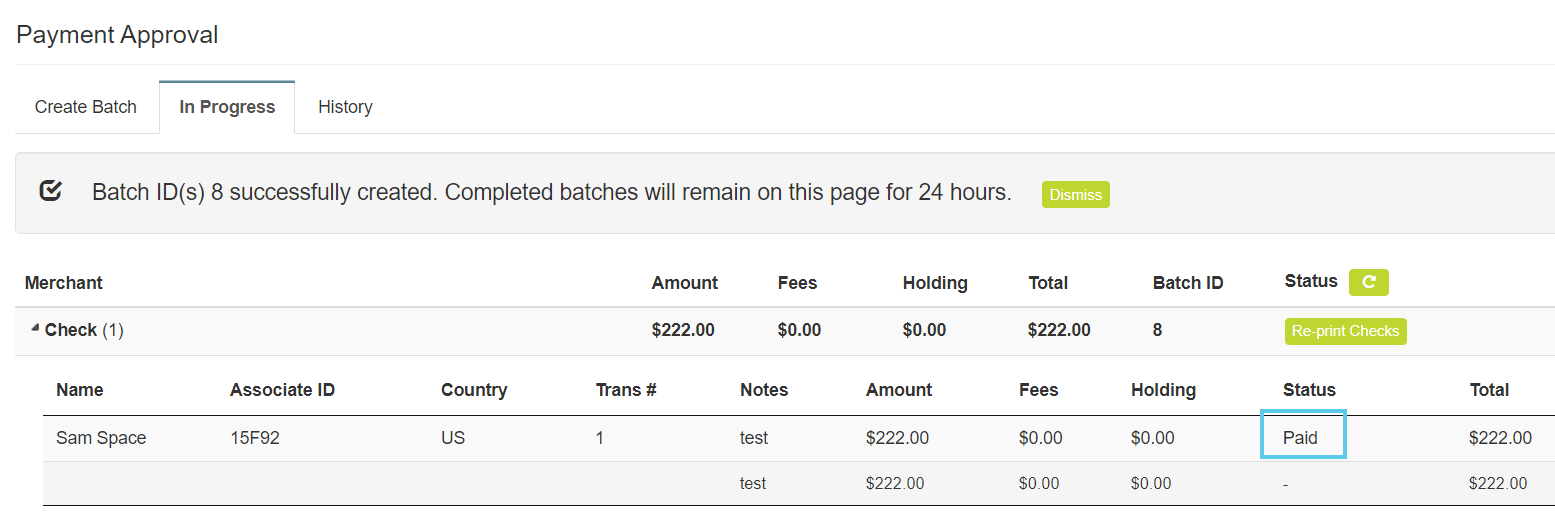
Click the Print Checks button, the payment status changes to "Paid" regardless if the checks are actually printed. This allows your payment records to accurately reflect within the system.
Comments
Please sign in to leave a comment.