Admin: Corporate Admin
Page: Inventory > Products > Item Detail > Pricing
URL: [CLIENTID].corpadmin.directscale.com/Corporate/Inventory/ItemDetail?iid=[ITEM_ID]
Permission: ViewInventory()
The Pricing tab is where you set a price for your item. You can define the amount and for which Stores and Associate Types they appear.
Setting a Price
To set the inventory item’s price:
-
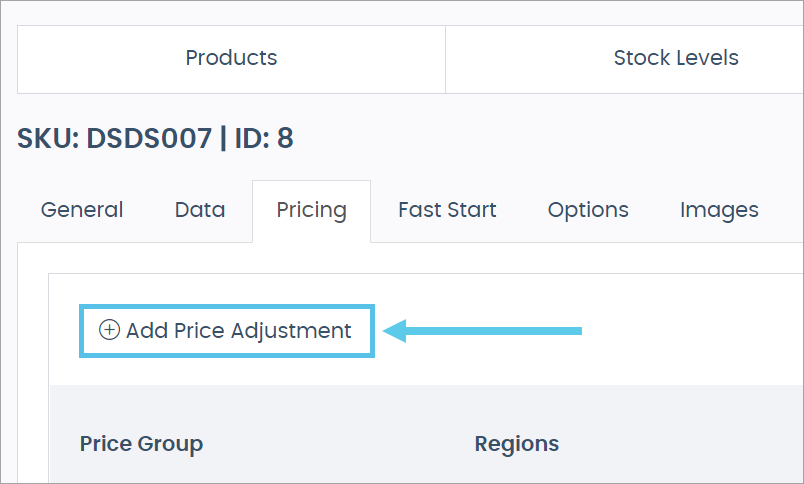
Click the + Add Price Adjustment button.
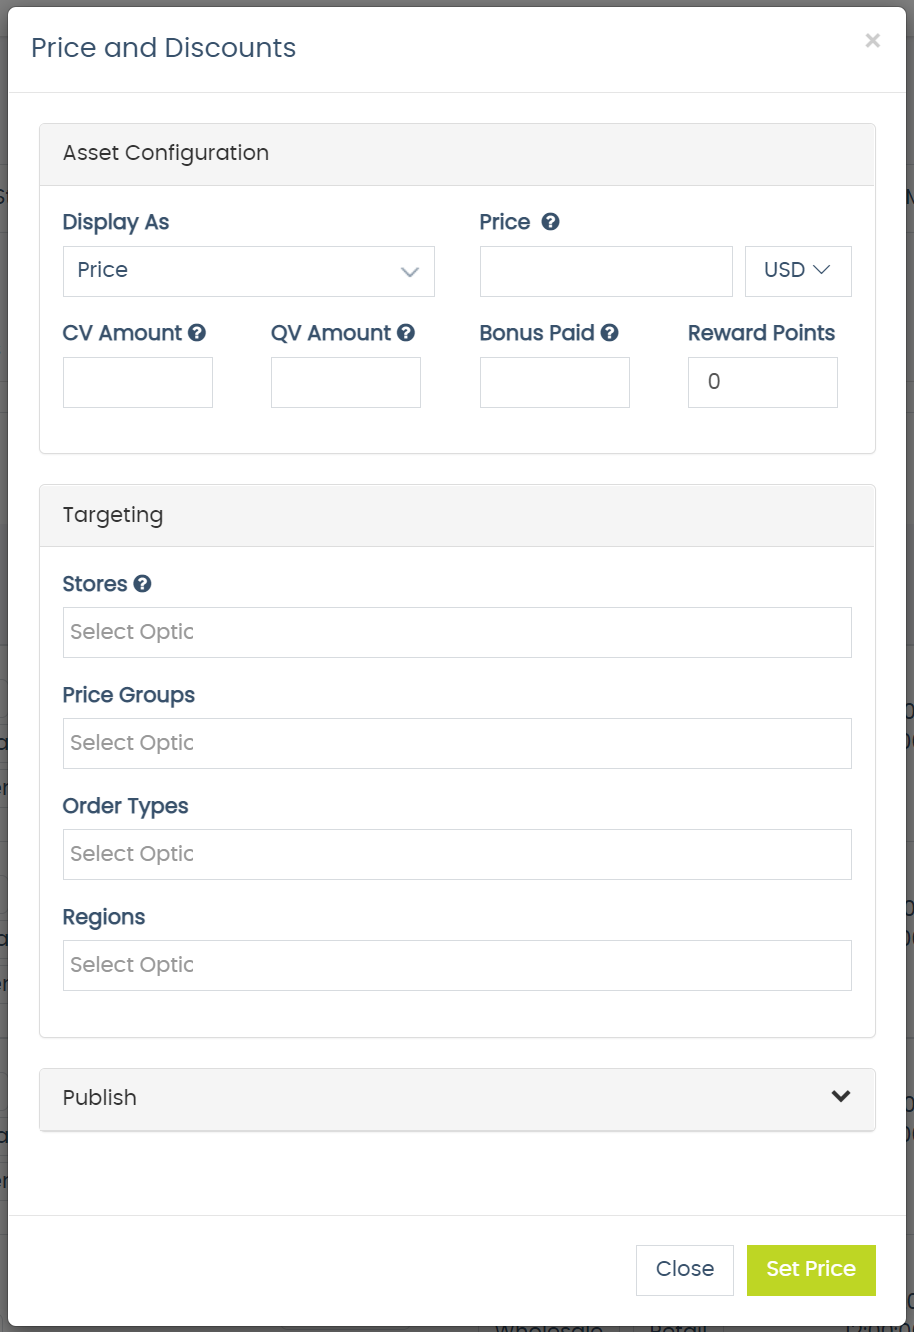
The Price and Discounts pop-up opens.
-
Complete the applicable fields (see the following sections).
-
Click Set Price.
| If you have multiple prices set for an item, the item uses whichever price is at the bottom of the list. |
Setting Price and Currency Type
-
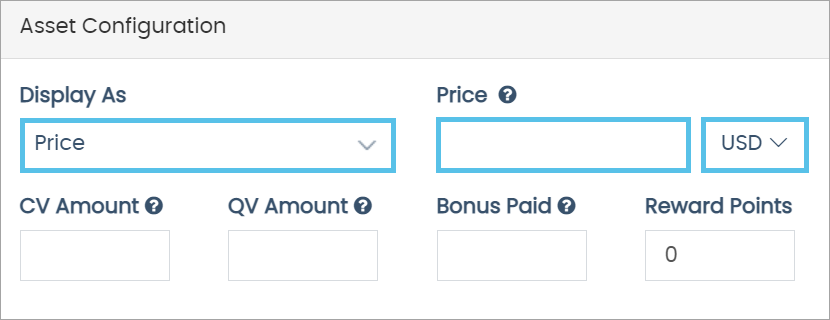
Click Display As and select Price.
You must set a Price before adding any Discounts. -
Enter the standard sales Price for the item.
-
Select an available Currency type (USD by default).
Setting Volume and Bonuses
-
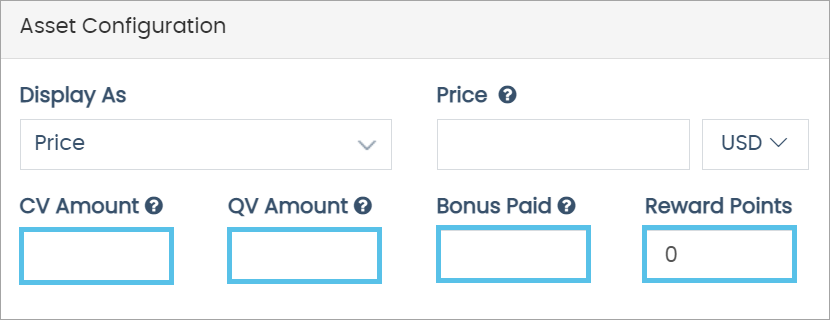
CV Amount - Type the Commissionable Volume for the item.
-
QV Amount - Type the Qualifying Volume for the item.
-
Bonus Paid - Type the bonus paid to the Associate.
- Reward Points - If you have Reward Points set up in the system, enter the reward points amount. To learn how to set up Reward Points, see Reward Points Guide.
The CV, QV, and Bonus Paid fields are only applicable to compensation plans that allow for them. If programmed, enter the applicable volume in the fields; otherwise, leave blank.
Setting Price Availability
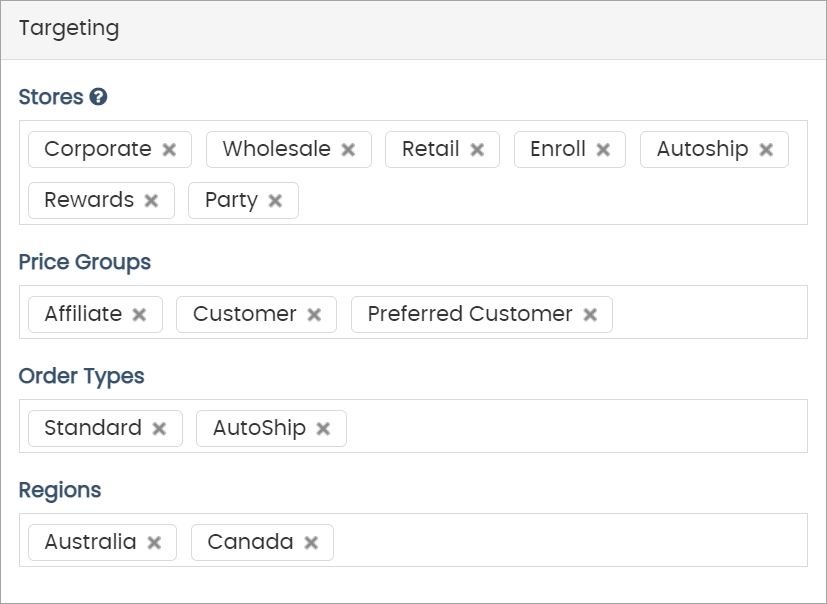
-
Stores - Assign for which stores this item will appear.
The item will only show if you configure the category selected on the Data tab with a matching store.
-
Price Group - Determine which Associate Type will see this item.
-
Order Type - Determine the Order Type assignment of the item.
Read more in Understanding Order Types.
-
Regions - Assign the item to a region.
Associates must be in the selected region to see this item (determined by the Associate’s address).
Setting the Beginning and Ending Date
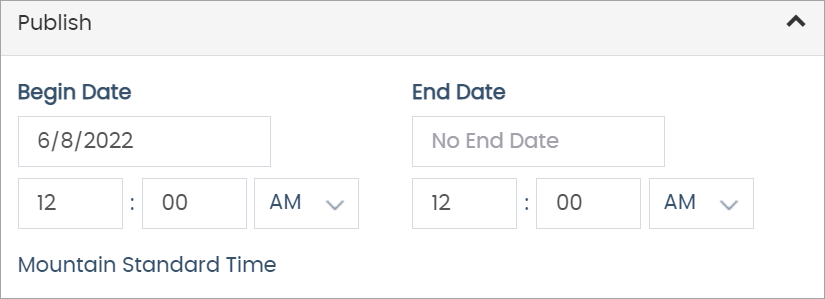
Adjust the date and time parameters to your preference for the price. If you want to leave the price active with no end, make no change to the default parameters.
This feature is useful when a price or item is promotional or seasonal. By setting parameters, the price will not appear outside of these dates and times.
Entering an end time of 12:00 a.m. means the price will end at the beginning of the day of the assigned end date, not the end. To end a price at the end of the day, make sure the end time is set to 11:59 p.m. on the end date.
Adding Discounts
You can add a Discount that overrides any Price options you have set up for applicable:
-
Stores
-
Price Groups
-
Order Types
-
Regions
| You must set a Price before adding any Discounts. |
To add a Discount:
-
Click the + Add Price Adjustment button.
-
Click Display As and select Discount.
-
Enter the discounted sales Price for the item.
-
Select an available Currency type (USD by default).
-
You can complete the rest of the configuration in the same manner detailed in the previous Setting a Price section.
-
Click Set Price to add the Discount.
Correctly configured Discounts display in the shops with a strike through the full price followed by the discounted price.

Comments
Please sign in to leave a comment.