Admin: Web Office Admin
Page: Code Customization > Custom Office Widgets
URL: [CLIENTID].admin.directscale.com/#/Widgets
Permission: Client Widgets
With Custom Widgets, you can create Web Office widgets to serve purposes not covered by the default widgets.
The simplest way to build this content is with the Rich Text Editor, a TinyMCE Text Editor that has many of the text editing tools that you would find in Microsoft Word or Google Docs.
You can create more advanced custom content with HTML, CSS, and JavaScript as well. Check out some of these resources before you start:
Adding a Custom Widget
| For testing purposes, add your custom widget to your Stage environment first (if available). |
-
Click ADD WIDGET.
The Add Widget pop-up window opens.

-
Assign a Name for the widget.
-
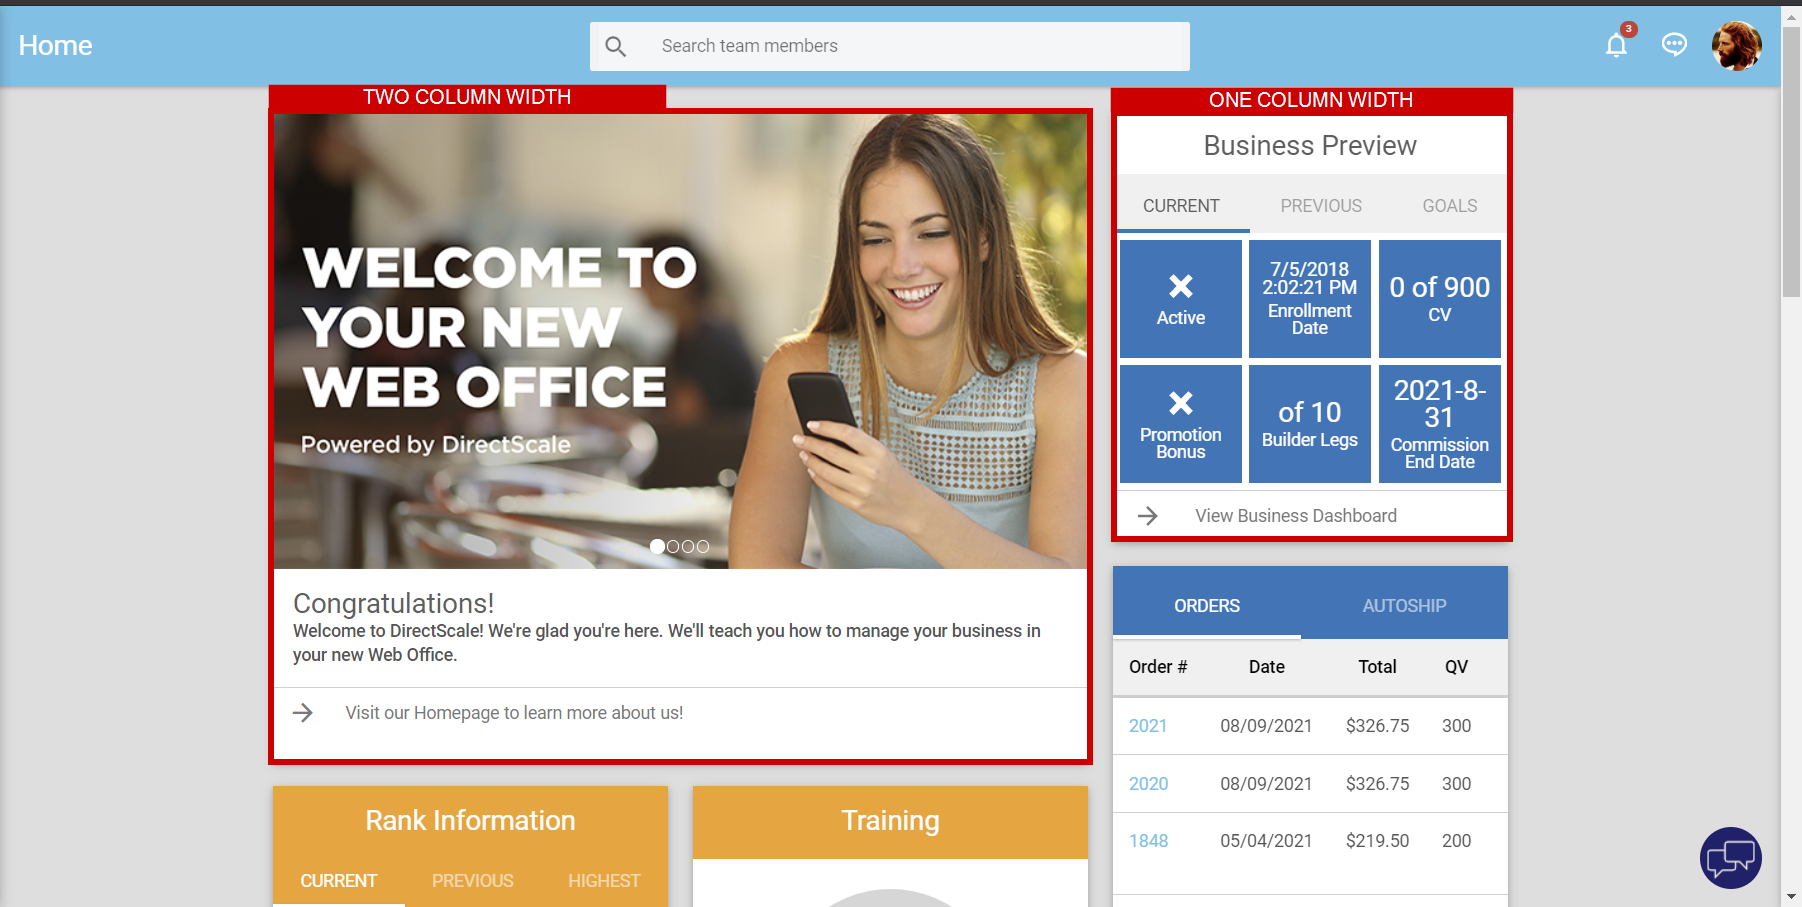
The width of the Web Office container is divided into three columns. Select the column width you need.
-
One Column - Spans one column
-
Two Columns - Spans two columns
-
Three Columns - Spans three columns.
-
-
Enter the content in the Custom Content Editor or Rich Text Editor.
-
You can customize for whom the content will display using Multi-Faceted Configuration (MFC).
-
Toggle the Published switch to publish the page after saving.
-
Click SAVE.
| Once you’ve created your widget, add it to a widget page. For example, adding a widget to the Web Office Homepage. |
| If you need answers, ideas, or consulting from an expert, see the DirectScale Marketplace. |
Using the Custom Content Editor
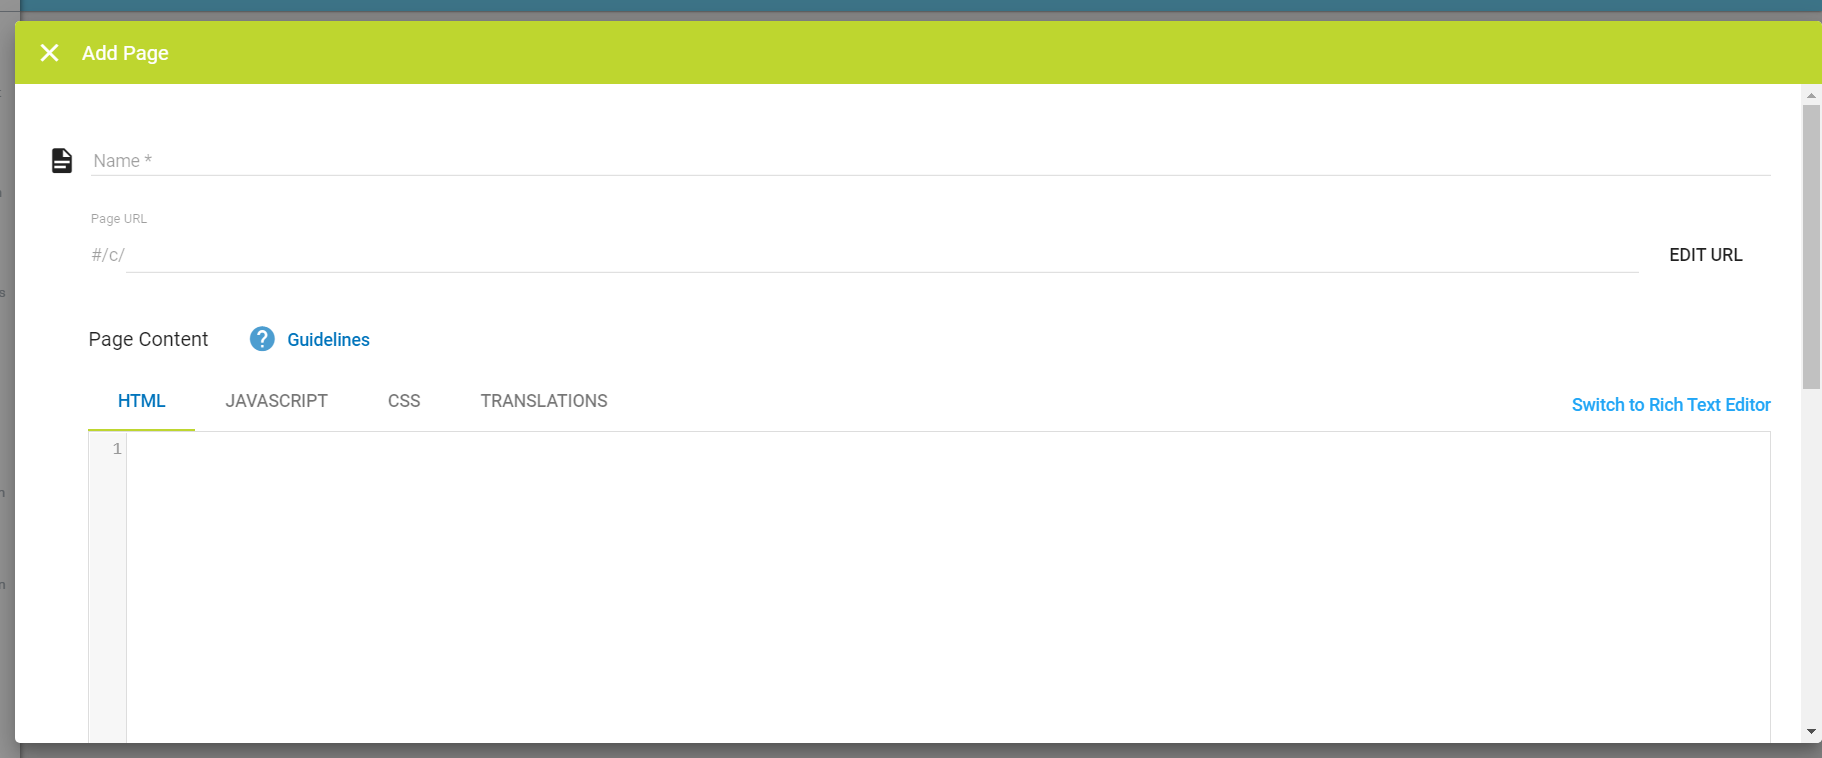
The Custom Content Editor provides a blank space to add your HTML, JAVASCRIPT, and CSS in three separate code-aware editors (provided by the open-source project CodeMirror). The site delivers the HTML/CSS/JavaScript together when the widget/page loads. You can also use CSharp (C#) to call CUSTOM API logic in the eCommerce Admin.
Using the Rich Text Editor
The Rich Text Editor is useful for simple pages with basic styling. The interface consists of a rich text editor (provided by the open-source project TinyMCE).
Read more about TinyMCE features in the Help Center: TinyMCE Text Editor.
If you’d like to use the Rich Text Editor, you need to switch to it before entering any content. The Rich Text Editor will remove certain HTML elements, such as <script>, which can cause a loss of markup. |
Embedding a Video
You can embed a video from YouTube or Vimeo in a custom widget.
_5dc1bc0e749e0.png?atomcache=1633623106355)
Using the Rich Text Editor:
-
Click the Insert/edit media button. The Insert/edit media pop-up window opens.
-
In the pop-up, paste the video’s share URL in the Source field.
Or, under the Embed tab, paste the video’s
<iframe>embed code. -
Click Ok. The video embeds into the editor.
For more help on embedding video links, see TinyMCE Editor.
Advanced Development Features
Are you looking for more advanced features? You can create more advanced custom widgets with HTML, CSS, and JavaScript.
Read more:
Comments
Please sign in to leave a comment.