Admin: Web Office Admin
Page: Web Office Configuration > Custom Notifications
URL: [CLIENTID].admin.directscale.com/#/CustomNotifications
Permission: Custom Notifications
|
The Custom Notifications page has been consolidated to contain all Web Office notification settings. If your notifications were previously configured via the Notifications page in Web Office Admin, please contact Customer Care before configuring any settings on this page. If both configurations are active, neither will function. |
The Custom Notifications page is where you customize the content and triggers of your business notifications.
The notifications set up through this page are reflected through the Web Office notification settings that the Associate can opt-in/out of (Web Office > Settings > Communication).

You configure notifications with Rules tied to a specific Notification Type. There are currently five Notification Types:
-
Enrollment - Set up notifications about individuals enrolling in Associates' downlines.
-
Rank Advancement - Set up notifications about individuals in Associates' downlines with advanced rank.
-
Order - Set up notifications about individuals in Associates' downlines that have placed orders.
-
Prospect - Set up notifications about new prospects in Associates' downline.
-
Community - Set up notifications when individuals comment on Associates' posts in the Community section.
Within each rule are different delivery methods called Template Types:
-
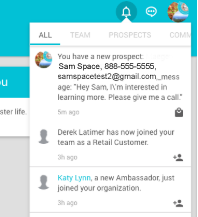
Office - The Associate will receive a notification via their Web Office.
-
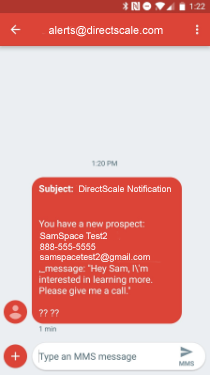
Text - The Associate will receive a notification via text message to the mobile phone number on file.
-
Email - The Associate will receive a notification via email to the email address on file.

These configurations are also used as default settings for the Settings > Communication > Custom Notification Widget and the Settings > Communication > Custom Notification Widget (Multiple Country).
Enable Notifications

Acts as a master kill switch for the notification service. Notifications are defaulted to ON, but selecting the slider will turn the notification service off.
When you turn the service off, notifications will not generate; therefore, the system will create no notification backlog. This option prevents a notification blast from happening when you turn the notification service back on.
Test SMTP Server

This section features a toggle that will block notifications from sending to the recipient. This setting:
-
Is permanently toggled-on on your Stage environment
-
Can be toggled on/off on Live
Toggle this setting OFF on your Live environment after launch for your Associates to receive notifications.
This way, you can test notifications, and your users won’t receive false alerts.
The credentials are created during implementation and added to the Web Office Admin. You can add your credentials by clicking the EDIT button.

Offline Team Chat

This section has options for how an Associate will receive their Web Office Team Chat message when their status is Offline.
-
For the When user is offline,send team messages via field, select/deselect the checkboxes for each category to enable/disable. Options include:
-
Text
-
Email
-
Associates can set their preferences with the Settings > Communication > Offline Messages Widget.
Corporate Communication

With this section, set the default way Associates will receive notifications from your company.
-
Under Show corporate communication preferences for…, select/deselect the checkboxes to enable/disable. Options include:
-
Text
-
Email
-
-
Under New User Defaults, Under New User Defaults, select/deselect the checkboxes for each category to set default.
You can override this setting for an individual Associate on their Detail page. See Updating an Associate’s Corporate Communications.
Associates can set their preferences with the Settings > Communication > Corporate Communication Widget.
Enable Notifications Types

Enable/disable specific Notification Types. This also removes the notification settings option from an Associate’s Web Office > Settings > Communication page.
Configuring Notification Rules

The Configure Notification section acts as a filter for all the active rules you’ve created.
The Rule List contains all of the existing, active notification rules that you have created.

Rules are configurations tied to specific events (such as a new enrollee or rank advancement) and trigger notifications to an Associate.
There are many rules already configured by default, but if you need to add more:
-
Click the button in the bottom right corner.

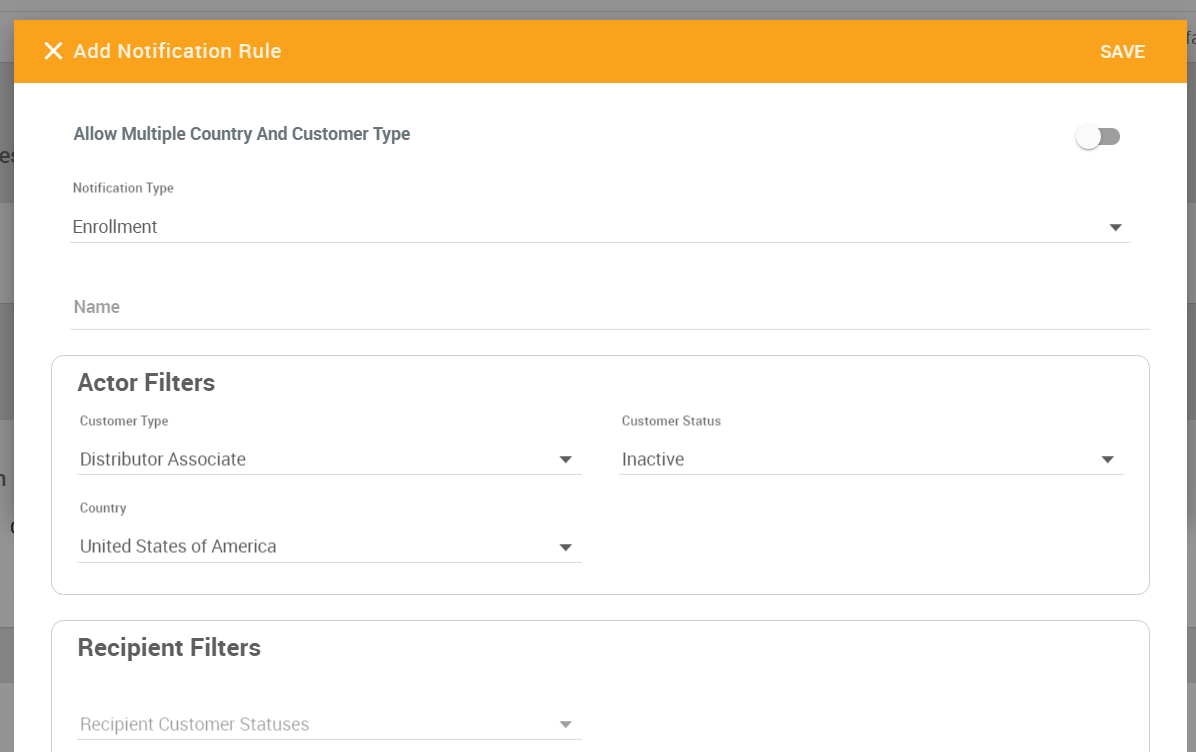
The Add Notification Rule pop-up window opens.
-
Click the Allow Multiple Country And Customer Type toggle to enable/disable.
When creating a new notification, the default allows for setting up one notification for a country and customer type.
Clicking the toggle lets you select multiple Customer Types and countries in the Actor Filters section.
For example, setting up new enrollment notifications for distributors, retail customers, and preferred customers. This feature will create a new rule for each customer type at one time, rather than manually creating a rule for each.
-
Select a Notification Type.
There are currently five notification types:
-
Enrollment - Set up notifications about individuals enrolling in Associates' downlines.
-
Rank Advancement - Set up notifications about individuals in Associates' downlines with advanced rank.
-
Order - Set up notifications about individuals in Associates' downlines who’ve placed orders.
-
Prospect - Set up notifications about new prospects in Associates' downline.
-
Community - Set up notifications when individuals comment on Associates' posts in the Community section.
-
-
Enter a Rule Name.
This is the rule’s title that displays in the Web Office > Settings > Communication page.

-
Under Actor Filters, select the filters that determine who will trigger the notification.
-
Select a Customer Type (or multiple if the Allow Multiple Country And Customer Type toggle is enabled ).
-
Select one or more Customer Statuses.
-
Select a Country (or multiple if the Allow Multiple Country And Customer Type toggle is enabled ).
-
Select any Ranks (Rank Advancement notification type only).
-
-
Under Recipient Filters, select the customer statuses and from which upline tree the notification will be sent.
-
Select one or more Recipient Customer Statuses.
-
Select Upline Tree.
-
-
Under User Preference Defaults, click each checkbox to set the default for how the Associate receives the notification.
| These default settings are also applied to the Custom Notification Widget but not the Custom Notification Widget (Multiple Country) |

-
Back Office - The Associate will receive a notification via their Web Office.

-
Text - The Associate will receive a notification via text message to the mobile phone number on file.

-
Email - The Associate will receive a notification via email to the email address on file.

-
Click the Downline Levels dropdown to set the default for how many levels deep the Associate will receive notifications.
-
Click the Personally Enrolled checkbox for the Associate to receive a notification for anyone personally enrolled.
-
Under Prevent Users from Modifying Default, click each toggle under each to disallow the Associate from opting out of the notification delivery methods in the Web Office > Settings > Communication page.

-
| These toggles apply to both the Custom Notification Widget and the Custom Notification Widget (Multiple Country). The Custom Notification Widget (Multiple Country) uses these default settings for the Override configuration process. |
-
If this rule is for the Order notification type:
-
Select the Order Types (such as Recurring Order if this is a notification specifically for recurring orders).
-
Select Order Status.
-
-
In the Template TinyMCE Text Editor, type the message into the text box.
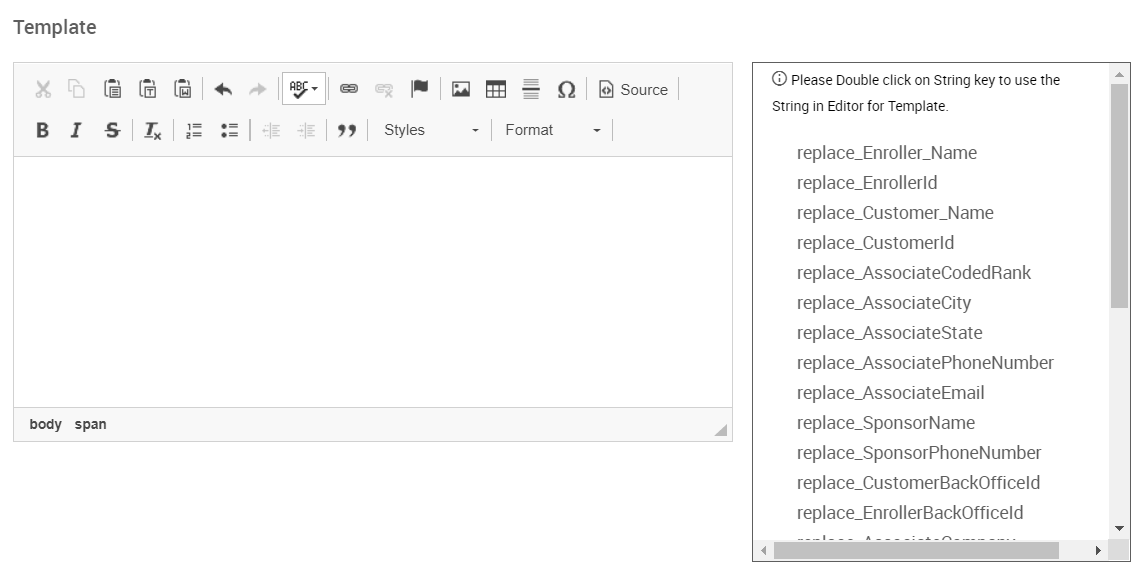
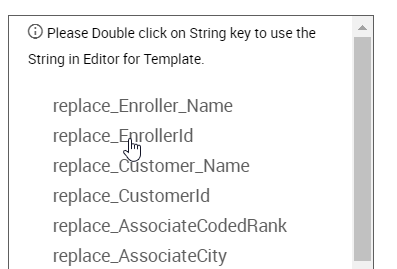
Double click the String Keys to merge user-specific information, such as Name, Email, and ID.

This will also set the templates (office, text, email, etc.) for all notification types.
You can modify the templates for each language/notification type after you save the rule.
-
Click SAVE when finished.
The rule is now visible in the Rule List.
You can edit the rules/configurations by clicking the icon.
Rule Templates
You can edit the template for each Template Type with the default rules or any rules you might add.
-
In the Rule List, locate the rule you want to edit. Click the icon.

You navigate to the Template List.

-
In the Template List, locate the specific Template Type for the language-delivery method you want to edit. Click the icon.
The Update Template pop-up window opens.

-
Click the toggle to enable/disable whether this template will apply to an Associate’s downline in which they enrolled.
-
Make any adjustments in the Template TinyMCE Text Editor.

Double-click the available String Keys to insert them into the editor.
-
Click SAVE when finished.
Adding Multiple Templates
Suppose you want your delivery methods to send a similar message. In that case, you can update the templates for a Notification Type at once instead of doing it one by one.
-
Click the Add Multiple Templates button.
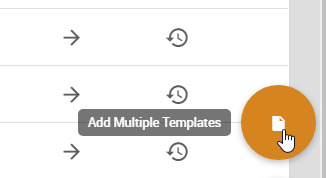
A configuration pop-up window opens.
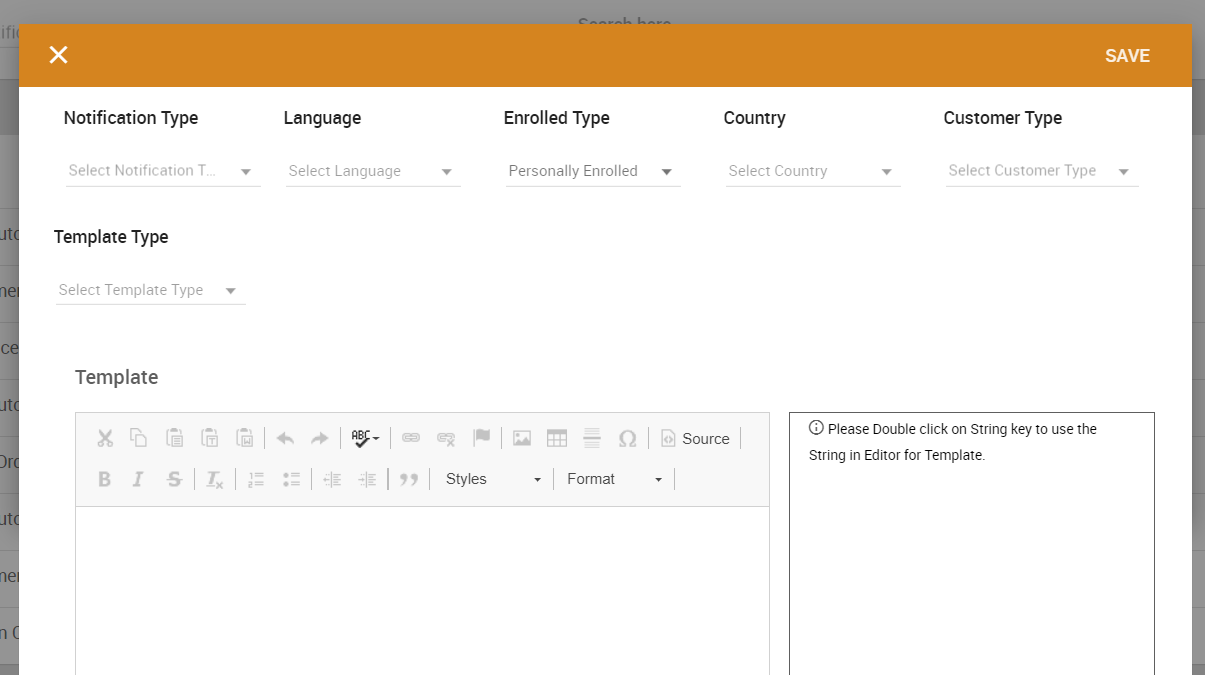
-
Select a Notification Type.
There are five notification types:
-
Enrollment - Set up notifications about individuals enrolling in Associates' downlines.
-
Rank Advancement - Set up notifications about individuals in Associates' downlines that have rank advanced.
-
Order - Set up notifications about individuals in Associates' downlines that have placed orders.
-
Prospect - Set up notifications about new prospects in Associates' downline.
-
Community - Set up notifications when individuals comment on Associates' posts in the Community section.
-
-
Select a Language.
-
Select the Enrolled Type.
-
Select one or multiple Countries.
-
Select one or multiple Customer Types.
Configure Customer Types on Corporate Admin > Administration > Advanced Settings > Associate Types. -
Select one or multiple Template Types.
-
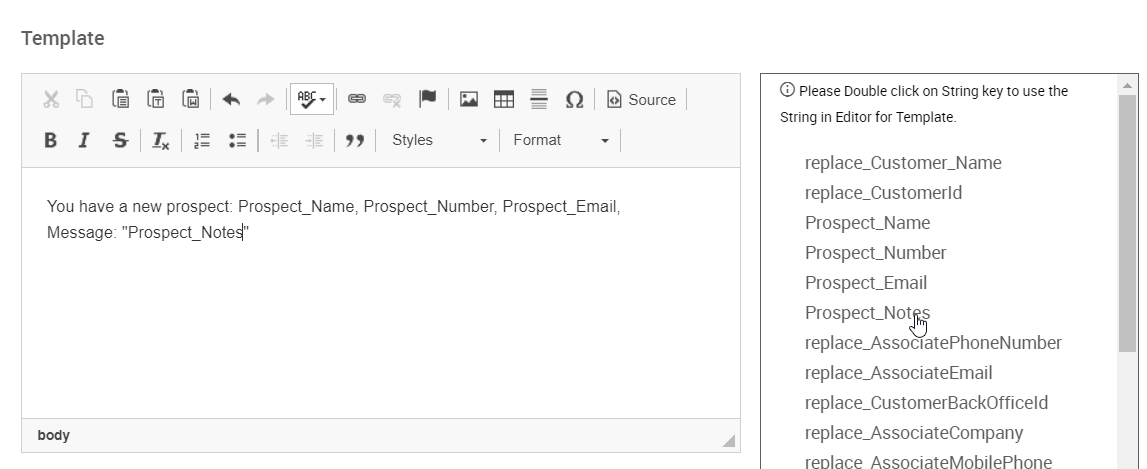
In the Template TinyMCE Text Editor, type the message into the text box.
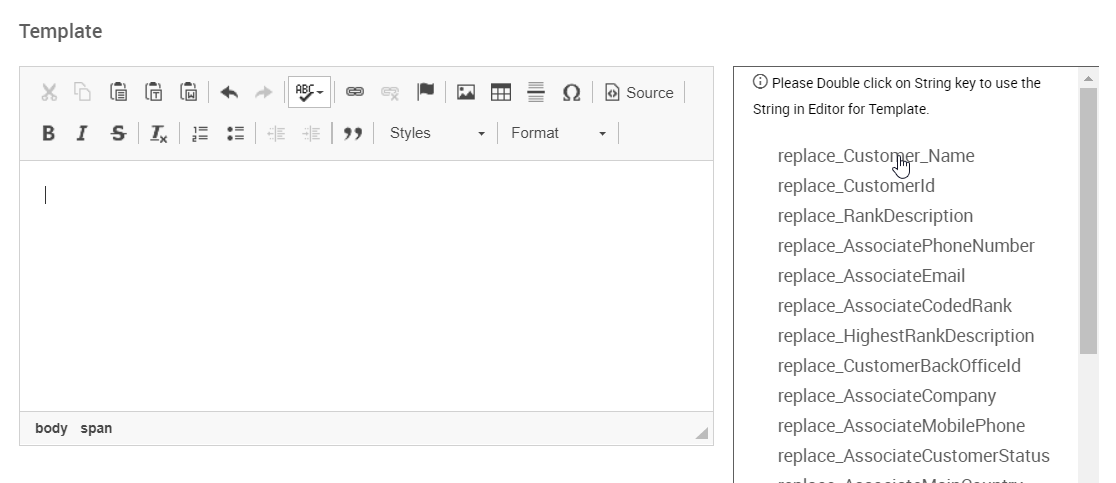
Double click the String Keys to merge user-specific information, such as Name, Email, and ID.
-
Click SAVE when finished.
String Keys and Merge Tags
You can insert String Keys (also known as merge tags or variables) into Custom Notification email templates to merge in user-specific information, such as Name, Email, and ID Number:
-
replace_Enroller_Name -
replace_EnrollerId -
replace_Customer_Name -
replace_CustomerId -
replace_AssociateCodedRank -
replace_AssociateCity -
replace_AssociateState -
replace_AssociatePhoneNumber -
replace_AssociateEmail -
replace_SponsorName -
replace_SponsorPhoneNumber -
replace_CustomerBackOfficeId -
replace_EnrollerBackOfficeId
Comments
Please sign in to leave a comment.