Admin: Web Office Admin
Page: Page Configurations > Team Dashboard
URL: [CLIENTID].admin.directscale.com/#/TabbedWidgets/TeamDashboard
Permission: Team Dashboard
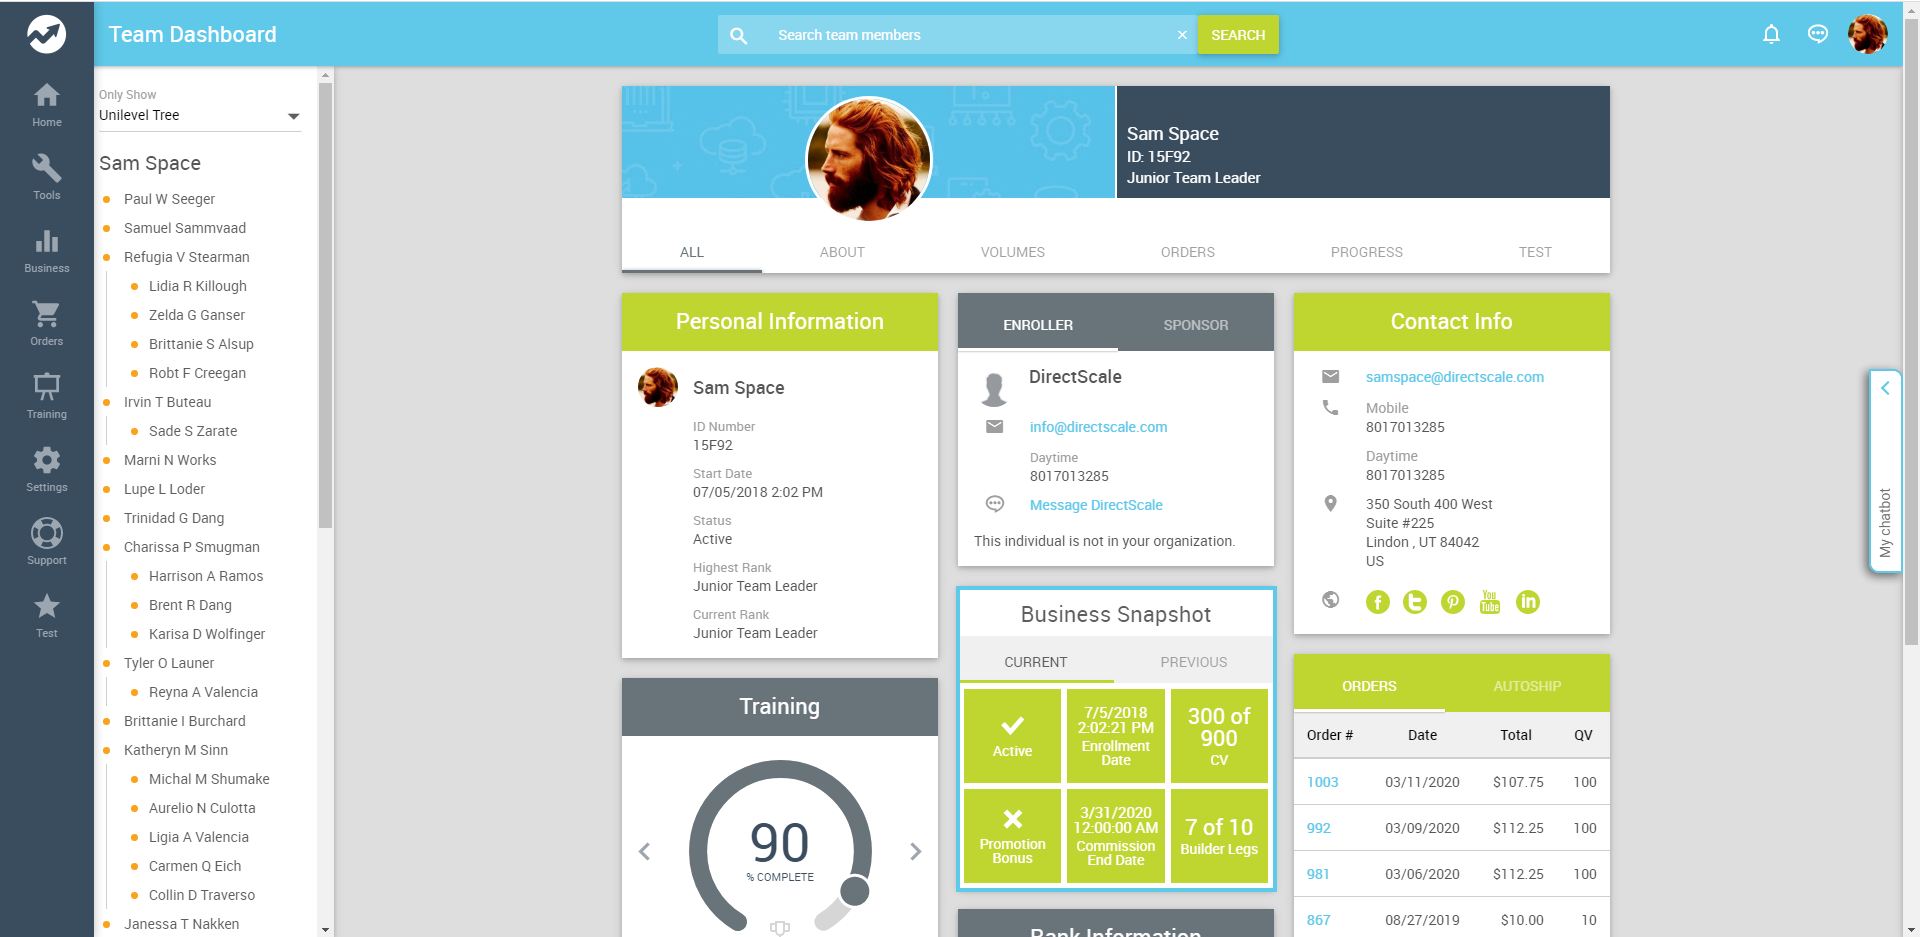
The Web Office Team Dashboard is an excellent tool for an Associate to view their own and their team’s progress. You can control which widgets and tabs display with the Web Office Admin.

Adding a Tab
Use tabs to categorize the different widget functions.
- Click the ADD NEW button and select Add Tab to open the Add Tab pop-up window.
- In the pop-up, enter the tab Name.
- When finished, click SAVE.
- New tabs won’t show in the Web Office until a widget is assigned to them.
Note: The Team Dashboard has an All tab that loads on page default. This contains all widgets added to the individual tabs. This All tab can not be edited or removed through the Web Office Admin.
Adding a Widget
Although you can add any of the available widgets, five widgets are already configured to display specifically on the Team Dashboard. Read more about each one by clicking its link.
- Team Dashboard > Orders/Autoships
- Team Dashboard > About You
- Team Dashboard > Personal Information
- Team Dashboard > Contact Info
- Team Dashboard > Sponsor/Enroller
These widgets are pre-built, but you can also create your own custom widgets. Once you create custom widgets, they will be available to select.
To add a widget:
-
Click the ADD NEW button, and select Add Widget.
-
In the pop-up, click the Widget dropdown, and select the widget you want to add.
-
Click the Tab dropdown, and select the tab under which you want your widget to appear.
-
Click the Published toggle to publish the widget now after saving the configuration.
Alternatively, you can publish the widget from the Widgets List by clicking the icon.
-
Select for whom this widget will show when the logged-in Associates view another individual’s Team Dashboard.
- In Enrollment tree – Associates in the logged-in Associates Enrollment Tree.
- In Placement tree – Associates in the logged-in Associates Unilevel Tree.
- Outside their tree – Associates with no business relationship to the logged-in Associate.
-
The rest of the settings are Multi-Faceted Configuration (MFC).
-
Click SAVE.
Editing/Deleting a Widget
To edit/delete a widget:
- Locate the widget in the list.
- Click the icon.
- In the pop-up, click the icon at the bottom of the window.
- Click DELETE to confirm.
Changing the Order Widgets appear in the Web Office
-
Note the location of the widget in the Web Office.
Web Office widget start location -
In the Widgets List, click the widget whose order you want to change and drag it to a higher or lower position in the list.
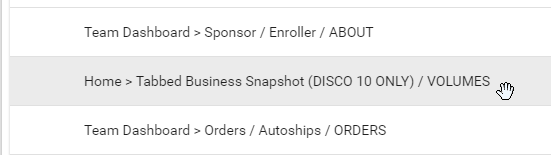
Click and drag the widget to change its location -
Drop the widget in its new position.
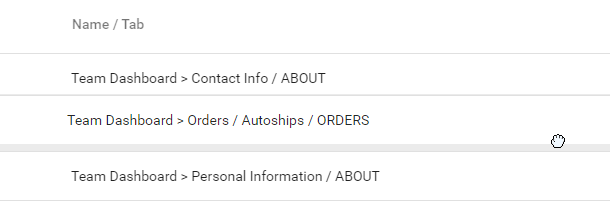
Drop the widget The Web Office Admin page will automatically save, and the widget will appear in its new sort order in the Web Office once refreshed.
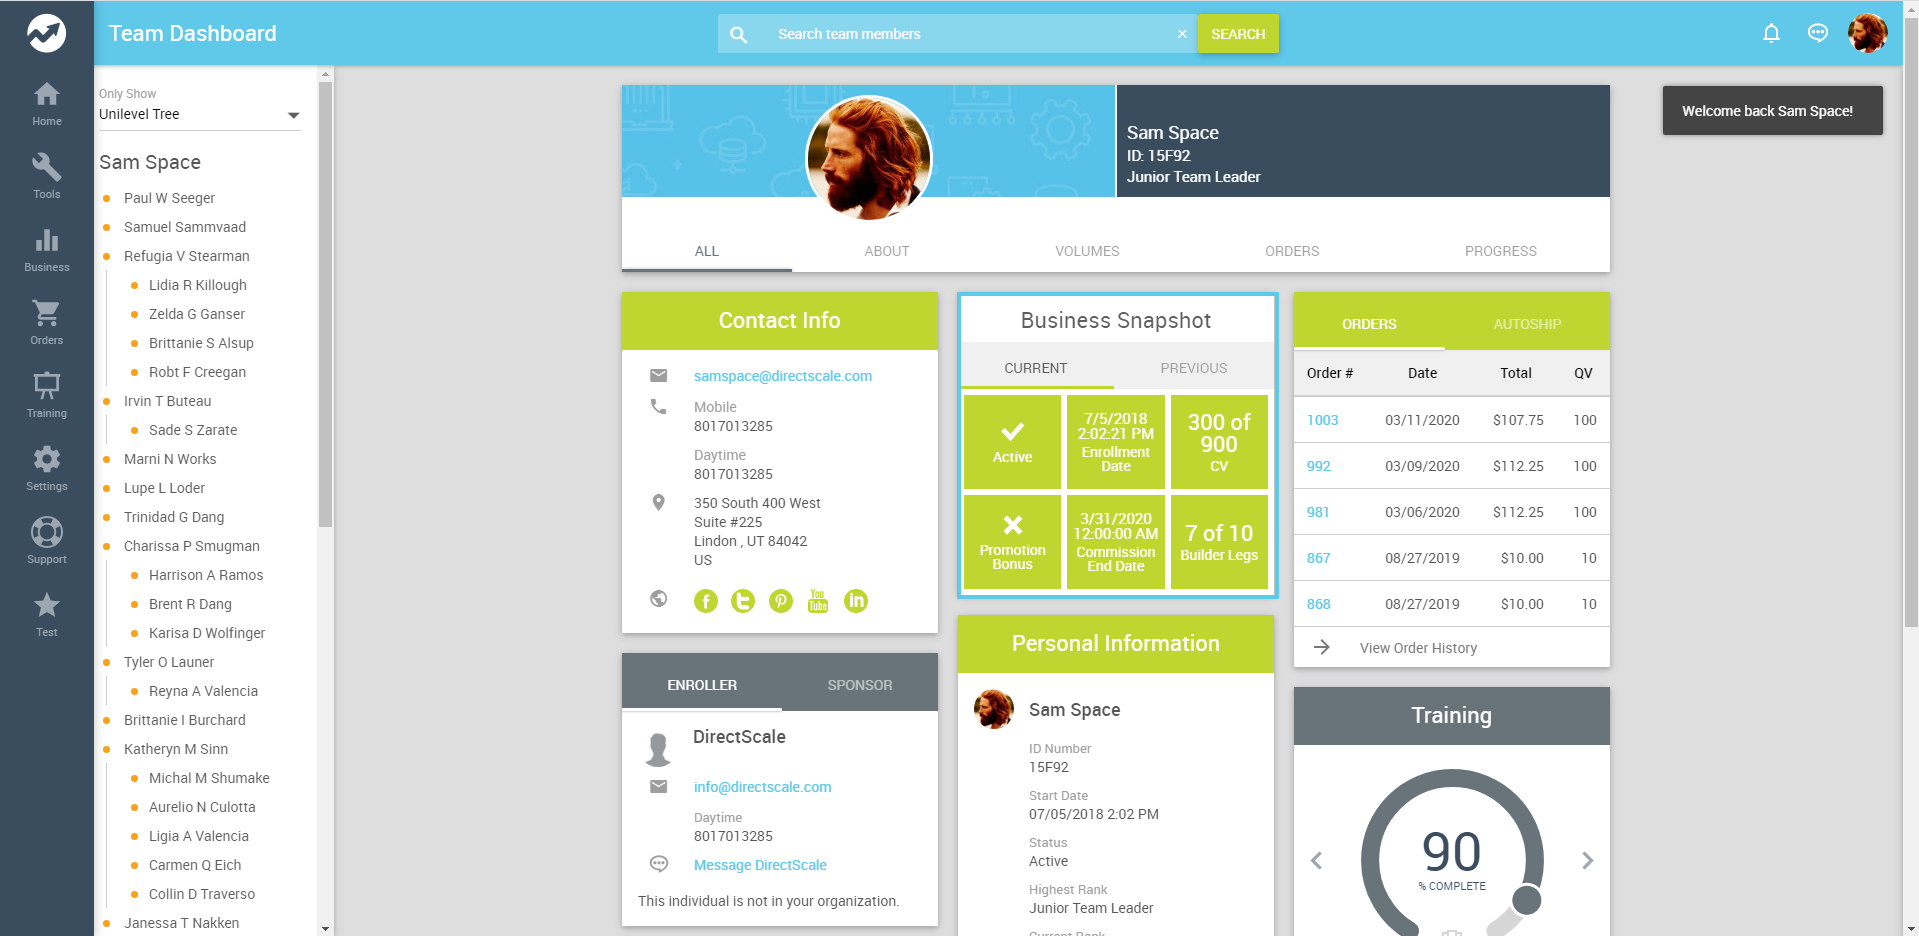
Web Office widget new location
Comments
Please sign in to leave a comment.