Admin: Web Office Admin
Page: Advanced Settings > Carts
URL: [CLIENTID].admin.directscale.com/#/Carts
Permission: Setup Carts
Custom shopping carts are the bulk of your custom Stores' set up where you can select the inventory category, shipping method and warehouse, Price Group, and Associate Type. These options determine which inventory items will be available in your custom Store.
| Custom shopping carts are not available for AutoShip. |
Before You Start
Creating custom shopping carts is a part of a more extensive process.
Read the full guide in Creating Custom Stores Guide.
Accessing the Add Shopping Cart Details
-
Expand the Shopping Carts section.
-
Click the button.

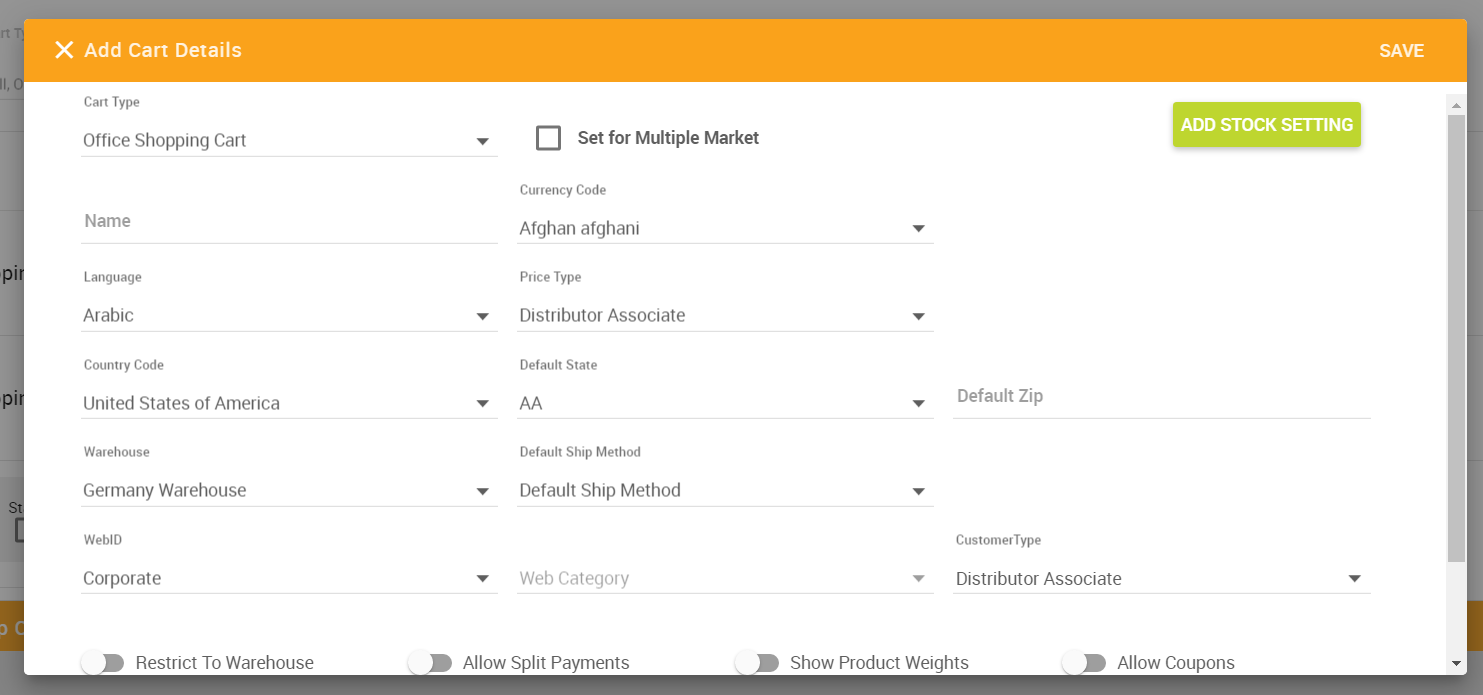
The Add Cart Details pop-up window opens.
In the pop-up, you have the option to set up a cart for:
Configuring Carts for a Single Market

-
Leave the Set Multiple Market checkbox unchecked.
-
Select Custom Shopping Cart from the Cart Type dropdown.
-
Enter a Name.
-
Select the Currency Code for the currency type you want to allow.
-
Select a Language.
-
Select a Price Type.
-
Select a Country Code, Default State, and enter a Default Zip.
-
Select the Warehouse and Default Ship Method.
You must click the dropdown and make a Default Ship Method selection, even if using the default. Failure to do so may result in issues with selecting a shipping method during checkout. -
Select your Custom Store in which this cart will be available with the WebID dropdown.
-
Select the Web Category.
-
Select the Customer Type.
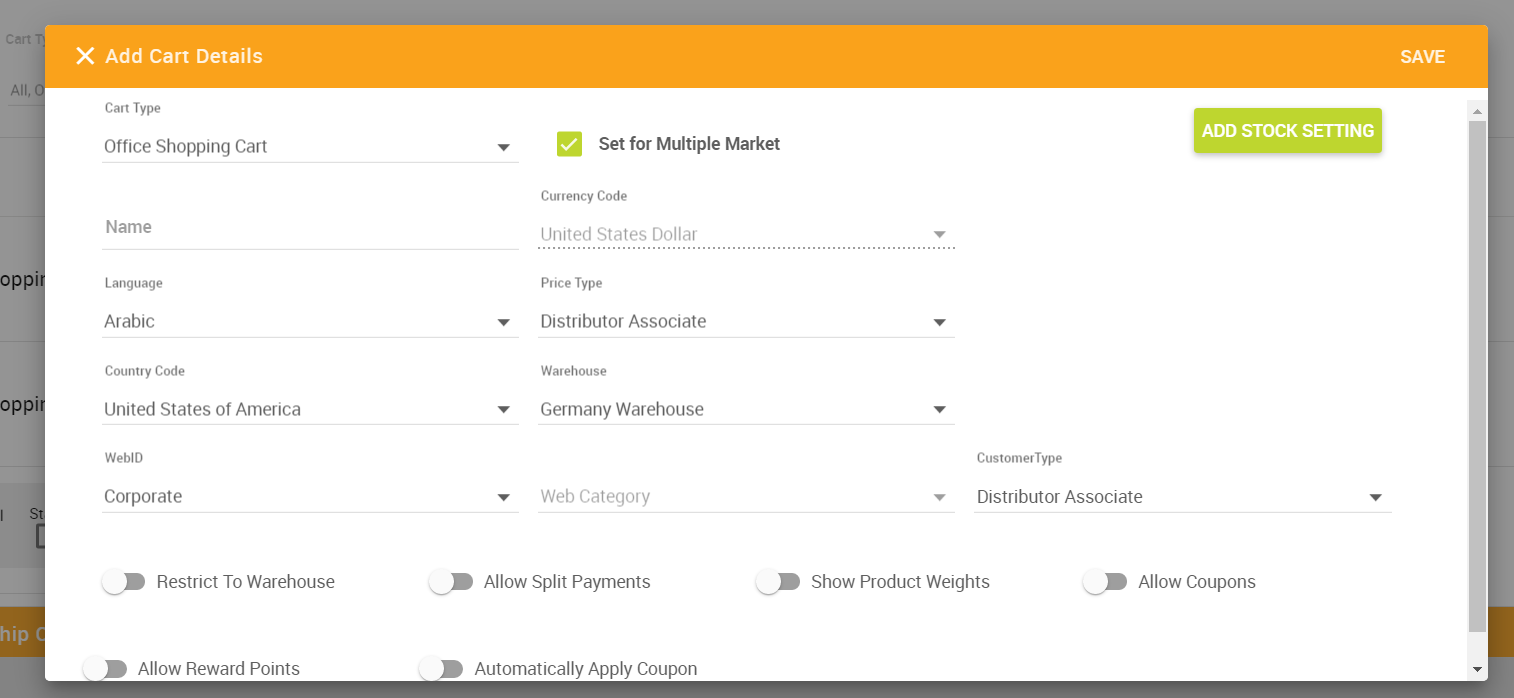
Configuring Carts for Multiple Markets

-
Check the Set Multiple Market checkbox.
-
Select Custom Shopping Cart from the Cart Type dropdown.
-
Enter a Name.
-
Currency Code is locked to United States Dollar.
-
Select a Language.
-
Select a Price Type.
-
Select one or more Country Code(s).
-
Select the Warehouse.
-
Select your Custom Store in which this cart will be available with the WebID dropdown.
-
Select the Web Category.
-
Select the Customer Type.
Enabling Toggles

Click the toggles to enable:
-
Restrict To Warehouse
-
Allow Split Payments
-
Show Product Weights
-
Allow Coupons
-
Allow Reward Points
-
Automatically Apply Coupon
-
Toggled on: reveals a field where you enter the coupon code you want to apply automatically.
-
Adding Stock Setting

You can select how the items will display based on their out-of-stock status. These configurations are relevant to the overall stock tracking tools.
For more information, see Adding Stock Settings for Shopping Carts in Web Office Admin.
Saving the Cart Configuration
When finished configuring the cart settings, enabling toggles, and adding stock settings:
-
Click SAVE.

-
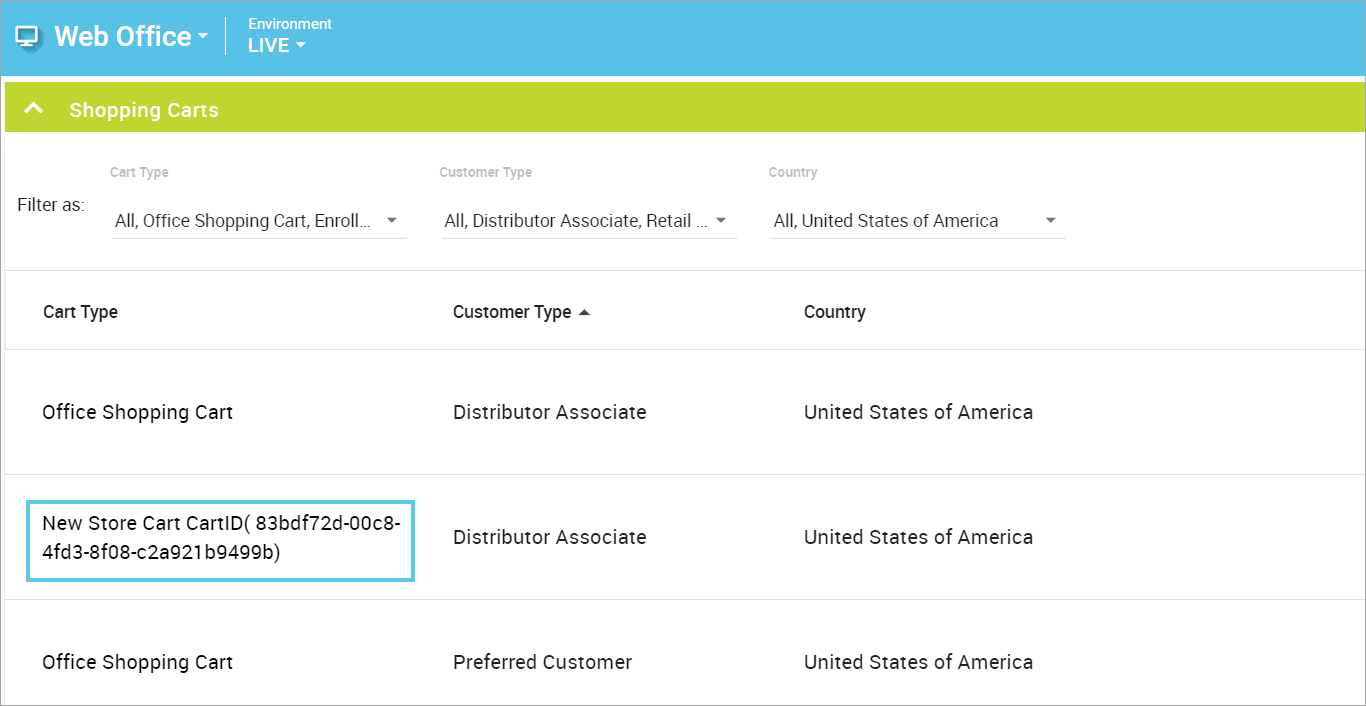
After adding the cart, copy the CartID from the Cart Type column (your CartID will look similar to this:
c72525ca-eae1-439f-b4e2-9681c50aee6d).
Linking to the Cart in the Navigation
-
-
In the Link Name field, copy and paste the following URL:
/OrderProductList?storeTitle=[STRING KEY OF STORE NAME]&cartId=[CART ID FROM ADMIN] -
In the URL, replace:
-
[STRING KEY OF STORE NAME]- The Store’s name formatted with underscores instead of any spaces (i.e.,New_Store_Name) -
[CART ID FROM ADMIN]- The Card ID you copied from Step 2 of Saving the Cart Configuration.
-
This URL is extremely case-sensitive and must be entered in the exact format. For example, /OrderProductList?storeTitle=New_Store&cartId=c72525ca-eae1-439f-b4e2-9681c50aee6d. -
-
In navigation link configuration, use Multi-Faceted Configuration to restrict who can see the link.
-
You can use the Custom Configurations field for more advanced and specific customization. For example,
User.AssociateEnrollmentDate <= '2021-03-04'.
Comments
Please sign in to leave a comment.