Sometimes referred to as YearlyRenewal. Some DirectScale clients are Membership-based; meaning, their products themselves are digital Memberships. For example, Netflix, you can’t access Netflix’s site/services without being a paid member.
The system hides Memberships from the Manage AutoShip page in Web Office and eCommerce Shop. You do not want your Associates updating their Membership as they would AutoShips, including changing their renewal date or deleting the Memberships. Memberships are not typically something of which an Associate opts out. They must call your customer support and request cancellation.
If the Membership expires, the Associate can no longer log in. This kind of logic requires custom development in your Client Extension (for example, changing an Associate’s Status to restrict access after expiration).
| The critical difference between Services and Memberships set up is a field called YearlyRenewal in the CRM_ServiceItems table. If you set this field to True, then you have a Membership. If False, you have a Service. |
Setting up a Membership SKU
Admin: Corporate Admin
Page: Inventory > Products
URL: [CLIENTID].corpadmin.directscale.com/Corporate/Inventory/ItemList
Permission: ViewInventory()
Set up an inventory item SKU for the Membership.
For more information, see Inventory Items and Pricing Guide.
Steps specific for Memberships:
-
When adding a Price Adjustment, there’s some essential information needed:
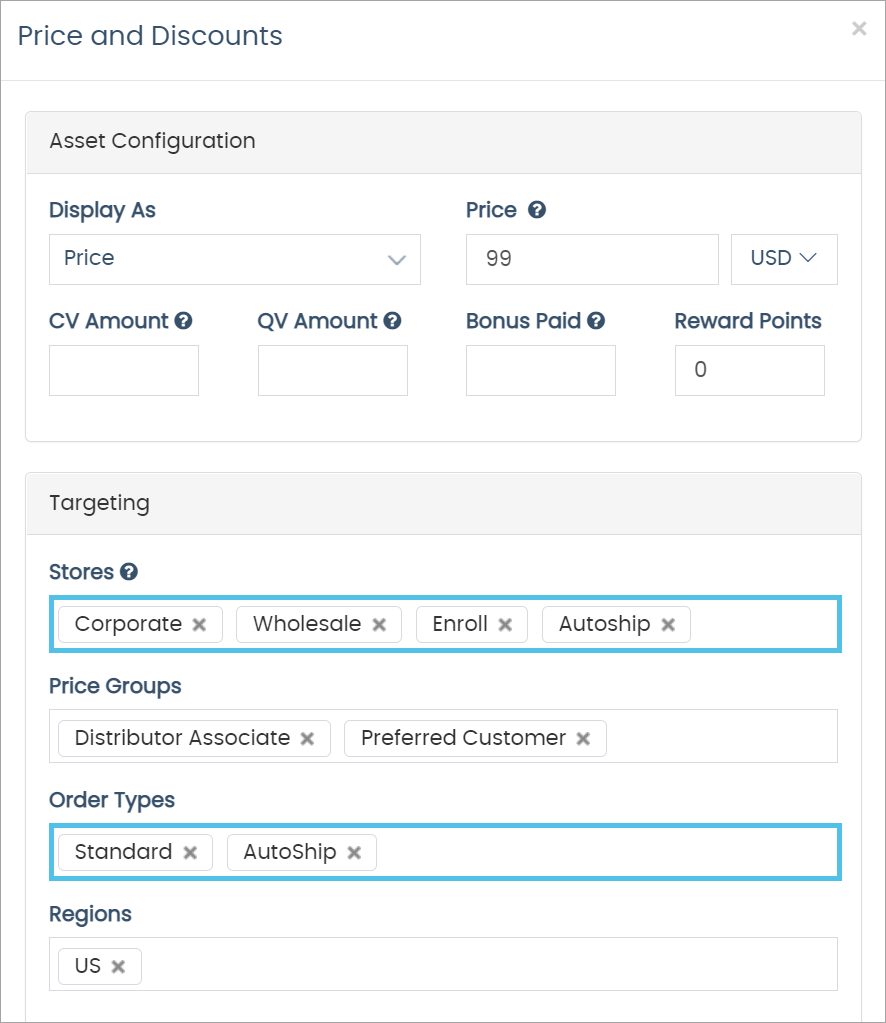
-
For Stores, select the Autoship Store.
-
For Order Types, select Standard and Autoship. All inventory items need to have Standard selected, and all Subscriptions must have both Standard and Autoship set.
-
-
Note your inventory items' Item ID for later. You can find this on the inventory item’s Item Detail page, as well as in the URL:
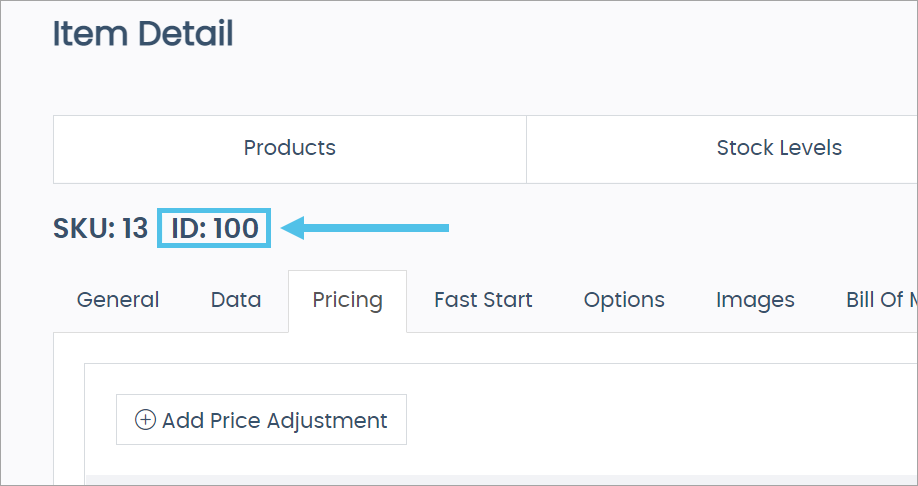
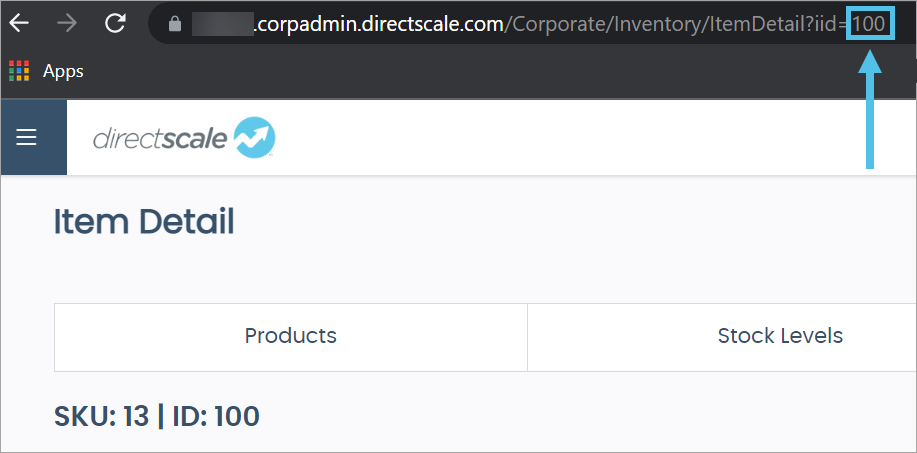
For example:
[CLIENTID].corpadmin.directscale.com/Corporate/Inventory/ItemDetail?iid=100The Item ID is necessary because it’s how you’ll reference the Database inventory item, so take note of it later in the guide.
The ItemIDis also therecordnumberin the INV_Inventory table.
Adding Membership Data to the Database
| There is currently no Admin page for configuring Memberships. Changes need to be made in the Database directly using the Data Editor. |
| Only an experienced SQL developer should use the Data Editor. |
A Membership pulls data from the following Database tables:
-
CRM_Services - Stores the name of the Membership. Without this table, there is no Membership to attach anything to.
-
CRM_ServiceItems - Stores much of the data that make Memberships work. This table provides a connection between a Membership and an item. Without this mapping, the system will not create Memberships for an Associate, nor will they renew.
-
CRM_AssociateServices - Stores which Associates have which Memberships, as well as the expiration date.
To set up a Membership, you will have to edit the CRM_Services and CRM_ServiceItems tables with the Data Editor.
Giving the Membership a Name
Edit the CRM_Services table to give the Membership a name.
-
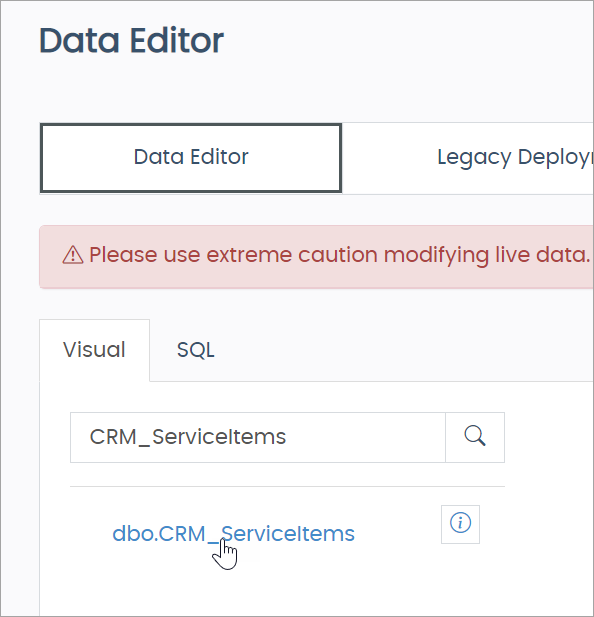
In the Data Editor, search for and select the CRM_Services table.
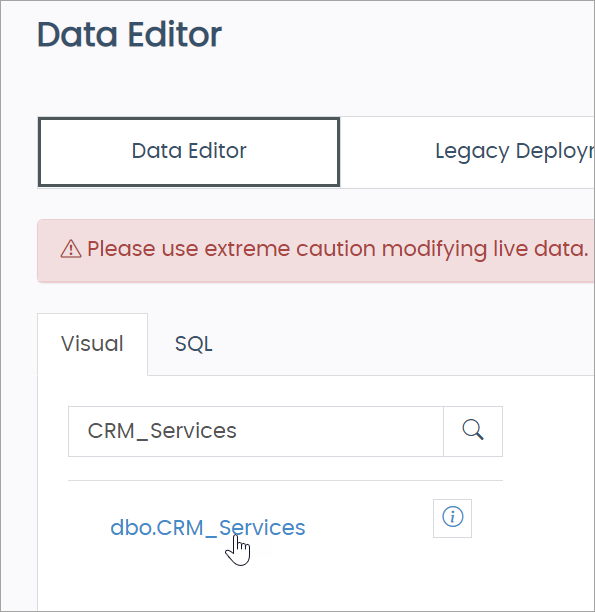
To view the Table Schema, click the icon. -
Click the New Row button to add a new row.
-
Click the empty field under ServiceName and enter the name of your Membership.

-
Click the icon to create the new Membership.
Take note of the recordnumber. This will be used as the ServiceID in the CRM_ServiceItems table.
You can add more rows to create multiple Membership offerings.
In the next section, configure the specifics of what this Membership does.
| One SKU could add one month, another SKU could add a year, to the same Membership (this example would require two entries in the CRM_ServiceItems table). |
Configuring the Membership
Edit the CRM_ServiceItems table and enter the Membership details in the necessary fields.
-
Search for and select the CRM_ServiceItems table.
-
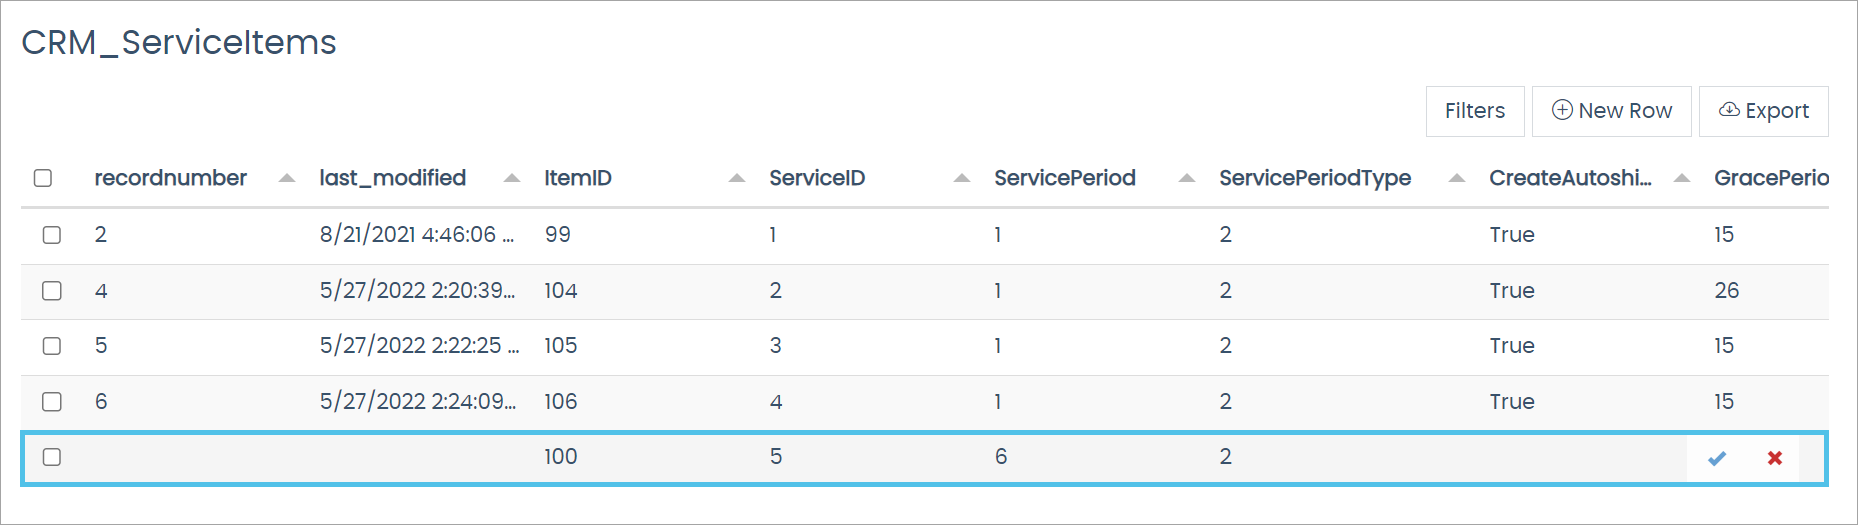
Click the New Row button to add a new row.
-
Enter data in the following fields:
-
Under ItemID, enter the inventory item’s
ItemID. This is the ID you noted in the Setting Up a Membership SKU section. -
Under ServiceID, enter the
recordnumberfrom the CRM_Services table. -
Under ServicePeriod, enter the number of periods for the given ServicePeriodType. For example, if your ServicePeriodType was "Monthly" and you wanted the service to reoccur every two months, you would enter
2in this field. -
Under ServicePeriodType, enter the frequency that correlates with the ServicePeriod.
-
Day = 0
-
Week = 1
-
Month = 2
-
Year = 3
For example, to have a monthly renewal, enter
1in ServicePeriod and enter2in ServicePeriodType. -
-
Under CreateAutoship, click the checkbox TRUE or FALSE. Do you want to create an AutoShip to auto-renew the Membership? If so, select TRUE. Autoship is what charges the Associate. The Membership is a date to apply business logic to whatever happens at expiration. The system creates the AutoShip with the ServicePeriod based on ServicePeriodType, so a MONTHLY interval will create a monthly AutoShip.
-
For GracePeriod, the system does nothing with this data by default. Use if you want to provide the Associate more time past the expiration date before considered expired.
-
Under YearlyRenewal, check the box. YearlyRenewal provides a distinction between a Service Subscription and a Membership Subscription.
-
When set to FALSE (unchecked), you have a Service Subscription.
-
When set to TRUE (checked), you have a Membership Subscription.
-
YearlyRenewal, when set to TRUE, hides the Membership from the Manage Autoship page in Web Office and eCommerce Shop.
-
-
Click the icon to save the table.
The preceding data entry enables the following features:
-
Enables a Membership with the sale of an inventory item.
-
Enables AutoShip creation with the sale of an inventory item.
-
Sets up a grace period for a Membership item.
Custom Development
If the Membership expires, the Associate can no longer log in. This kind of logic requires custom development (for example, changing an Associate’s Status to restrict access after expiration).
Comments
Please sign in to leave a comment.