Admin: eCommerce Admin
Page: Company Setting > Shopping Carts
URL: [CLIENTID].retailadmin.directscale.com/#/CompanyShoppingCart
Permission: Setup Carts
AutoShip shopping carts are a set of configurations that determine which Associate Types, Stores, and inventory items will be available in the eCommerce Shop.
For standard AutoShip shopping carts, see Setting Up AutoShip Shopping Carts.
Accessing the Cart Details
-
Expand the AutoOrder Carts section.
-
Click the button.
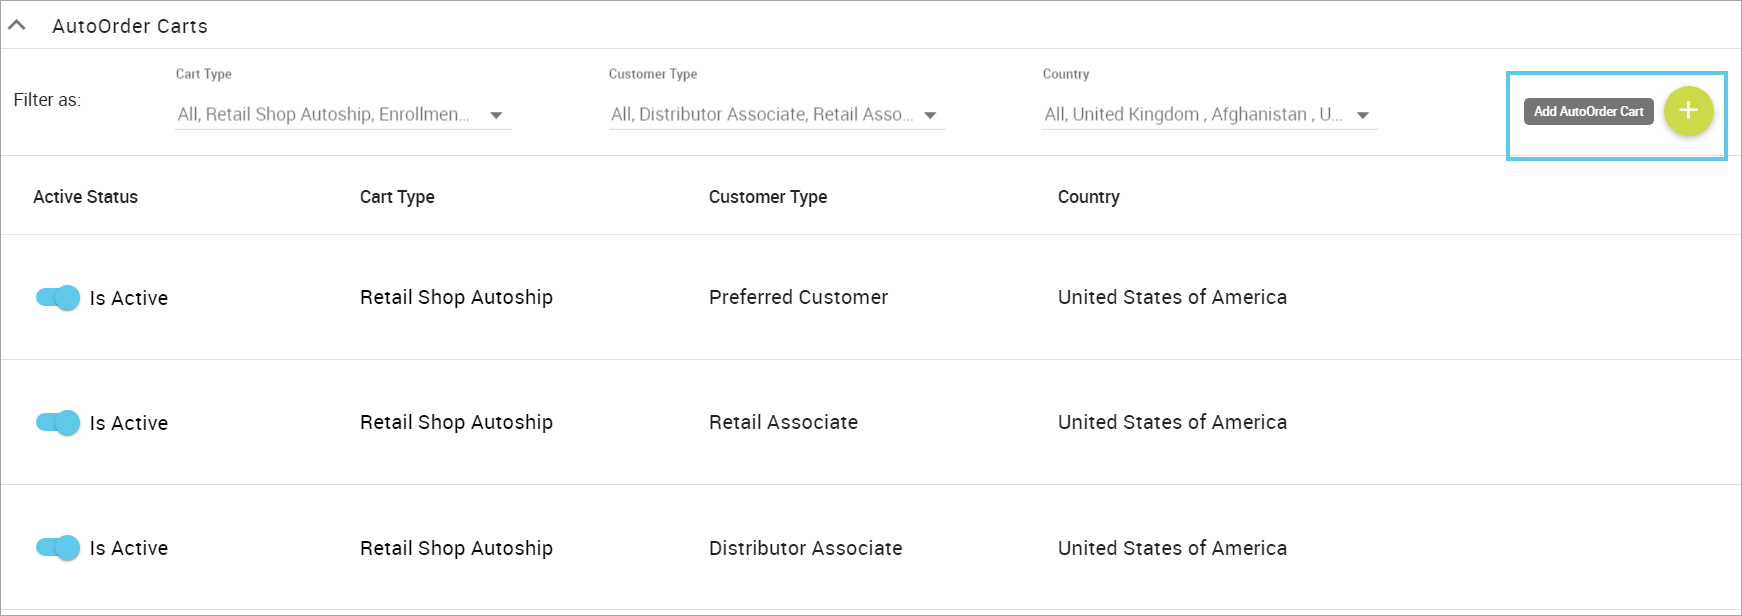
The Add AutoOrder Cart Details pop-up opens.
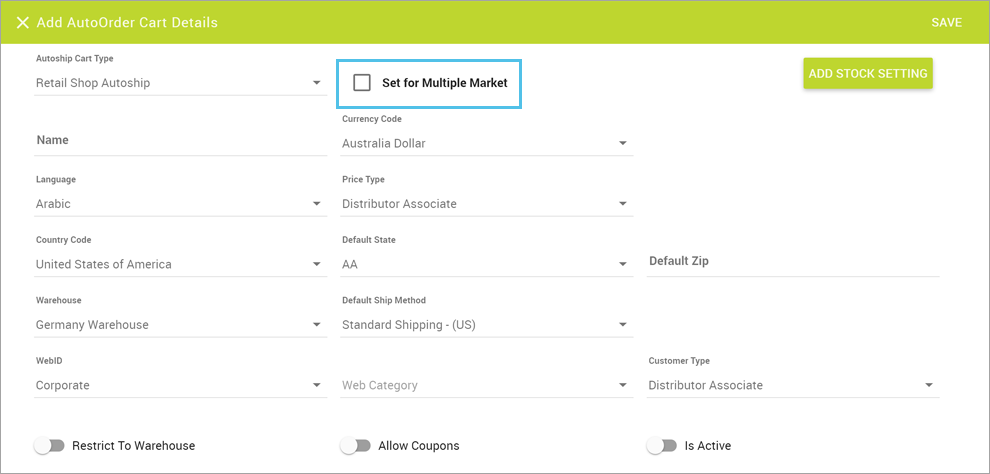
In the pop-up, you have the option to set up a cart for:
Configuring Carts for a Single Market
-
Leave the Set Multiple Market checkbox unchecked.
-
Select the AutoOrder Cart Type, either Enrollment Autoship store or eCommerce Shop Autoship.
-
Enter a Name.
-
Select the Currency Code for the currency type you want to allow.
-
Select a Language.
-
Select a Price Type.
-
Select a Country Code, Default State, and enter a Default Zip.
-
Select the Warehouse and Default Ship Method.
You must click the dropdown and make a Default Ship Method selection, even if using the default. Failure to do so may result in issues with selecting a shipping method during checkout. -
Select the Store in which this cart will be available with the WebID dropdown.
-
Select the Web Category.
-
Select the Customer Type.
-
Click the Allow Coupons toggle to enable Associates to apply coupons to their orders.
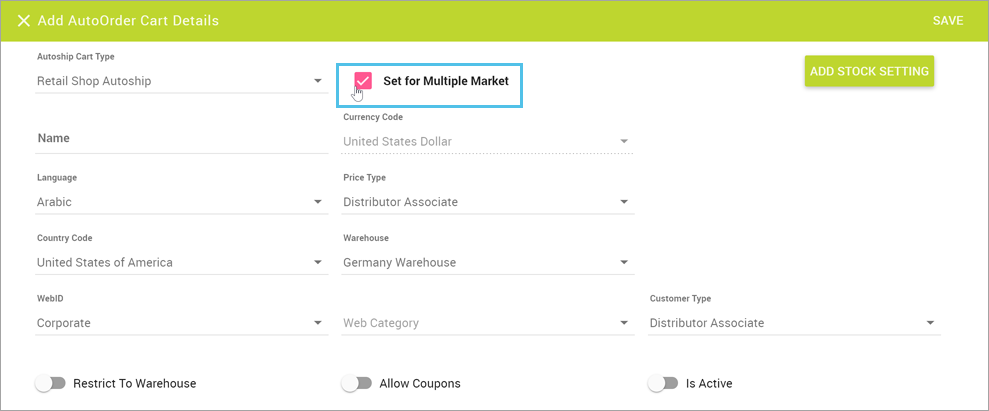
Configuring Carts for Multiple Markets
-
Check the Set Multiple Market checkbox.
-
Select the AutoOrder Cart Type for either the Enrollment Autoship store or the Retail Shop Autoship.
-
Enter a Name.
-
Currency Code is locked to United States Dollar.
-
Select a Language.
-
Select a Price Type.
-
Select one or more Country Code(s).
-
Select the Warehouse.
-
Select the Store in which this cart will be available with the WebID dropdown.
-
Select the Web Category.
-
Select the Customer Type.
-
Click the Allow Coupons toggle to enable Associates to apply coupons to their orders.
Adding Stock Settings
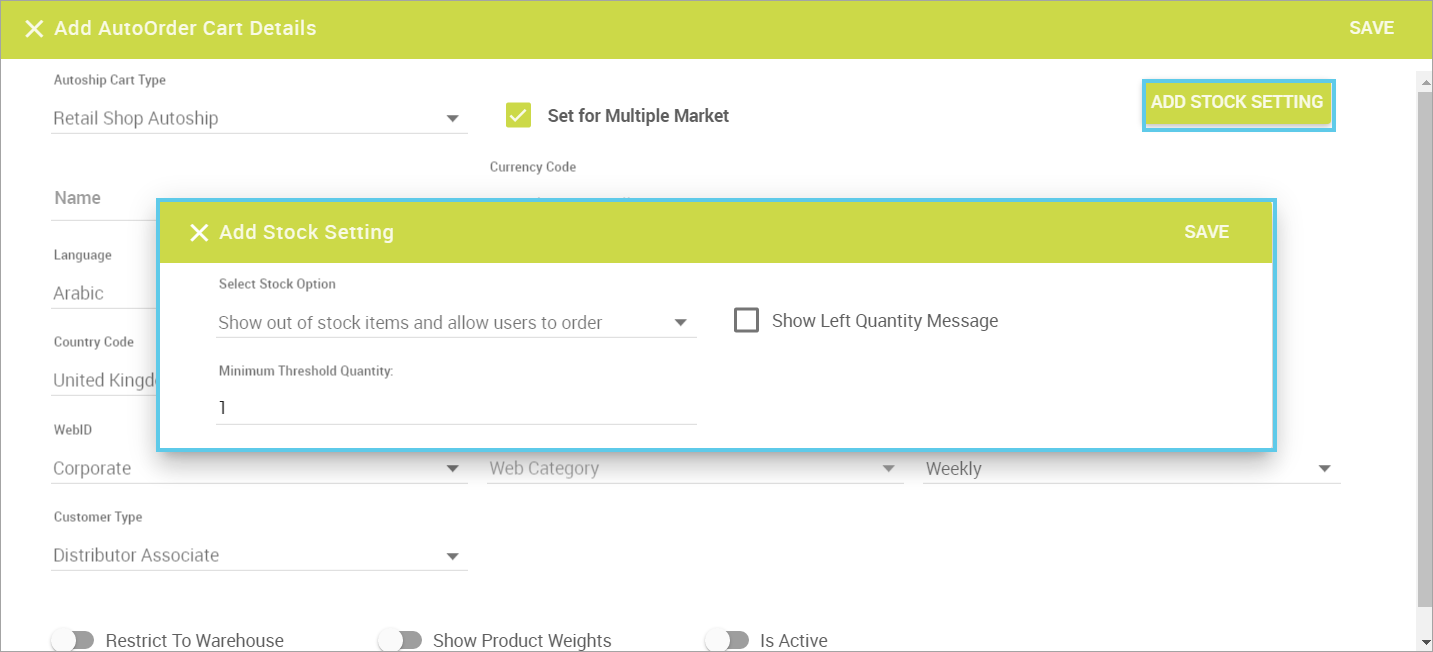
You can select how the AutoShip items will display based on their out-of-stock status. These configurations are relevant to the overall stock tracking tools.
For more information, see: Adding Stock Settings for Shopping Carts in Web Office Admin.
Saving the Cart
When finished configuring the cart settings, enabling toggles, and adding stock settings:
-
Click the SAVE button.

-
Repeat for each Cart Type and Customer Type needed.
AutoOrder Cart IDs
Each Shopping Cart type has an associated Cart ID. These IDs are the same for every client.
-
Retail Shop Autoship:
1C10056A-714E-4123-AA49-2E5CAF63B0C5 -
Enrollment Autoship:
3e1d5422-54e1-4903-a44b-654769a8b1be
Comments
Please sign in to leave a comment.